AV at Hessel
Whatever you do...1 Corinthians 10:31
Thank You Tech Team
Please take the time to read
"We are so thankful you all are willing to train and learn with us, but please understand that we have chained systems meaning one major change in one area could affect the entire A/V system. With that in mind, please do not make changes to any system beyond normal operation or what leadership has asked. If you would like to be a person with in depth knowledge on the system, please speak with TJ, Daniel, Or Hannah and we would be more than happy to work with you on that!"
Sebastopol
Power Cycle
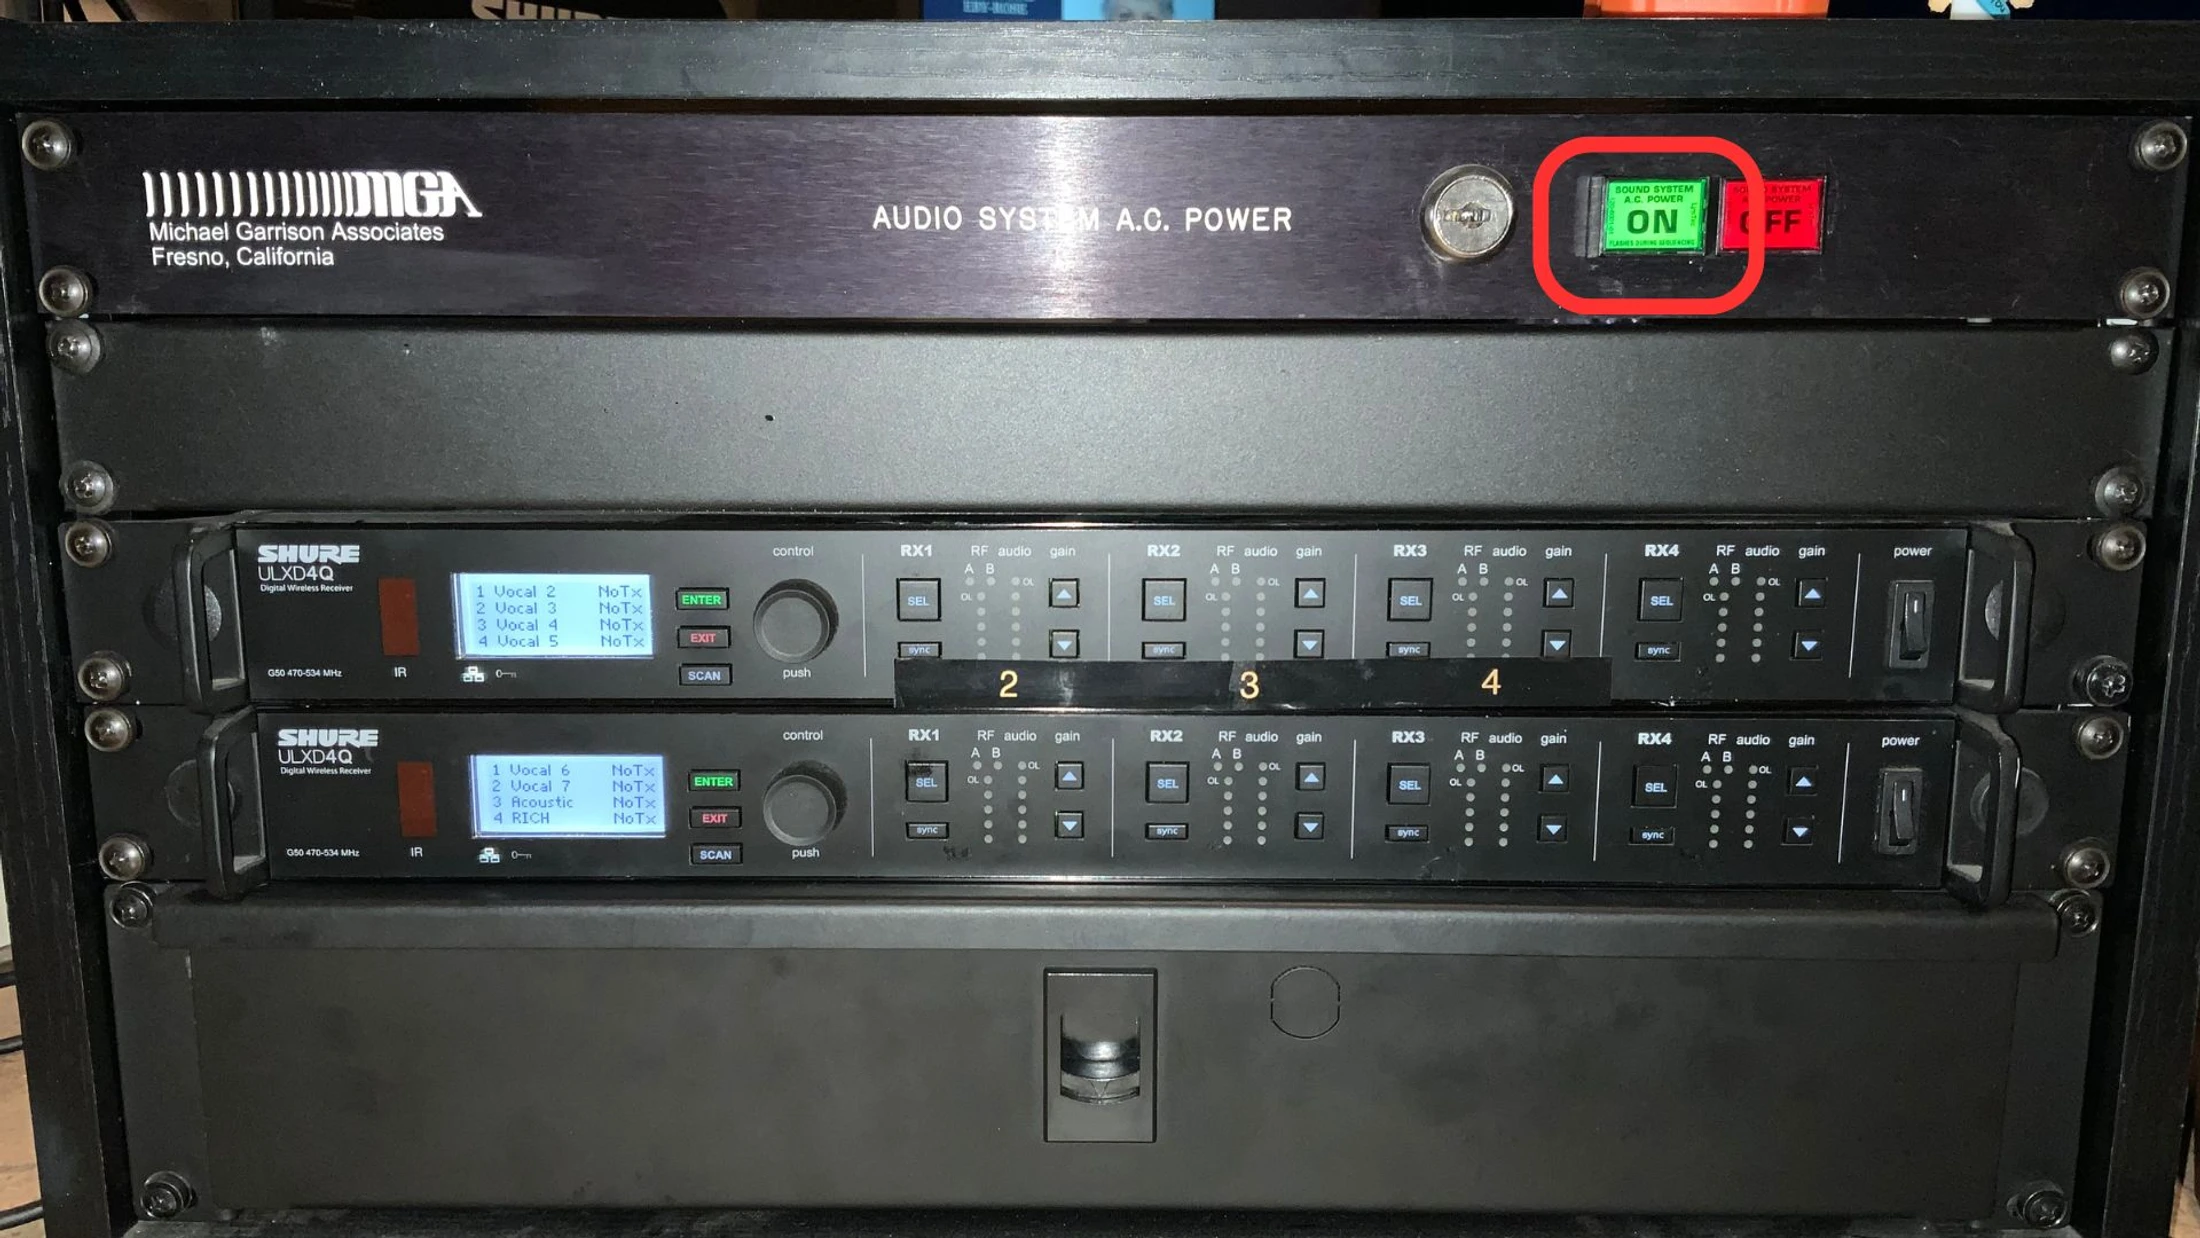
System Power On
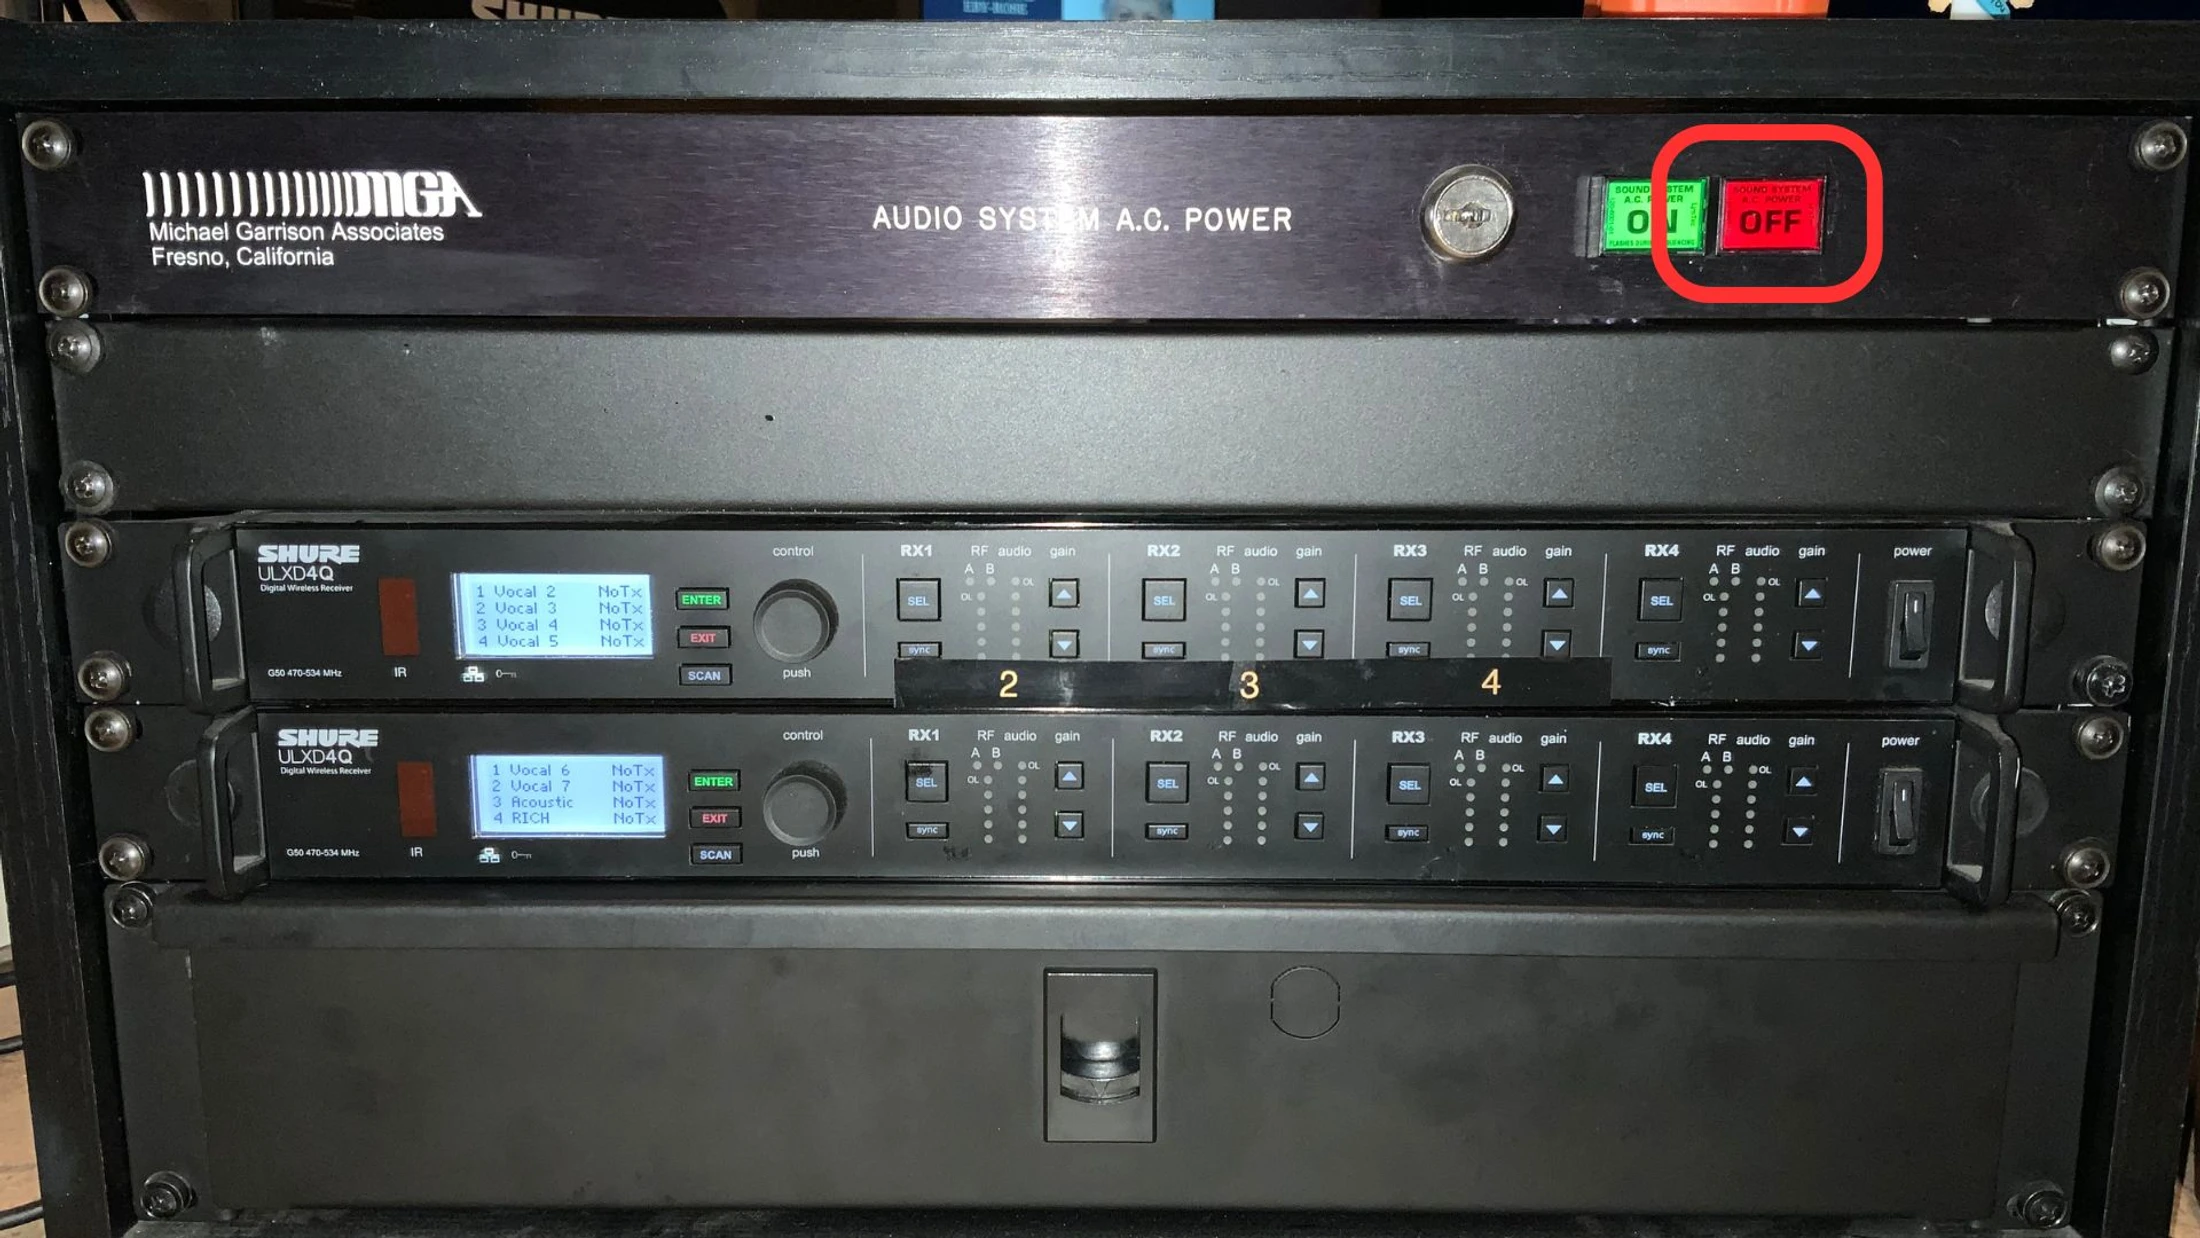
1. Turn on main power with green ”on” button
2. Turn on Behinger Wing
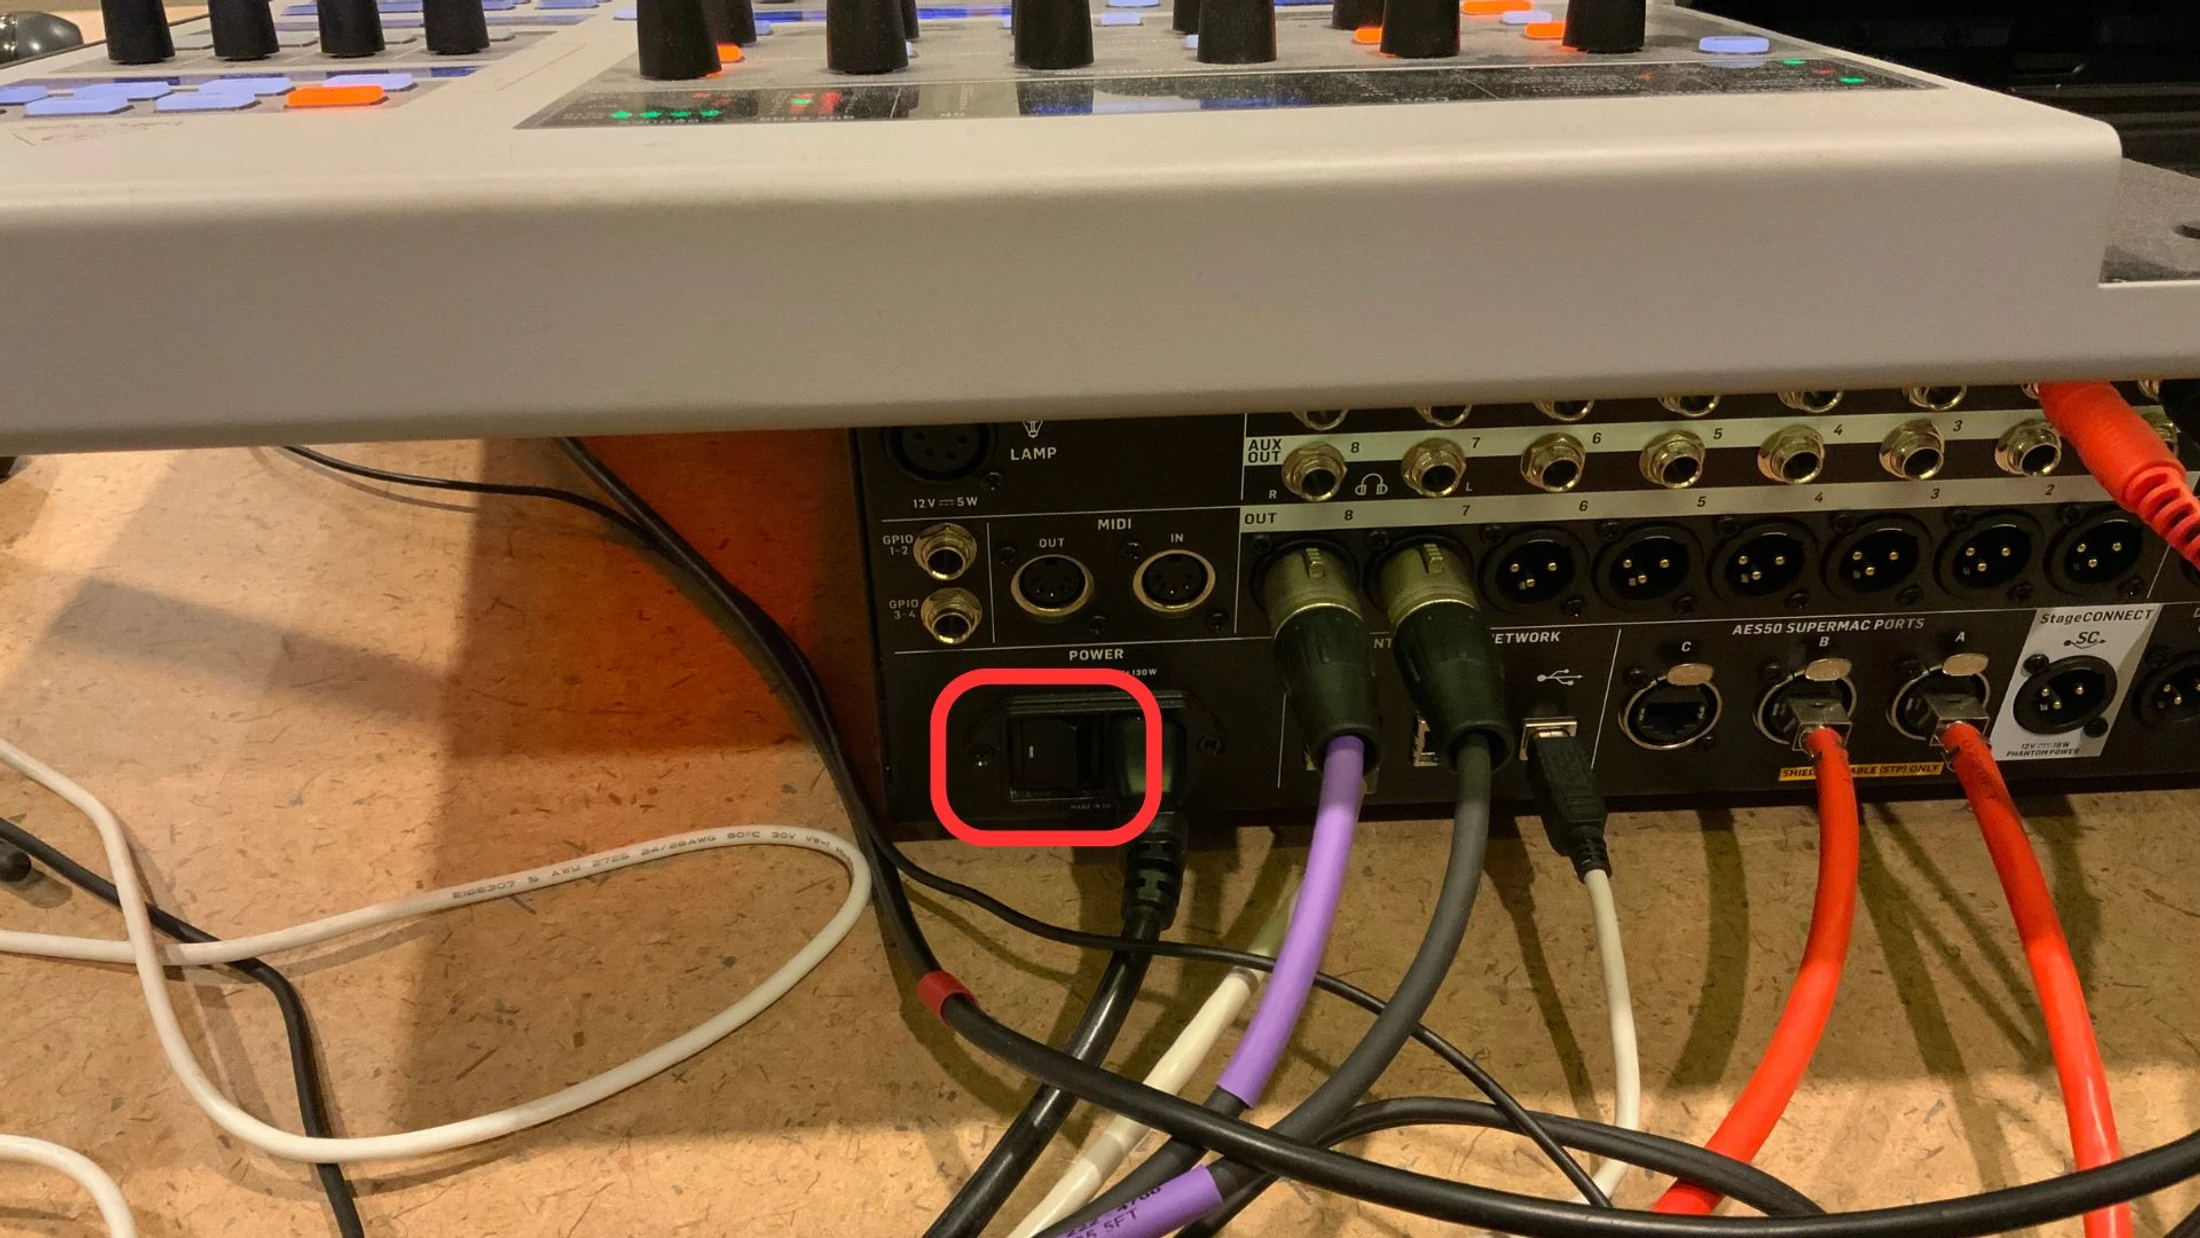
System Power On
Soundboard Power On
LED Wall Power On
The patio screen is controlled by the “Novastar” unit
1. When booted up the device will show a signal. The outside screen is not on yet
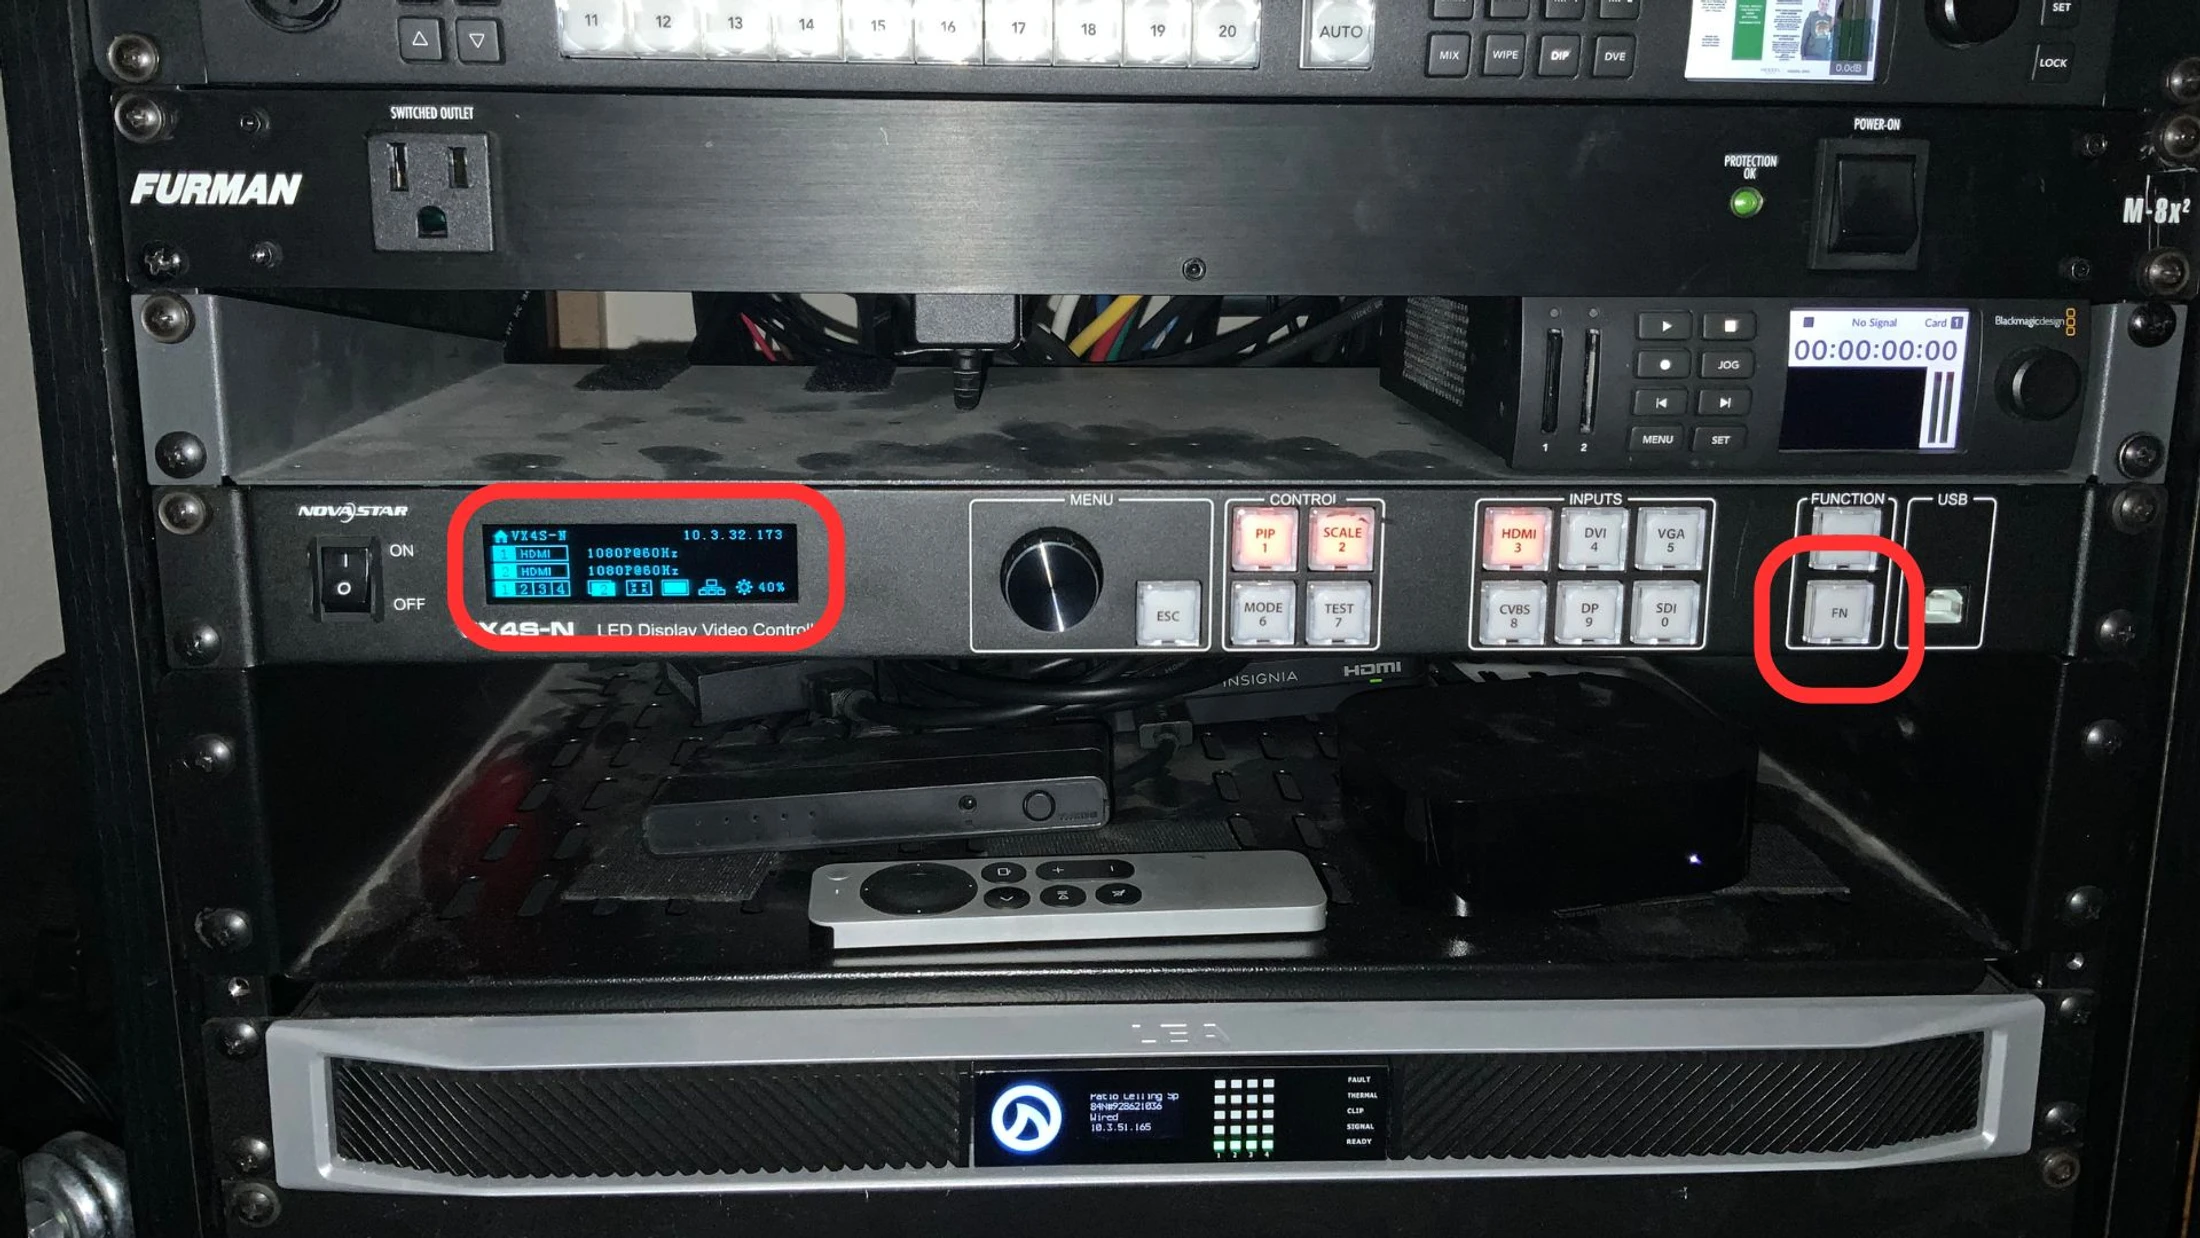
2. Press FN botton. Display will say blackout
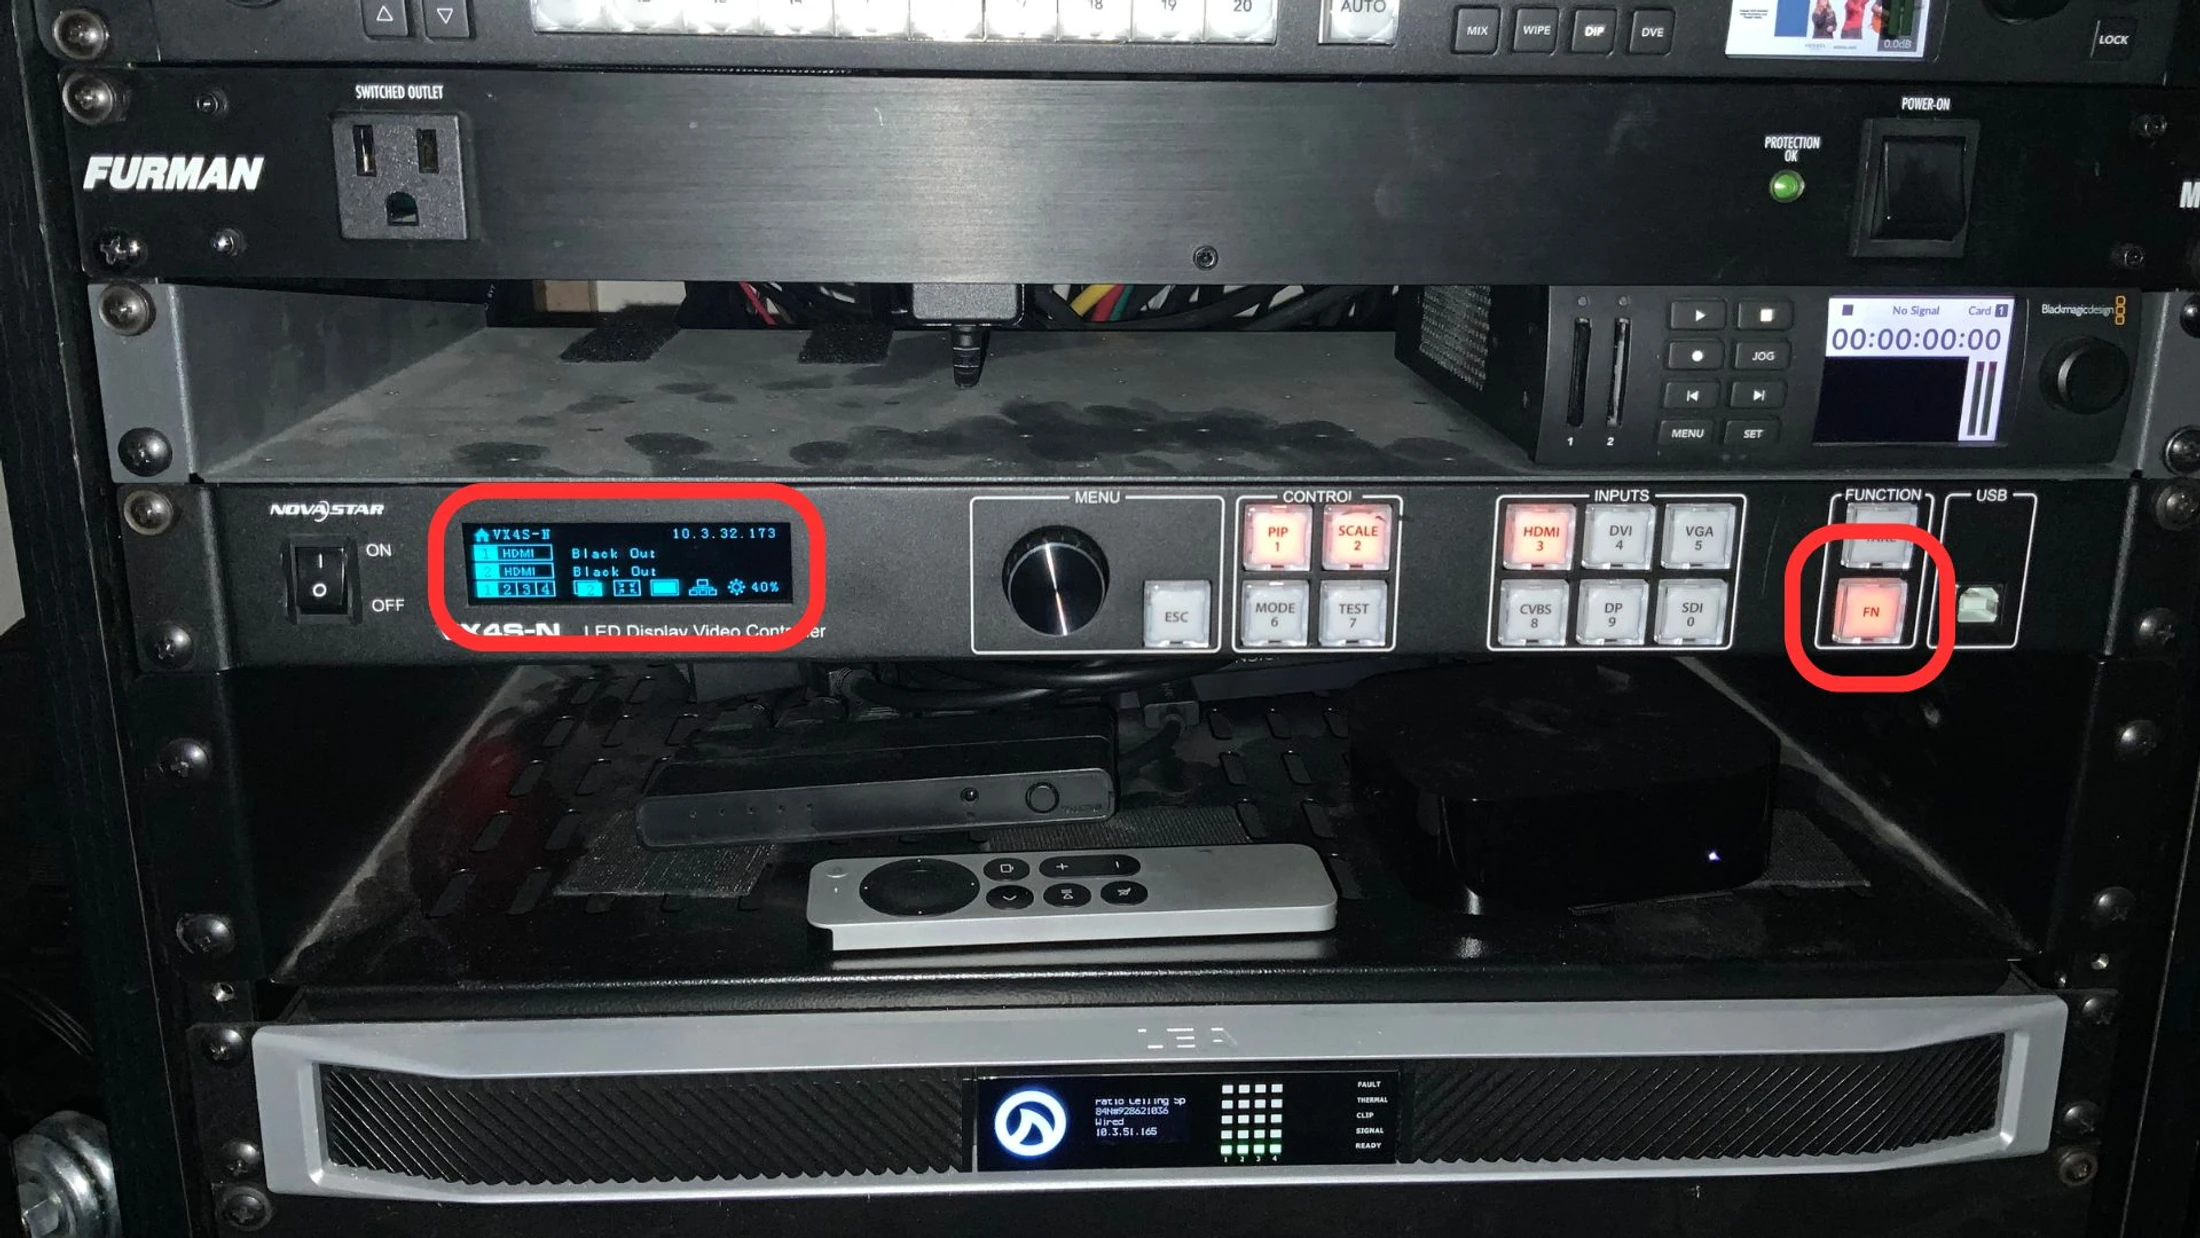
3. Press FN again to turn on screen. Display will say 1080p60Hz

Power On Patio LED Wall
System Power Off
Power down the system in the reverse order of powering it on.
If the patio LED wall is on..."Blackout" that display before starting the power down sequence.
1. Switch Off Soundbaord

2. Turn off main power with red “off” nutton
How To Power On The Computers
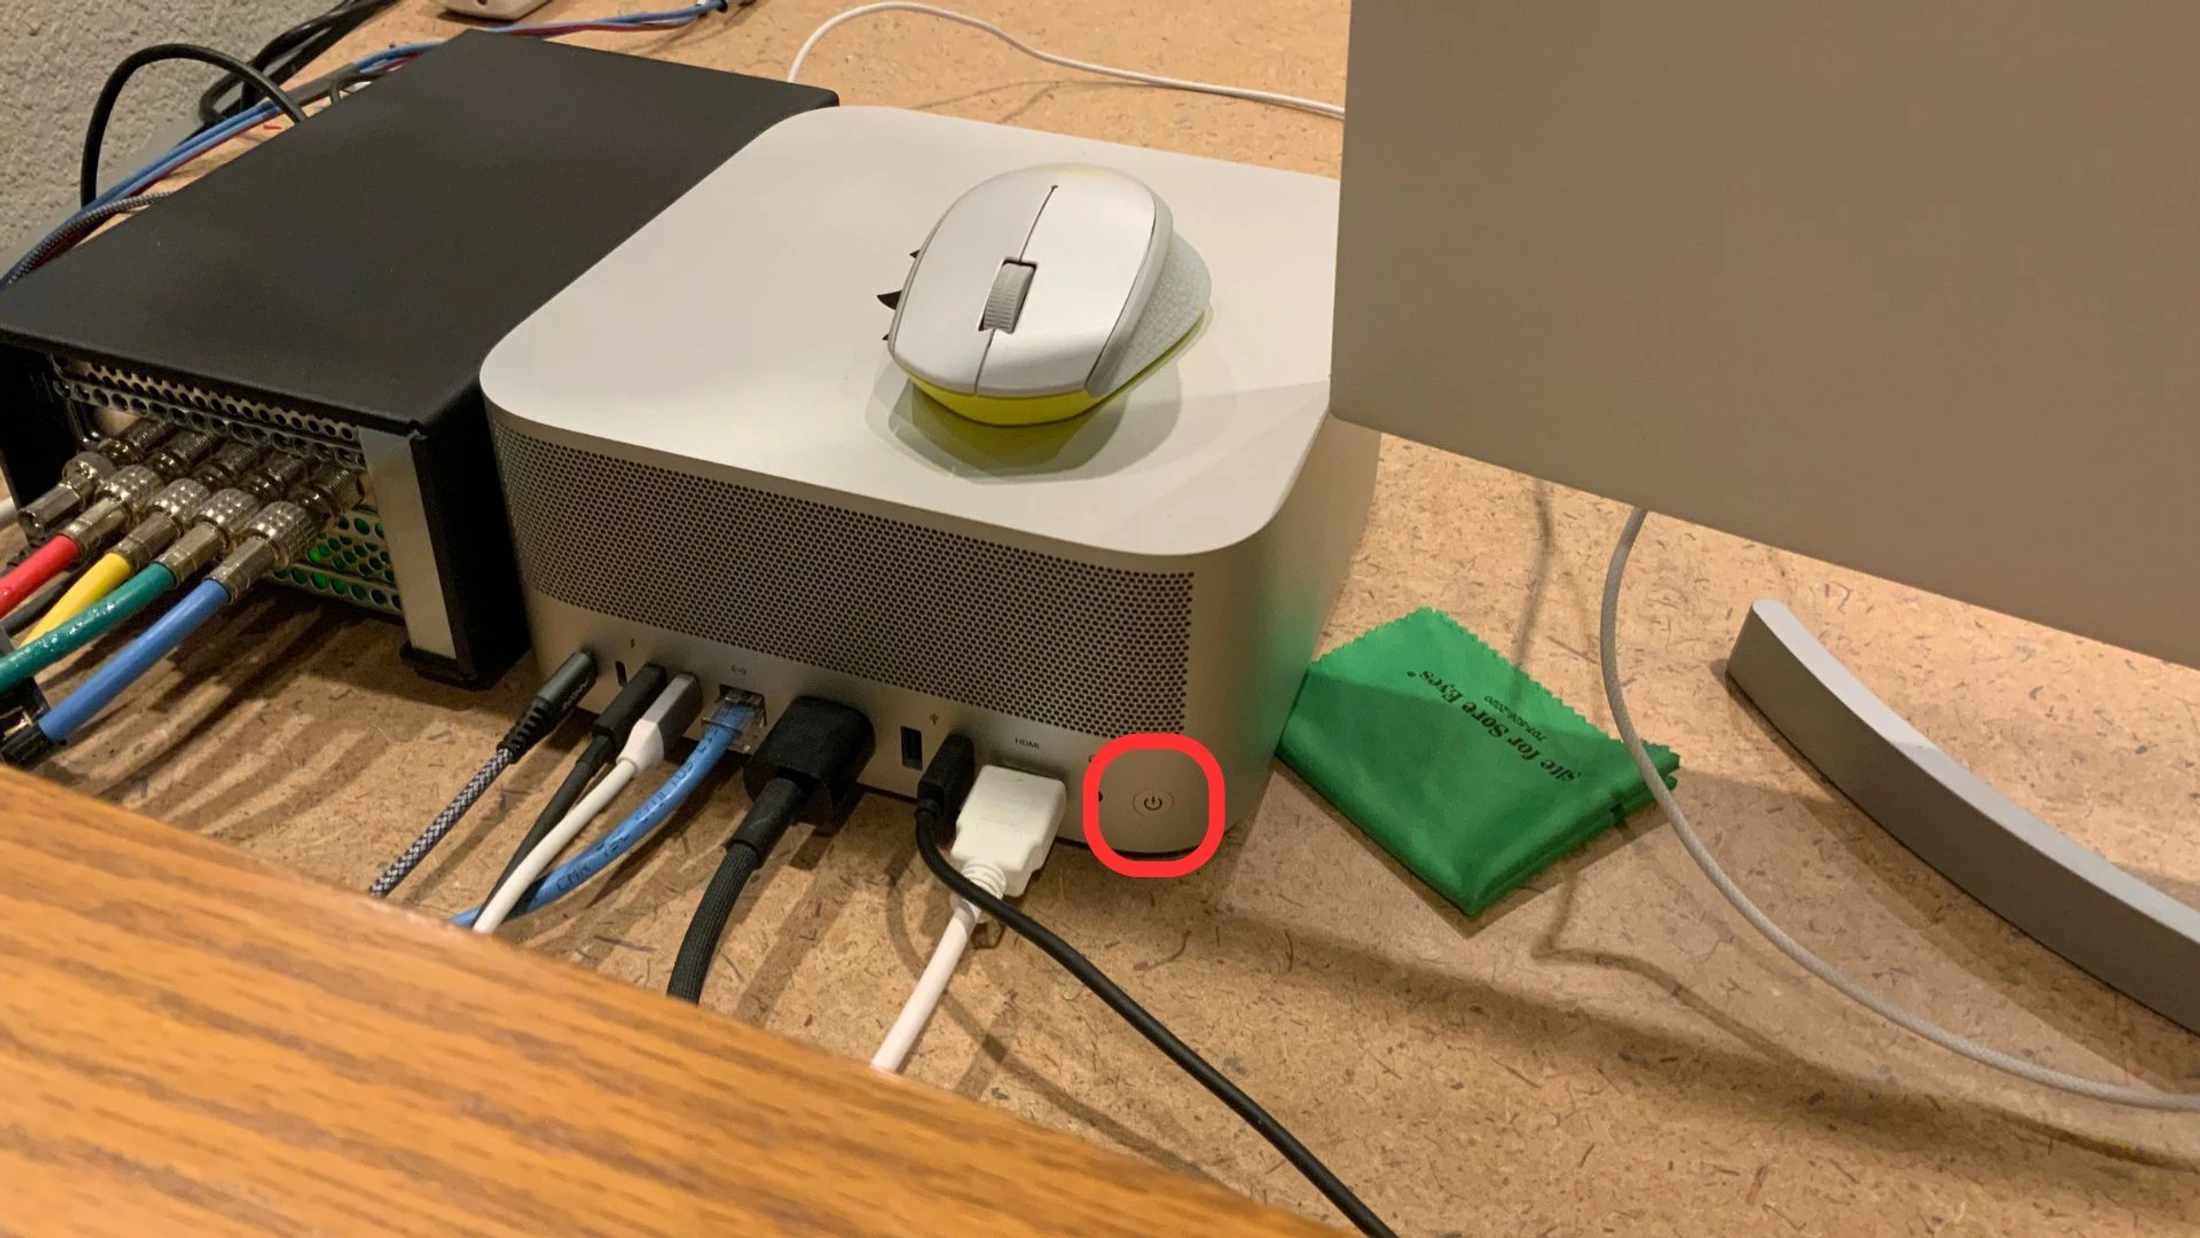
(If Computer is Off) 1. Press Mac power button located at the rear of the computer. leave computer on
How To Power On The Cameras
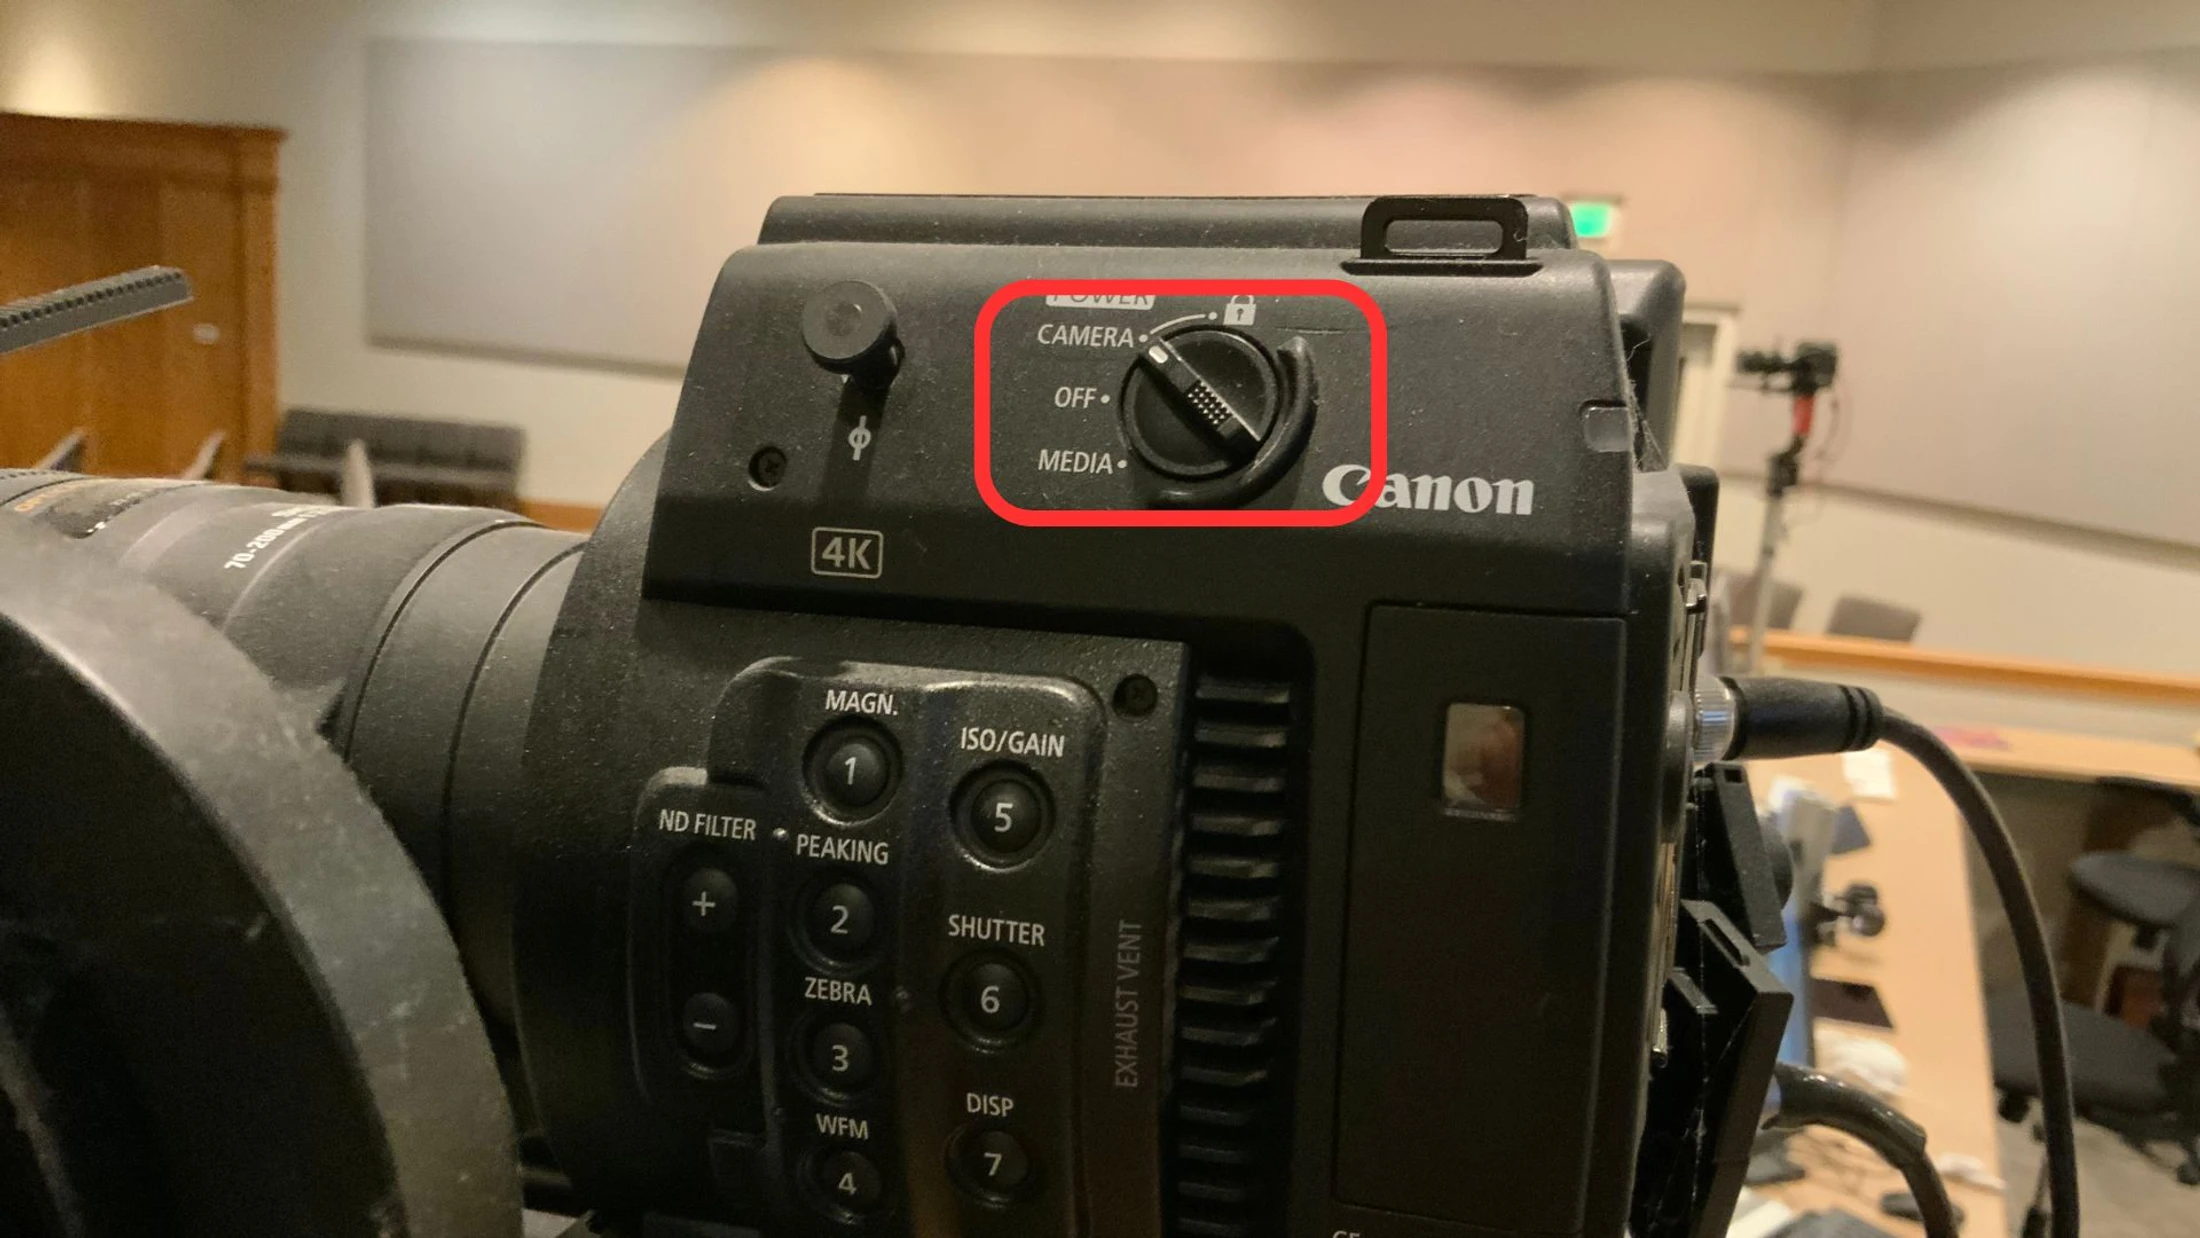
(If the cameras are off) 1. Switfh to “Camera” potition. leave camera on the power is controlled by the power switcher
2. Press and hold red button on zoom control untill the unit voibrates indicating that it is on.
The same process turns the device off as well
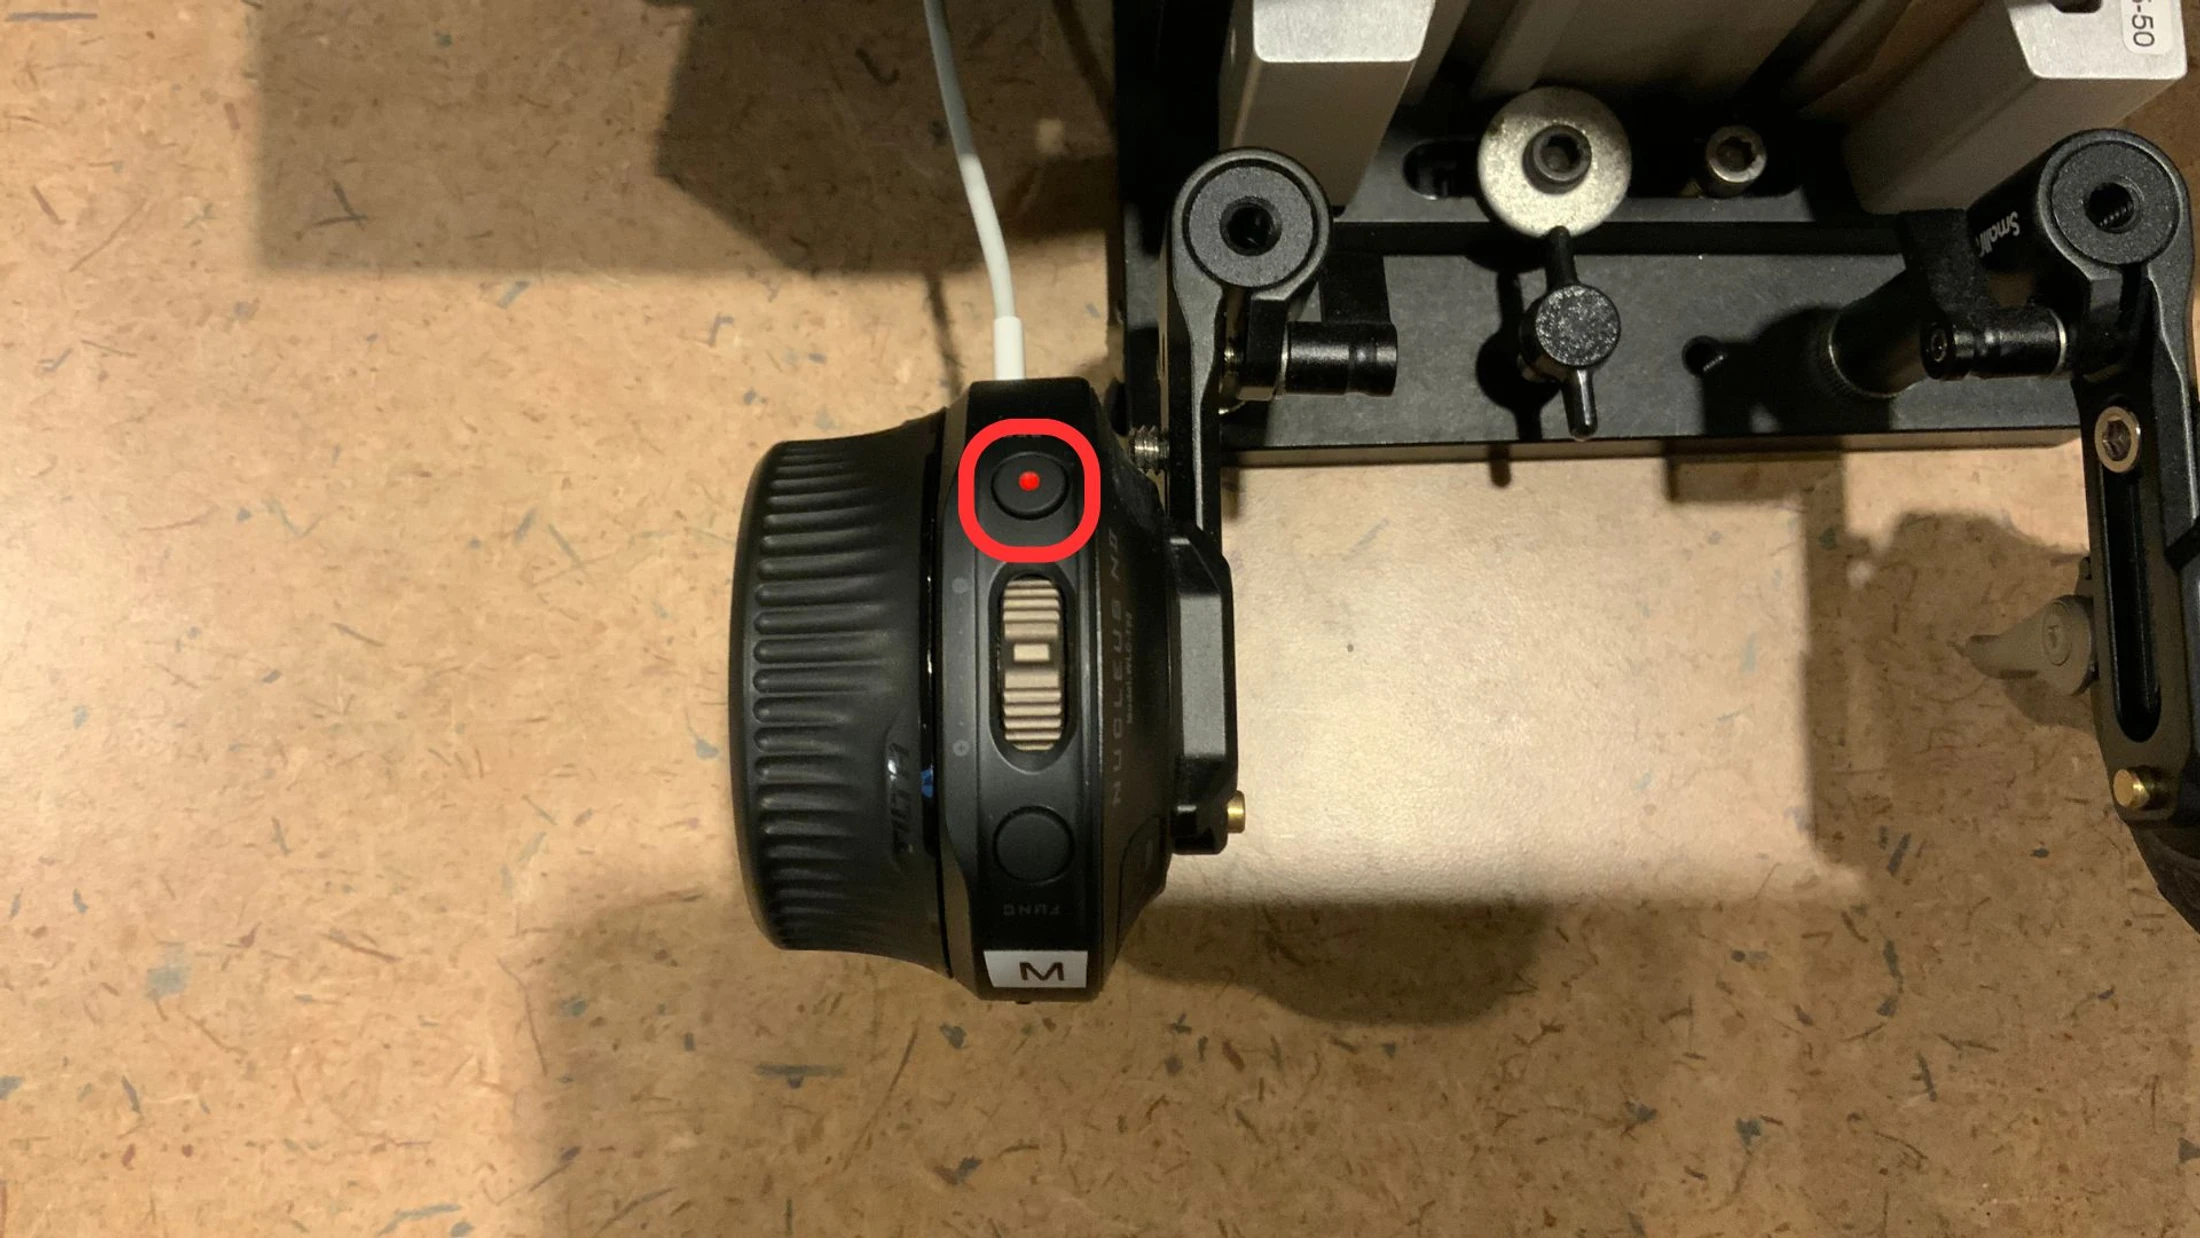
Powering On Camera System
Soundboard Operation
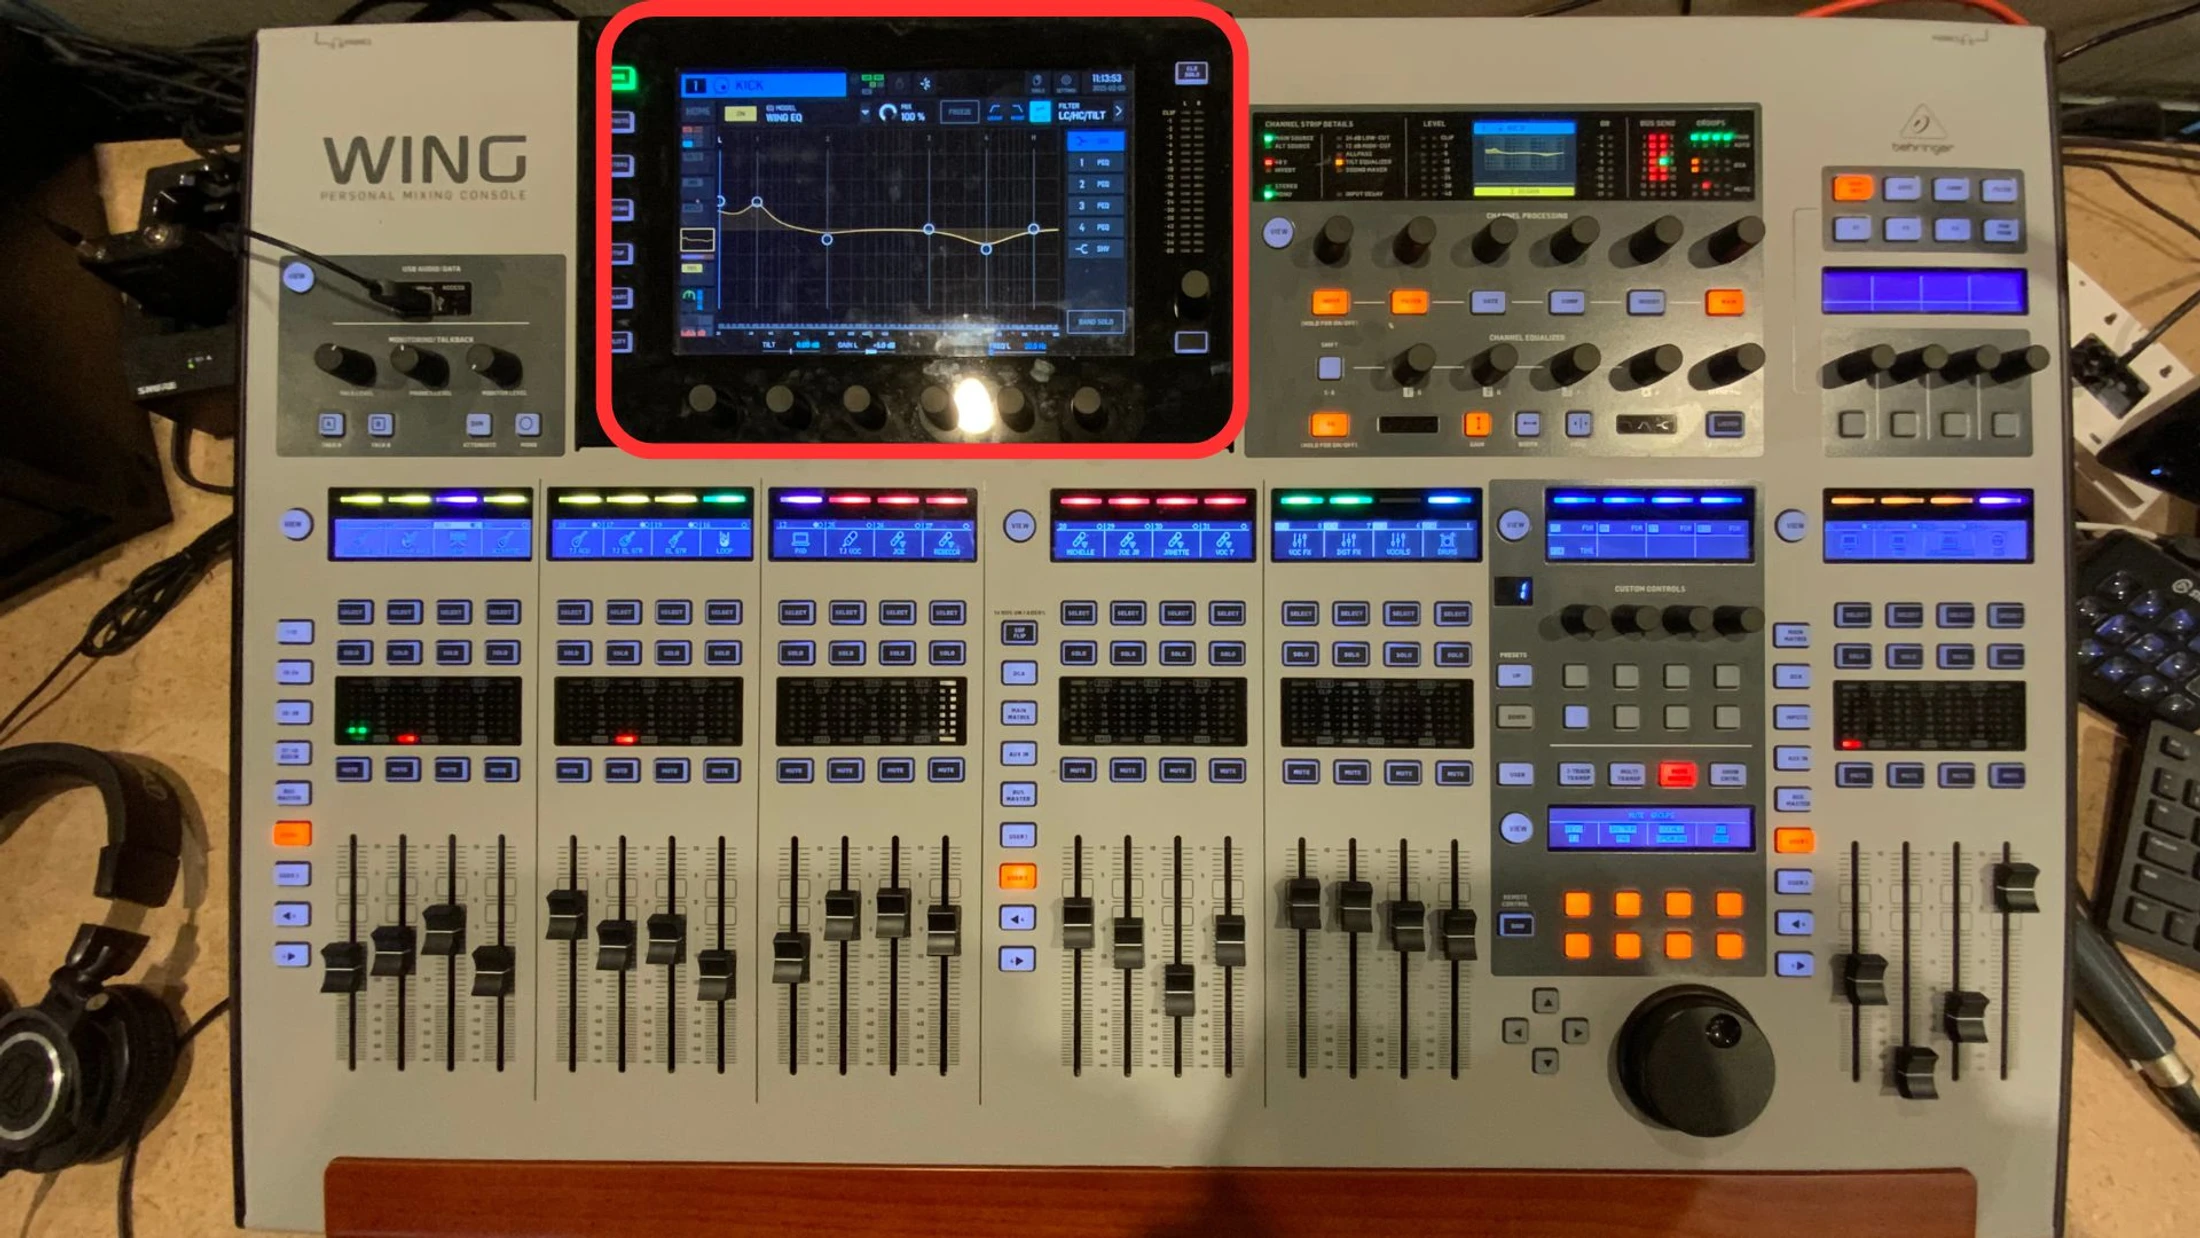
Basic layout of the soundboard
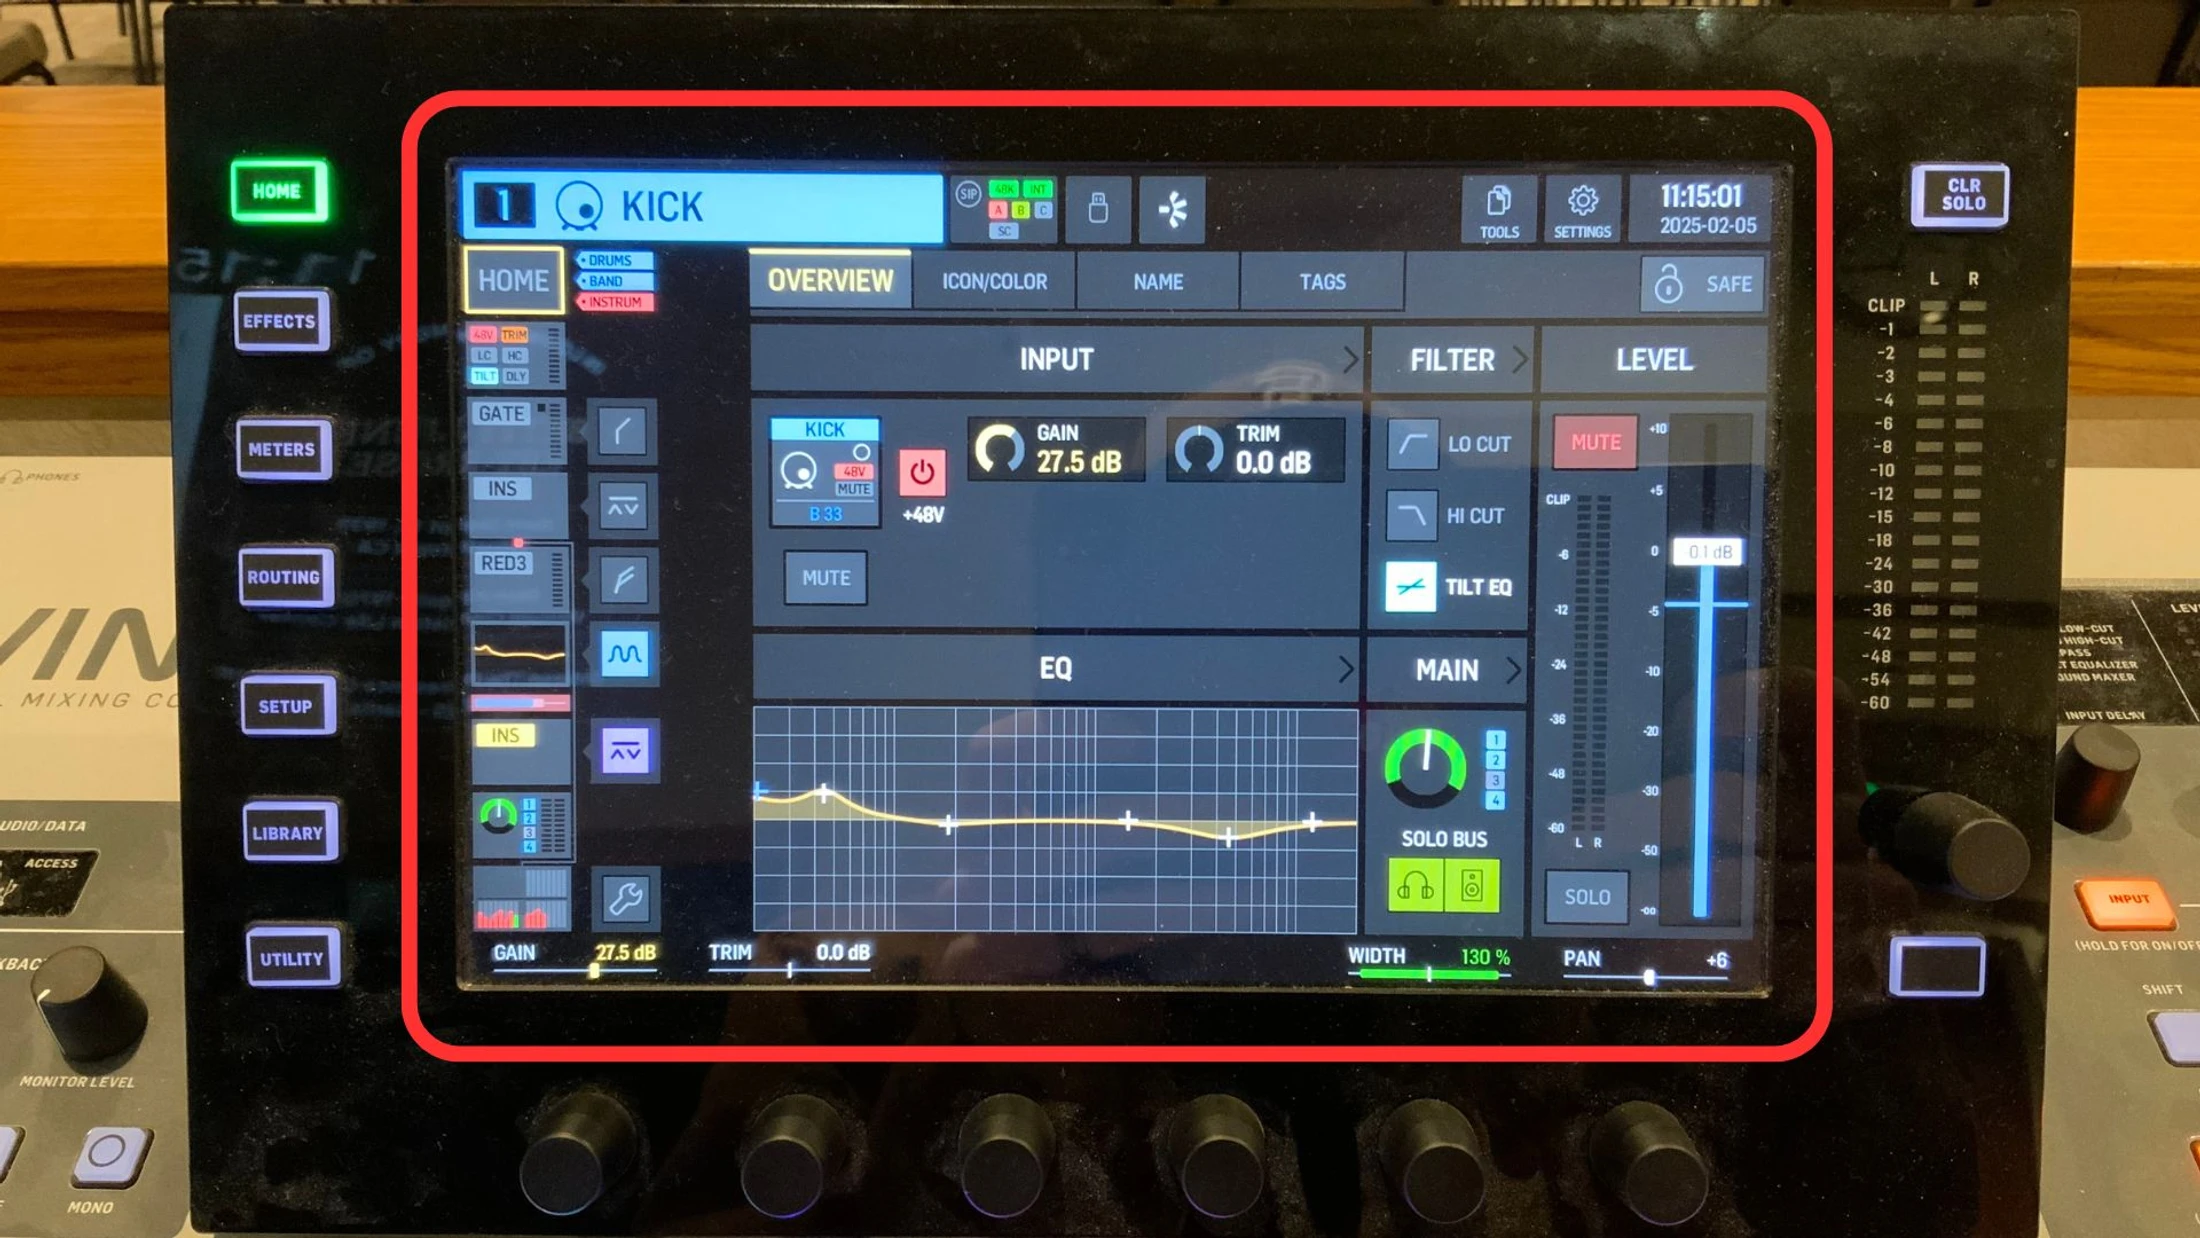
1. The Display is used for information reference and will change according to the “layer” you are controlling.
You will very rarely need to dive into the controls on this display
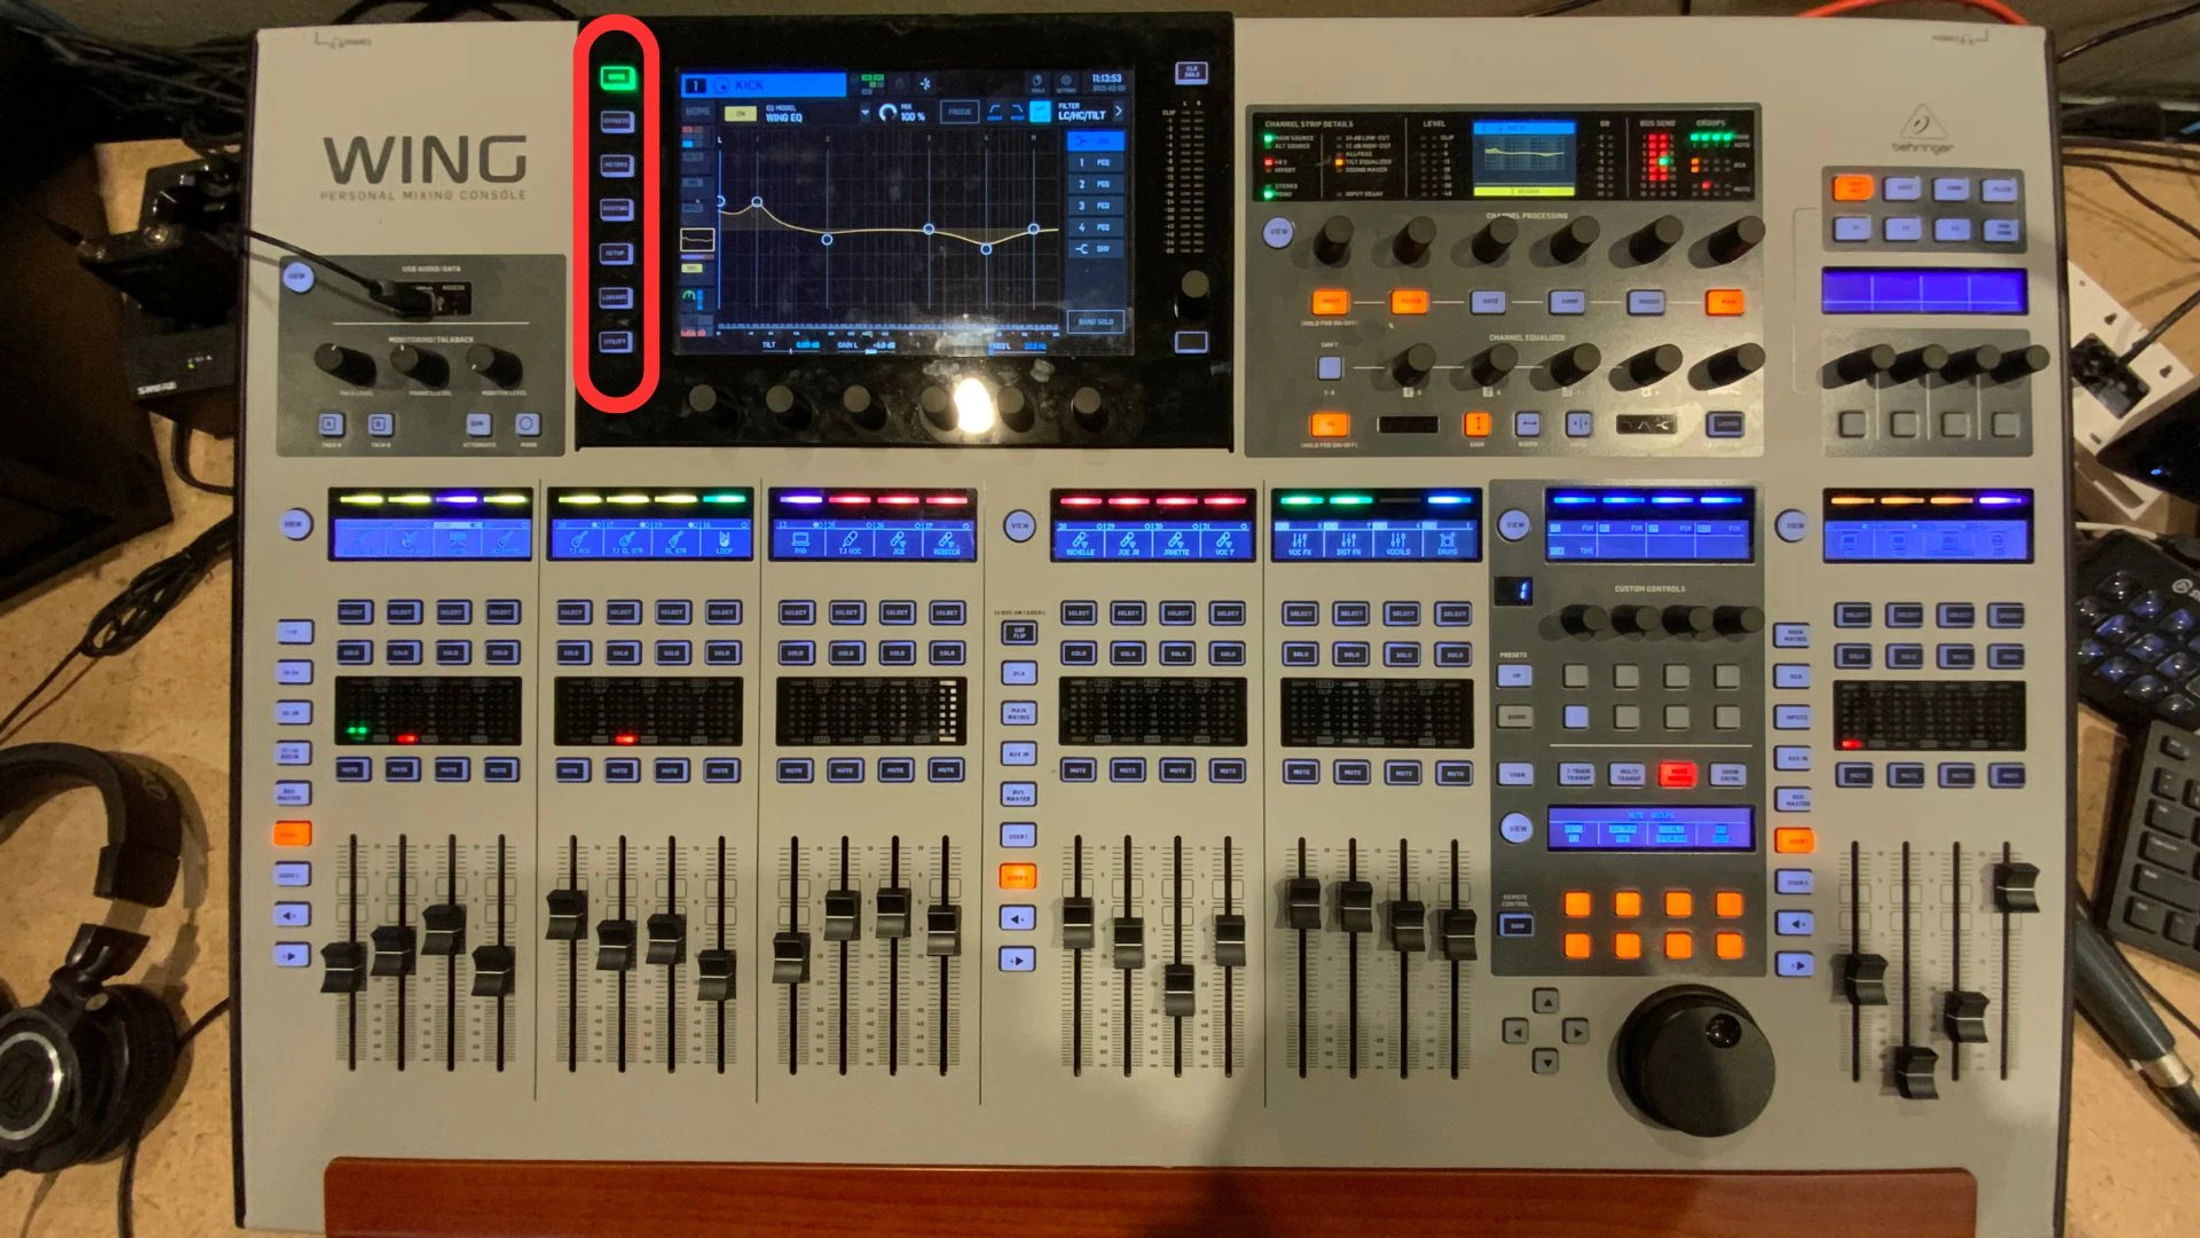
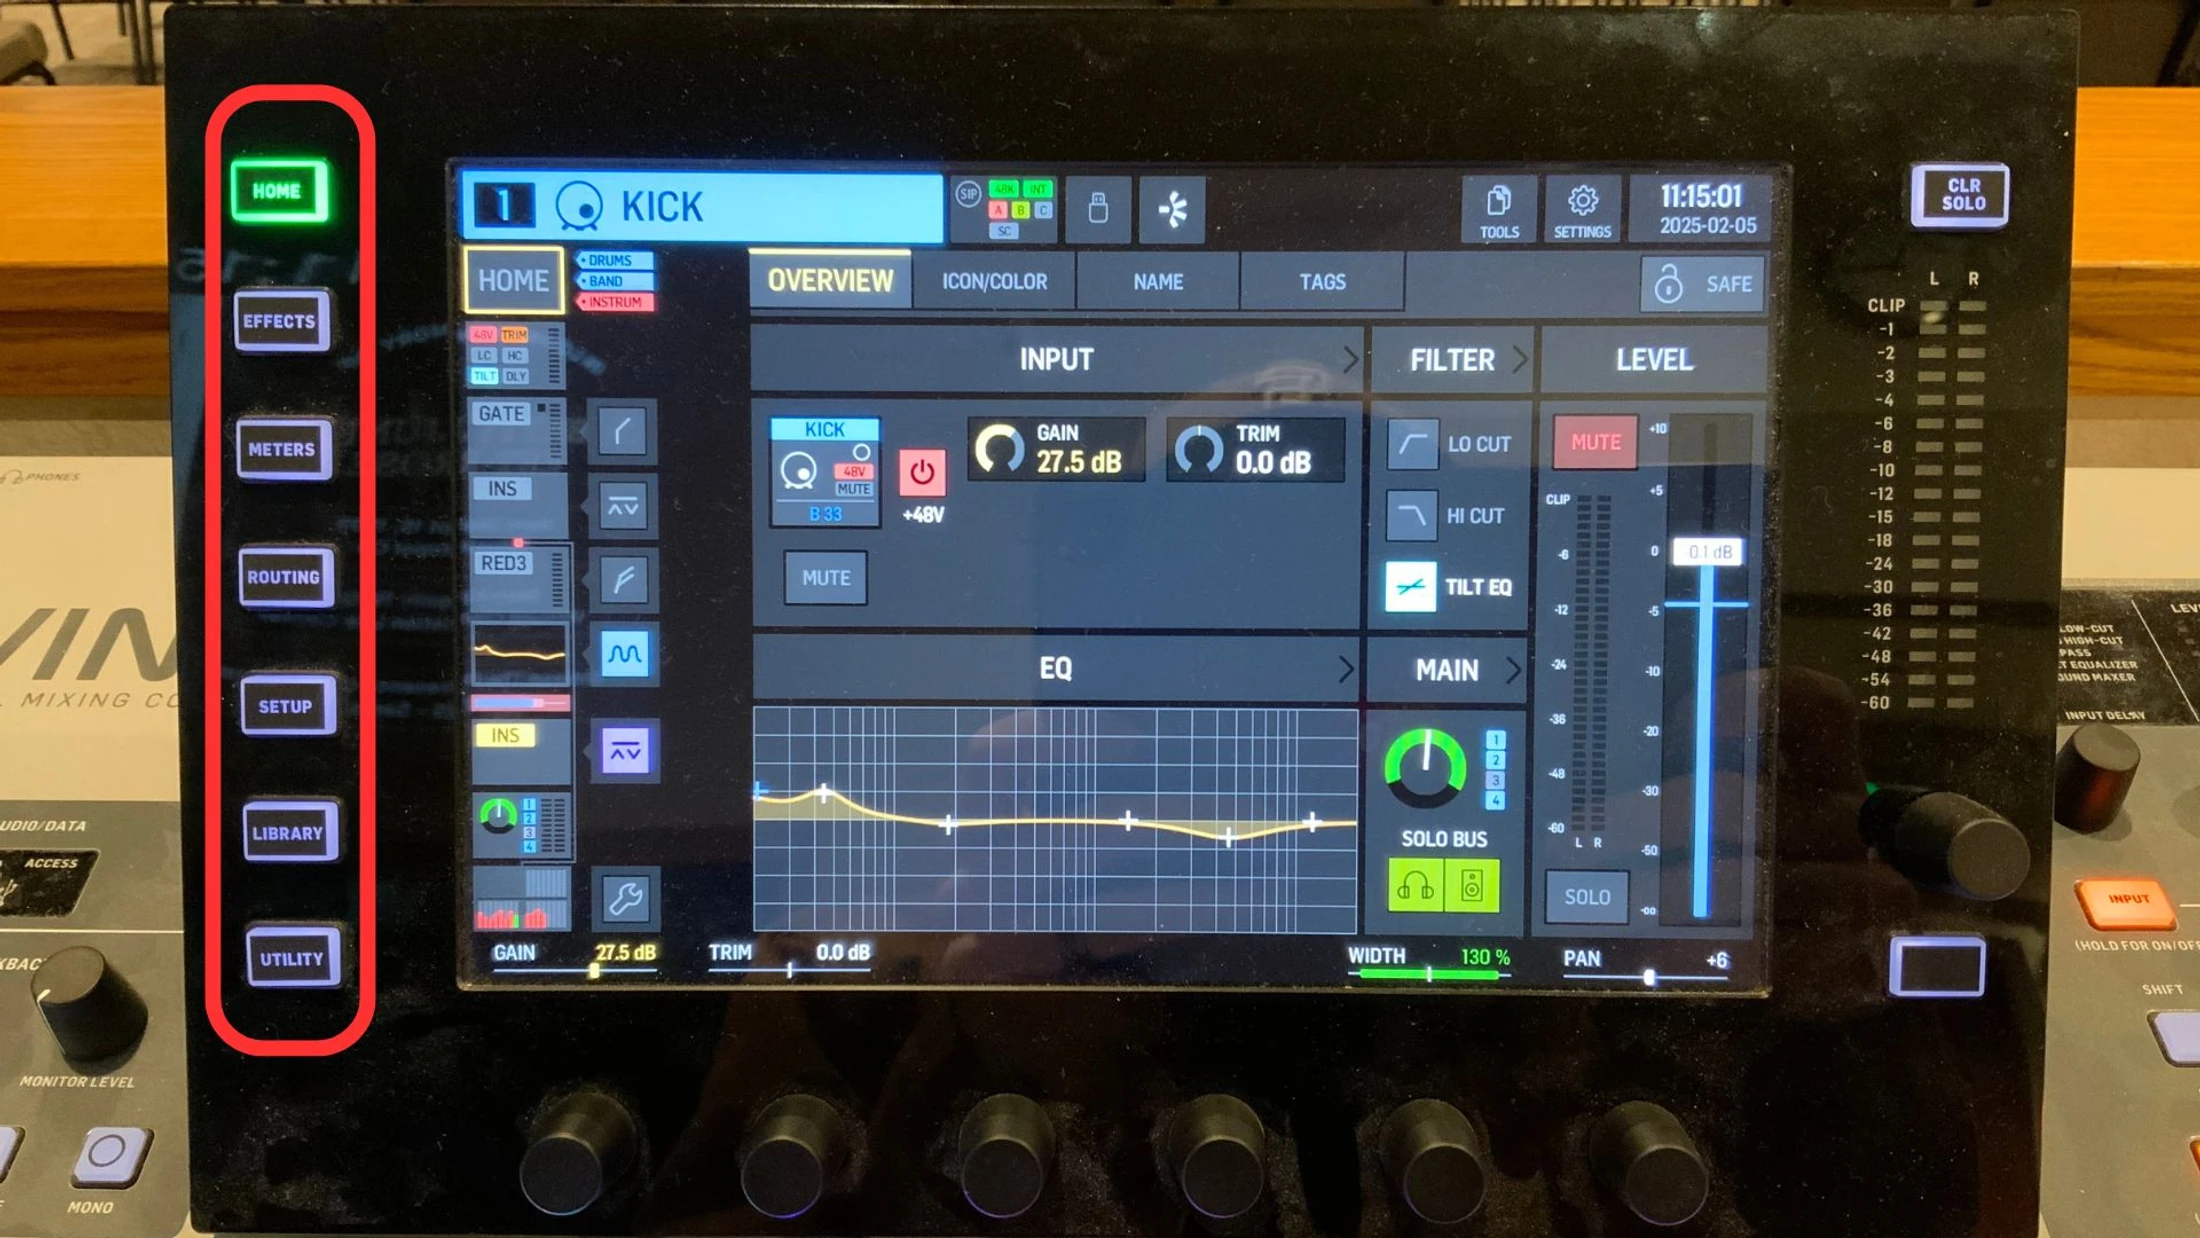
2. The function buttons are to dive into different layers on the soundboard display.
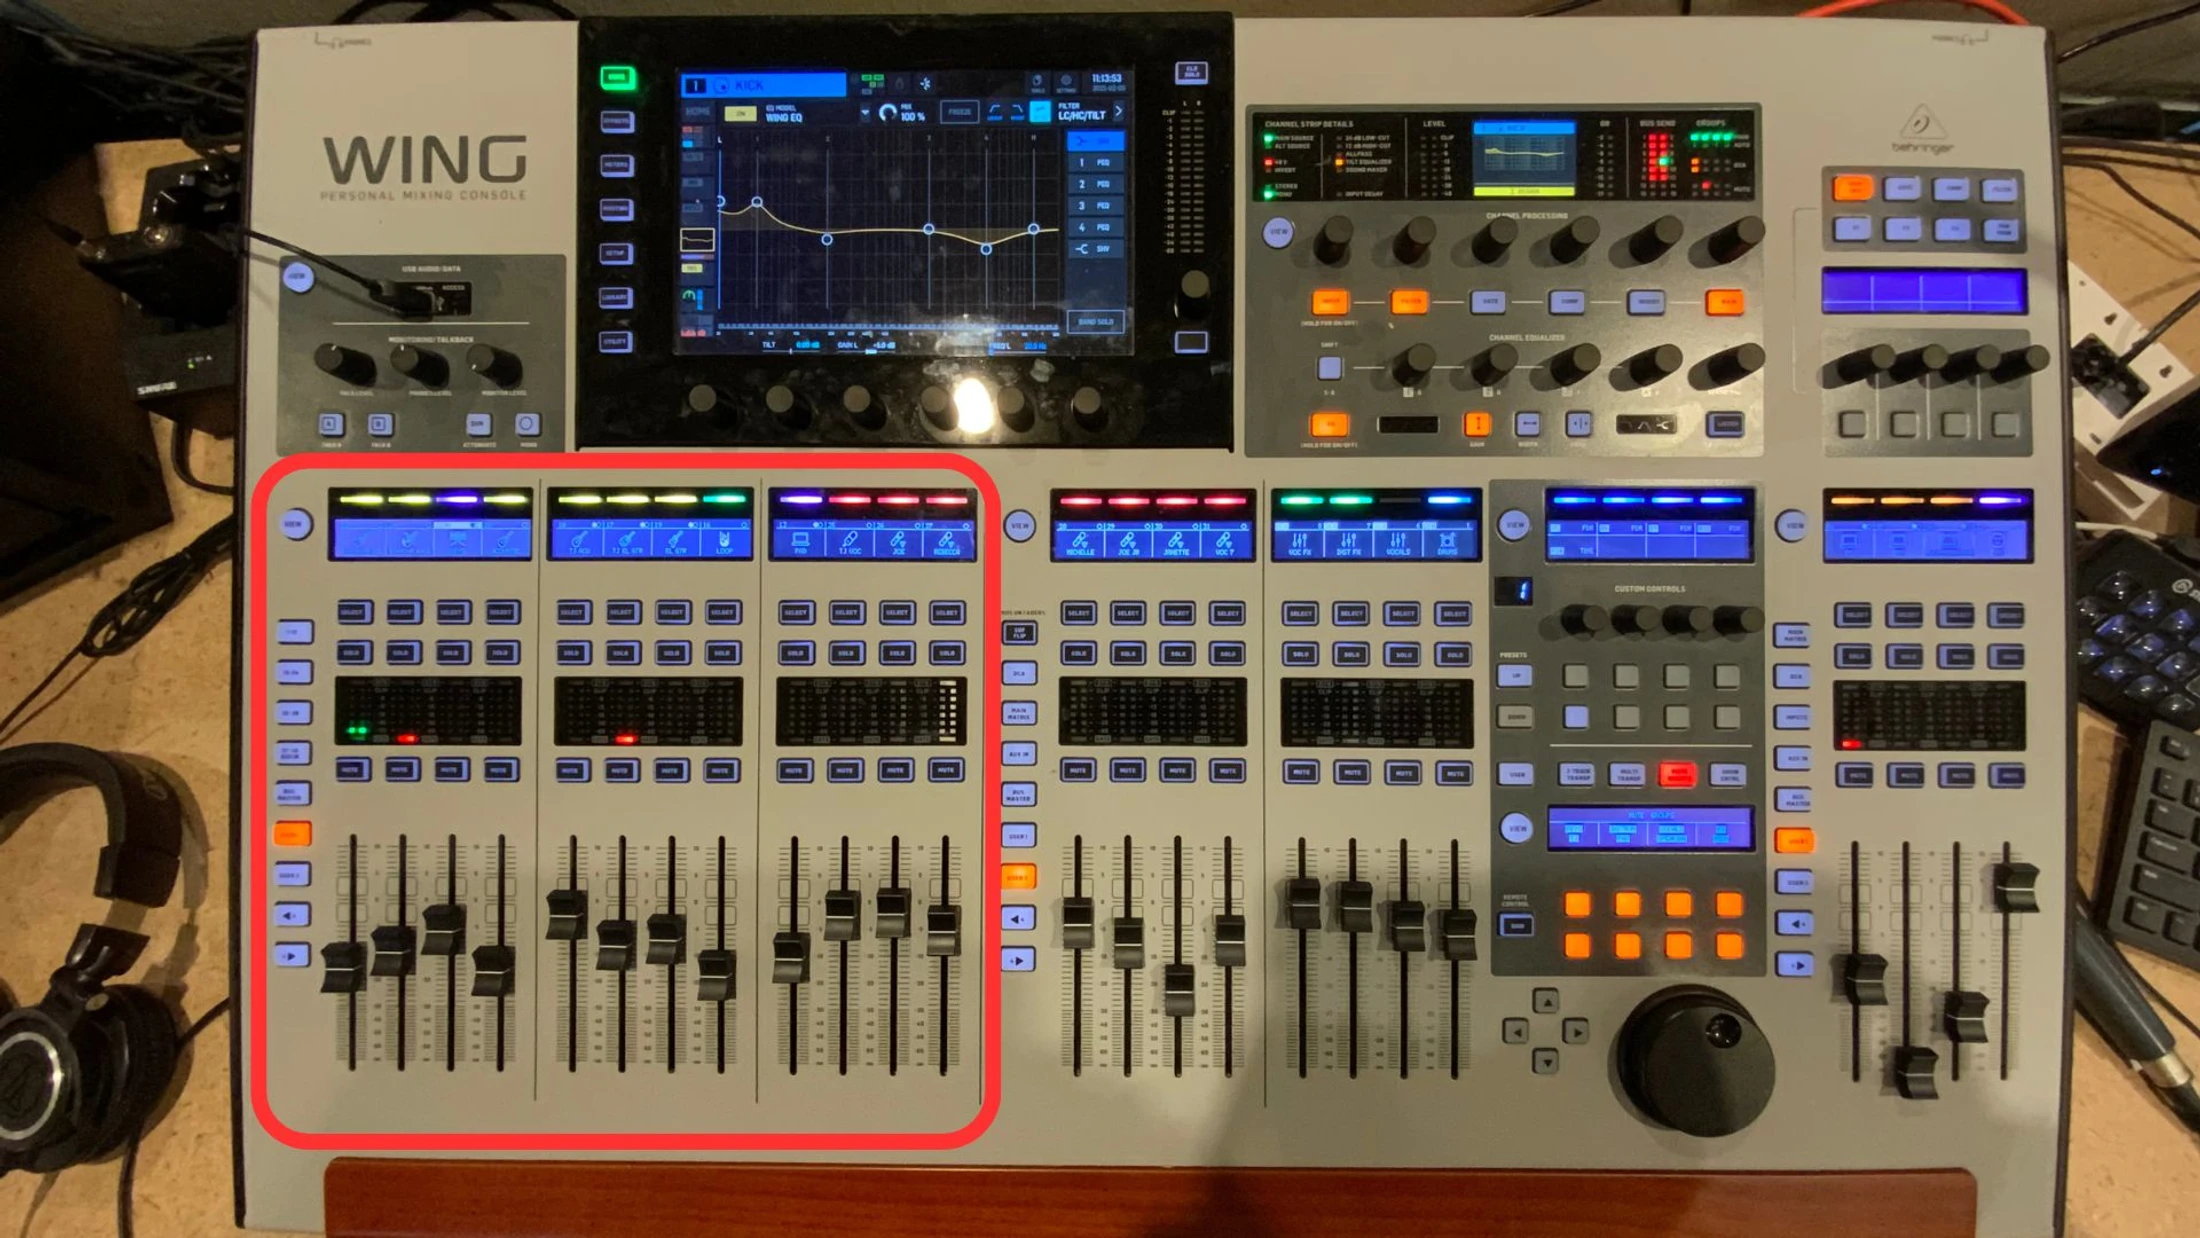
3. Fader bank 1 is where all the inputs are routed starting with the instruments and low end of the sound frequency.
4. After instruments will come vocals. Keep fader bank 1 on the “user 1” button
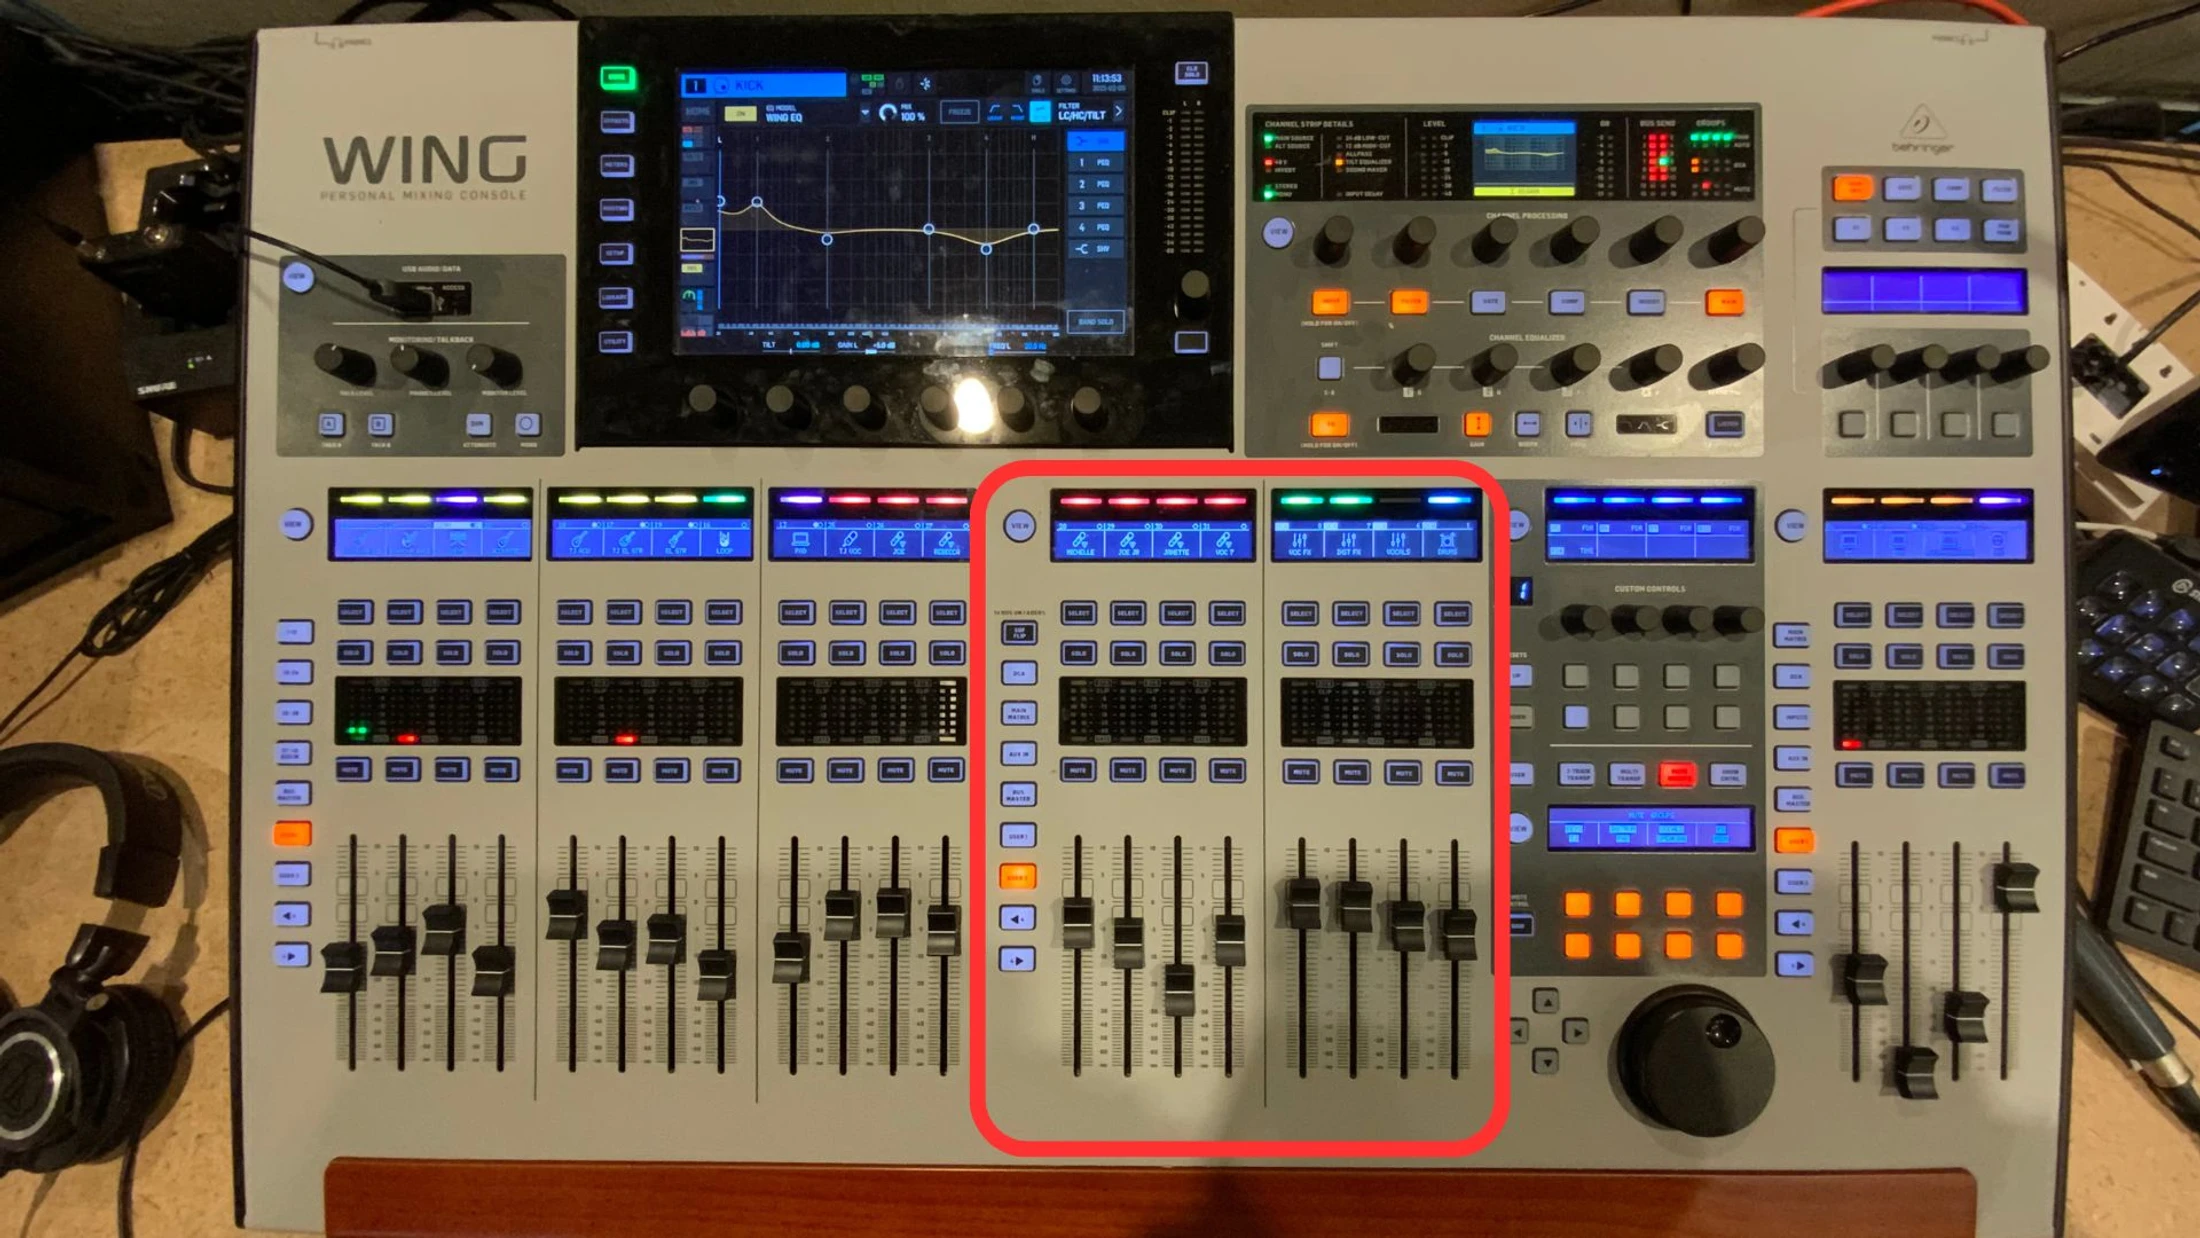
5. Fader bank 2 is a continuation of fader bank one and will have the rest of the vocal mics into FX faders.
Keep fader bank 2 on the “user 2” button
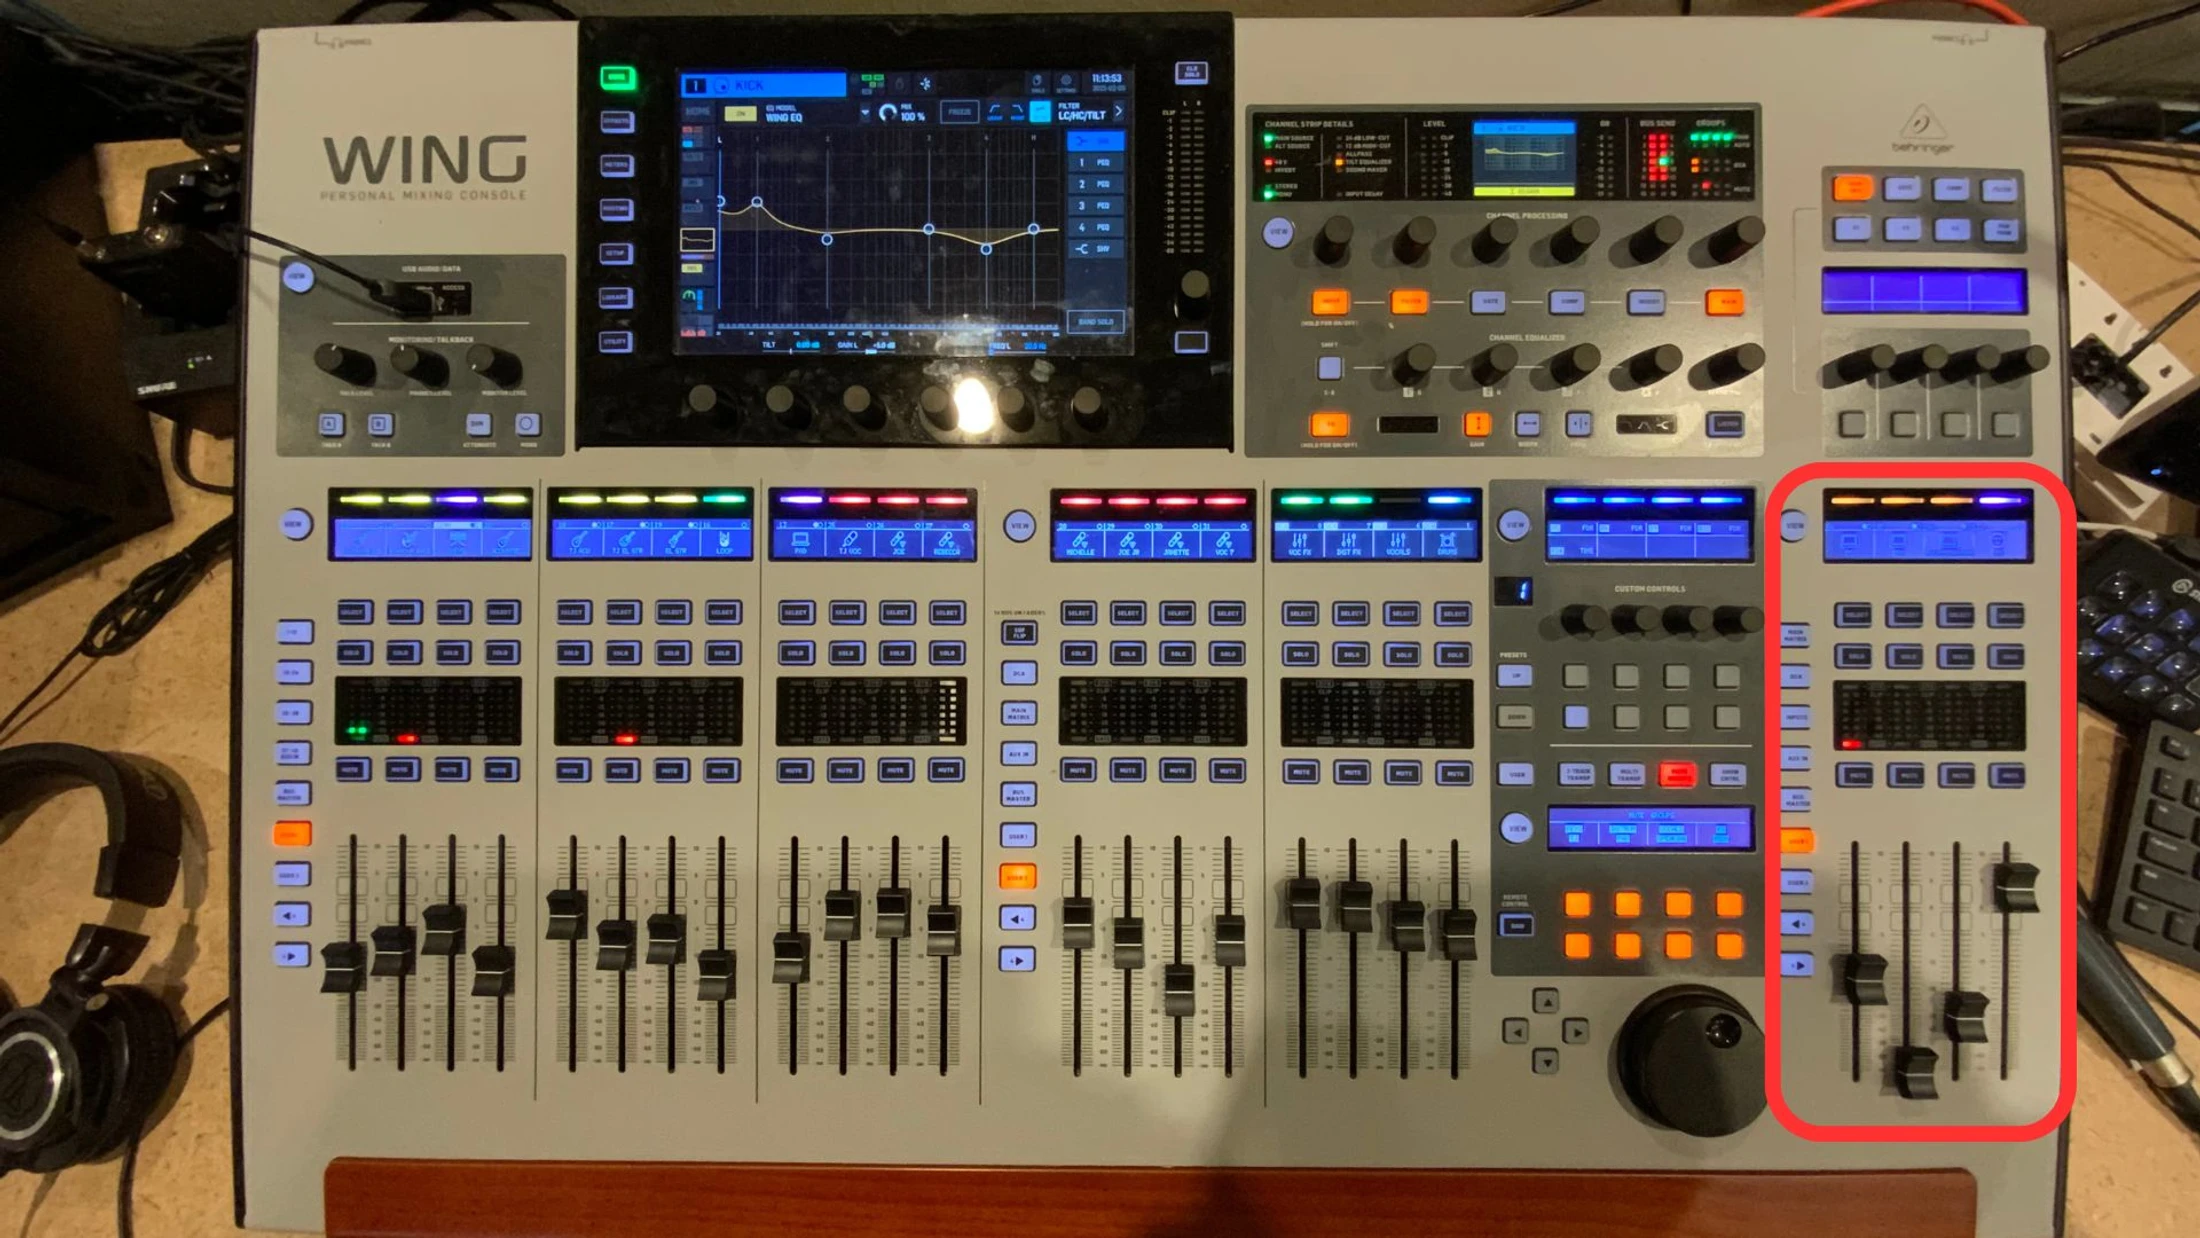
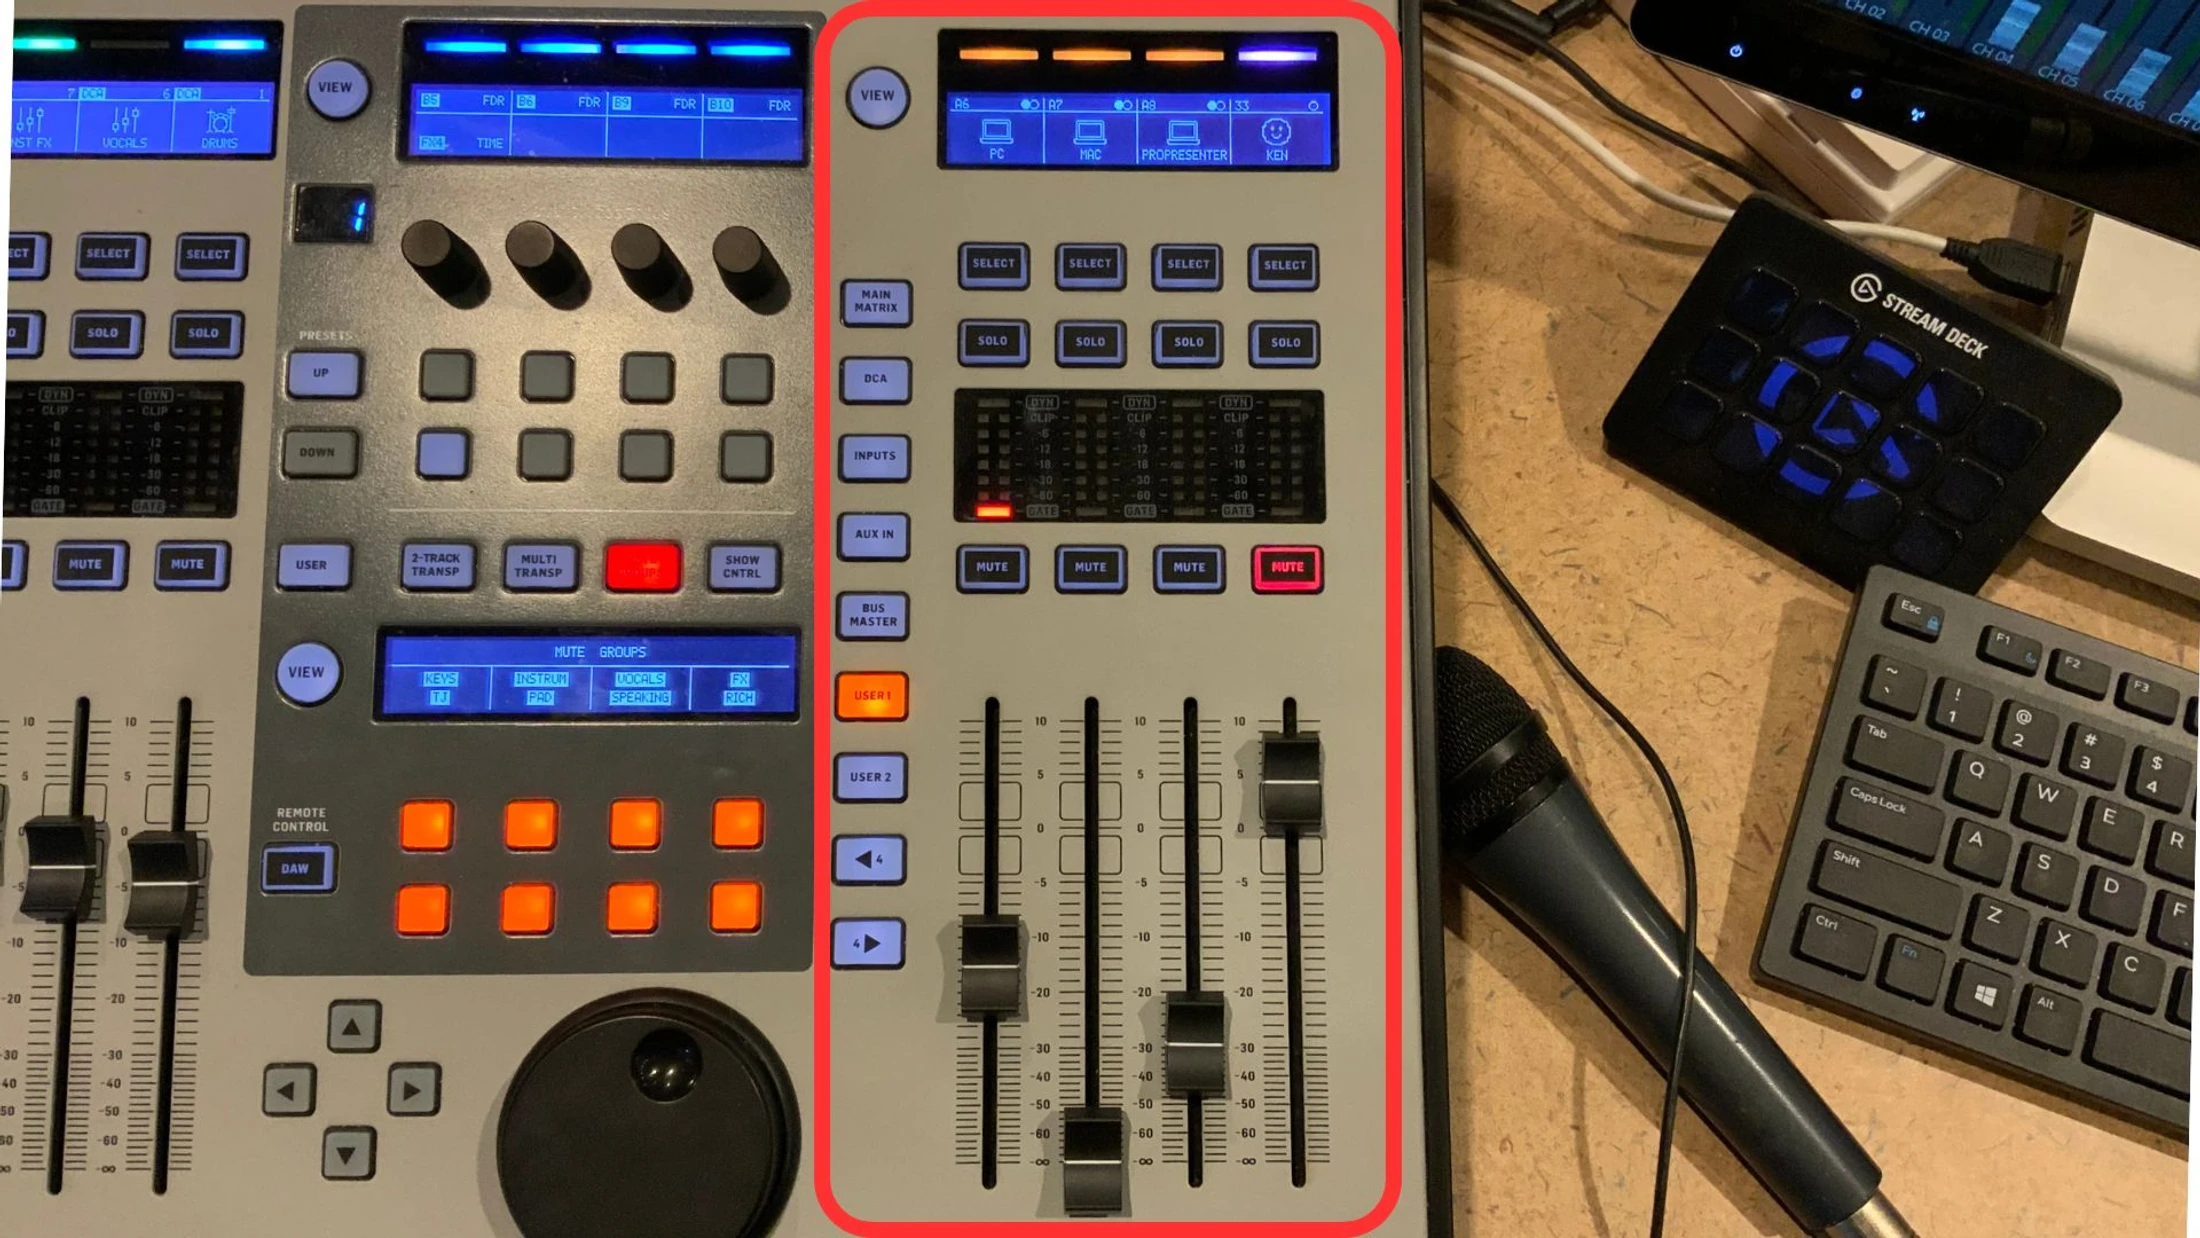
6. Main fader bank. Under the “user 2” button you will find the faders for the “Mains”, “Subs”, and “Live Stream” sends. Under the “user 1” button you will find faders for “Spotify”, “Mac”, “ProPresenter”, & the main “Speaker”. Please leave this fader on “User 1”
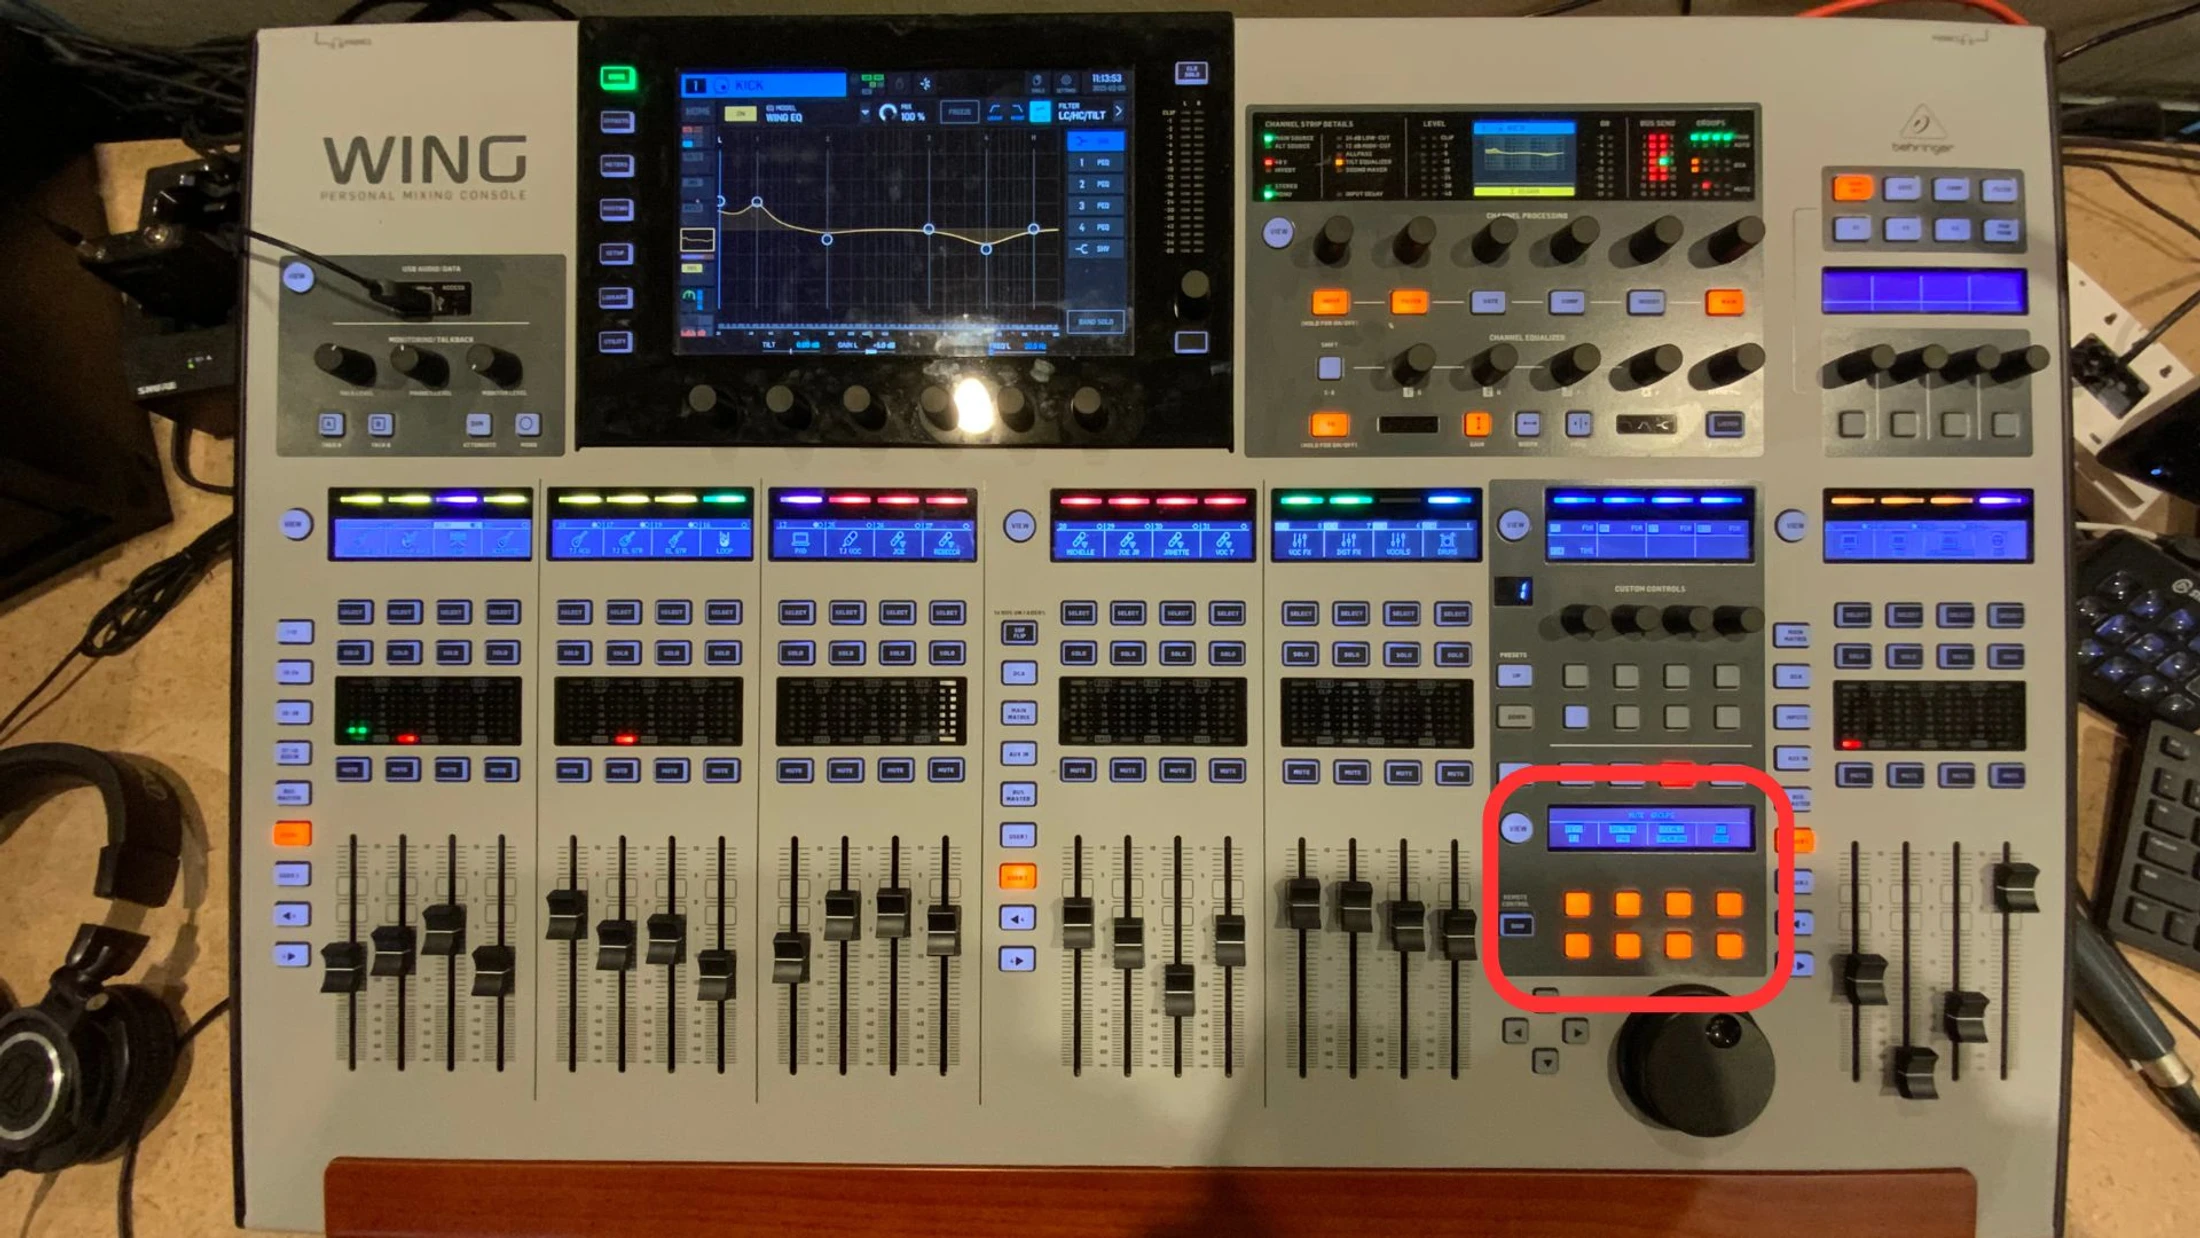
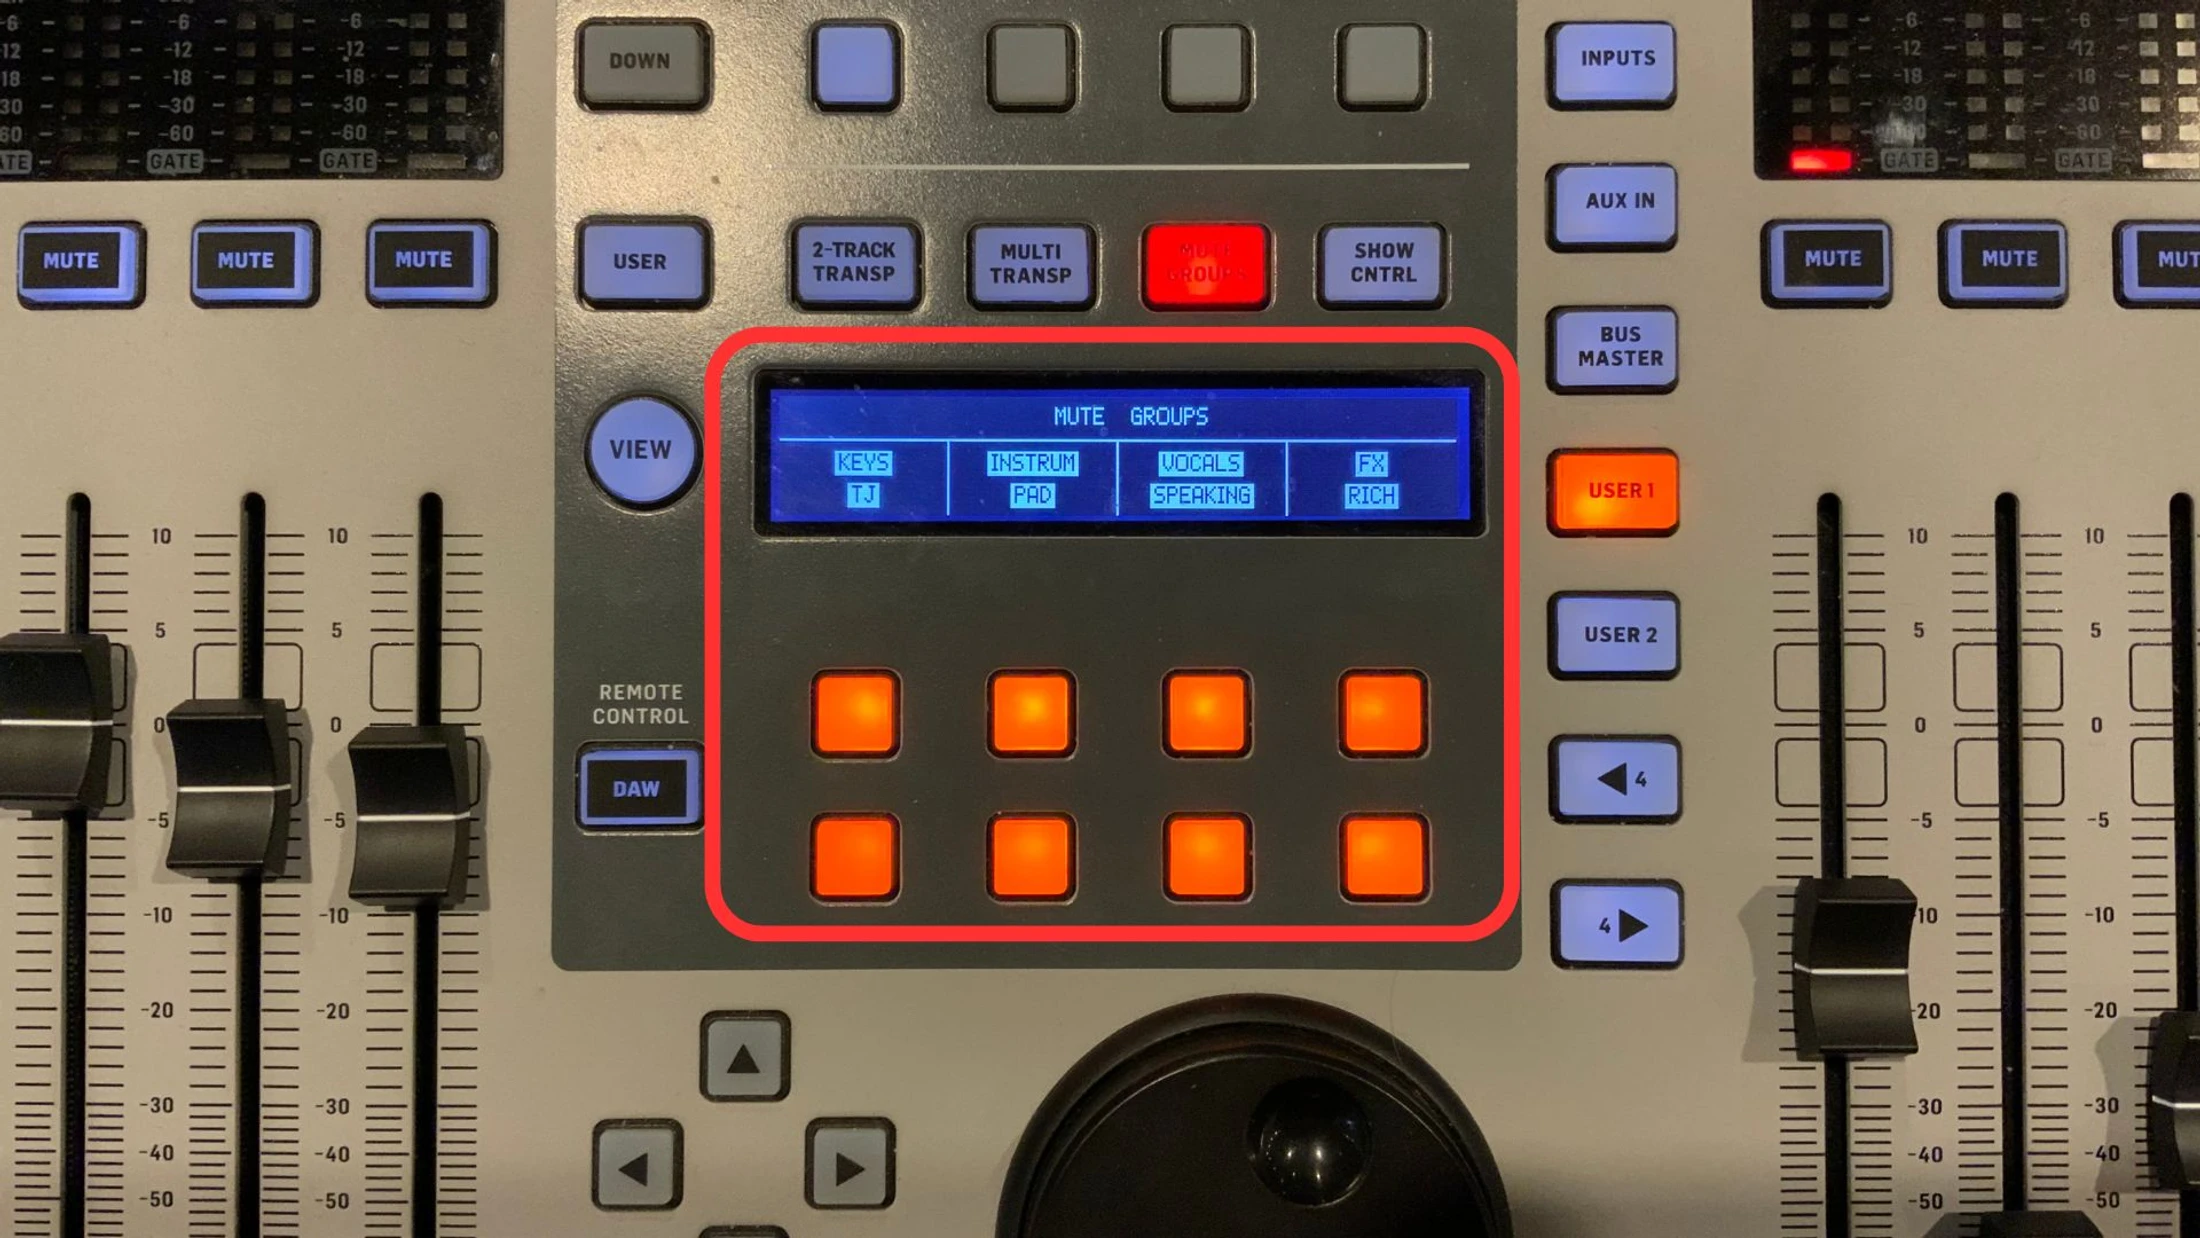
7. Mute Group section is used to mute and unmute pre identified groups on sends. The orange buttons correspond with the labels on the display. When illuminated the group is muted. The corresponding faders in that group will also flash the mute button on that fader. Use this section first for muting before individually muting faders.
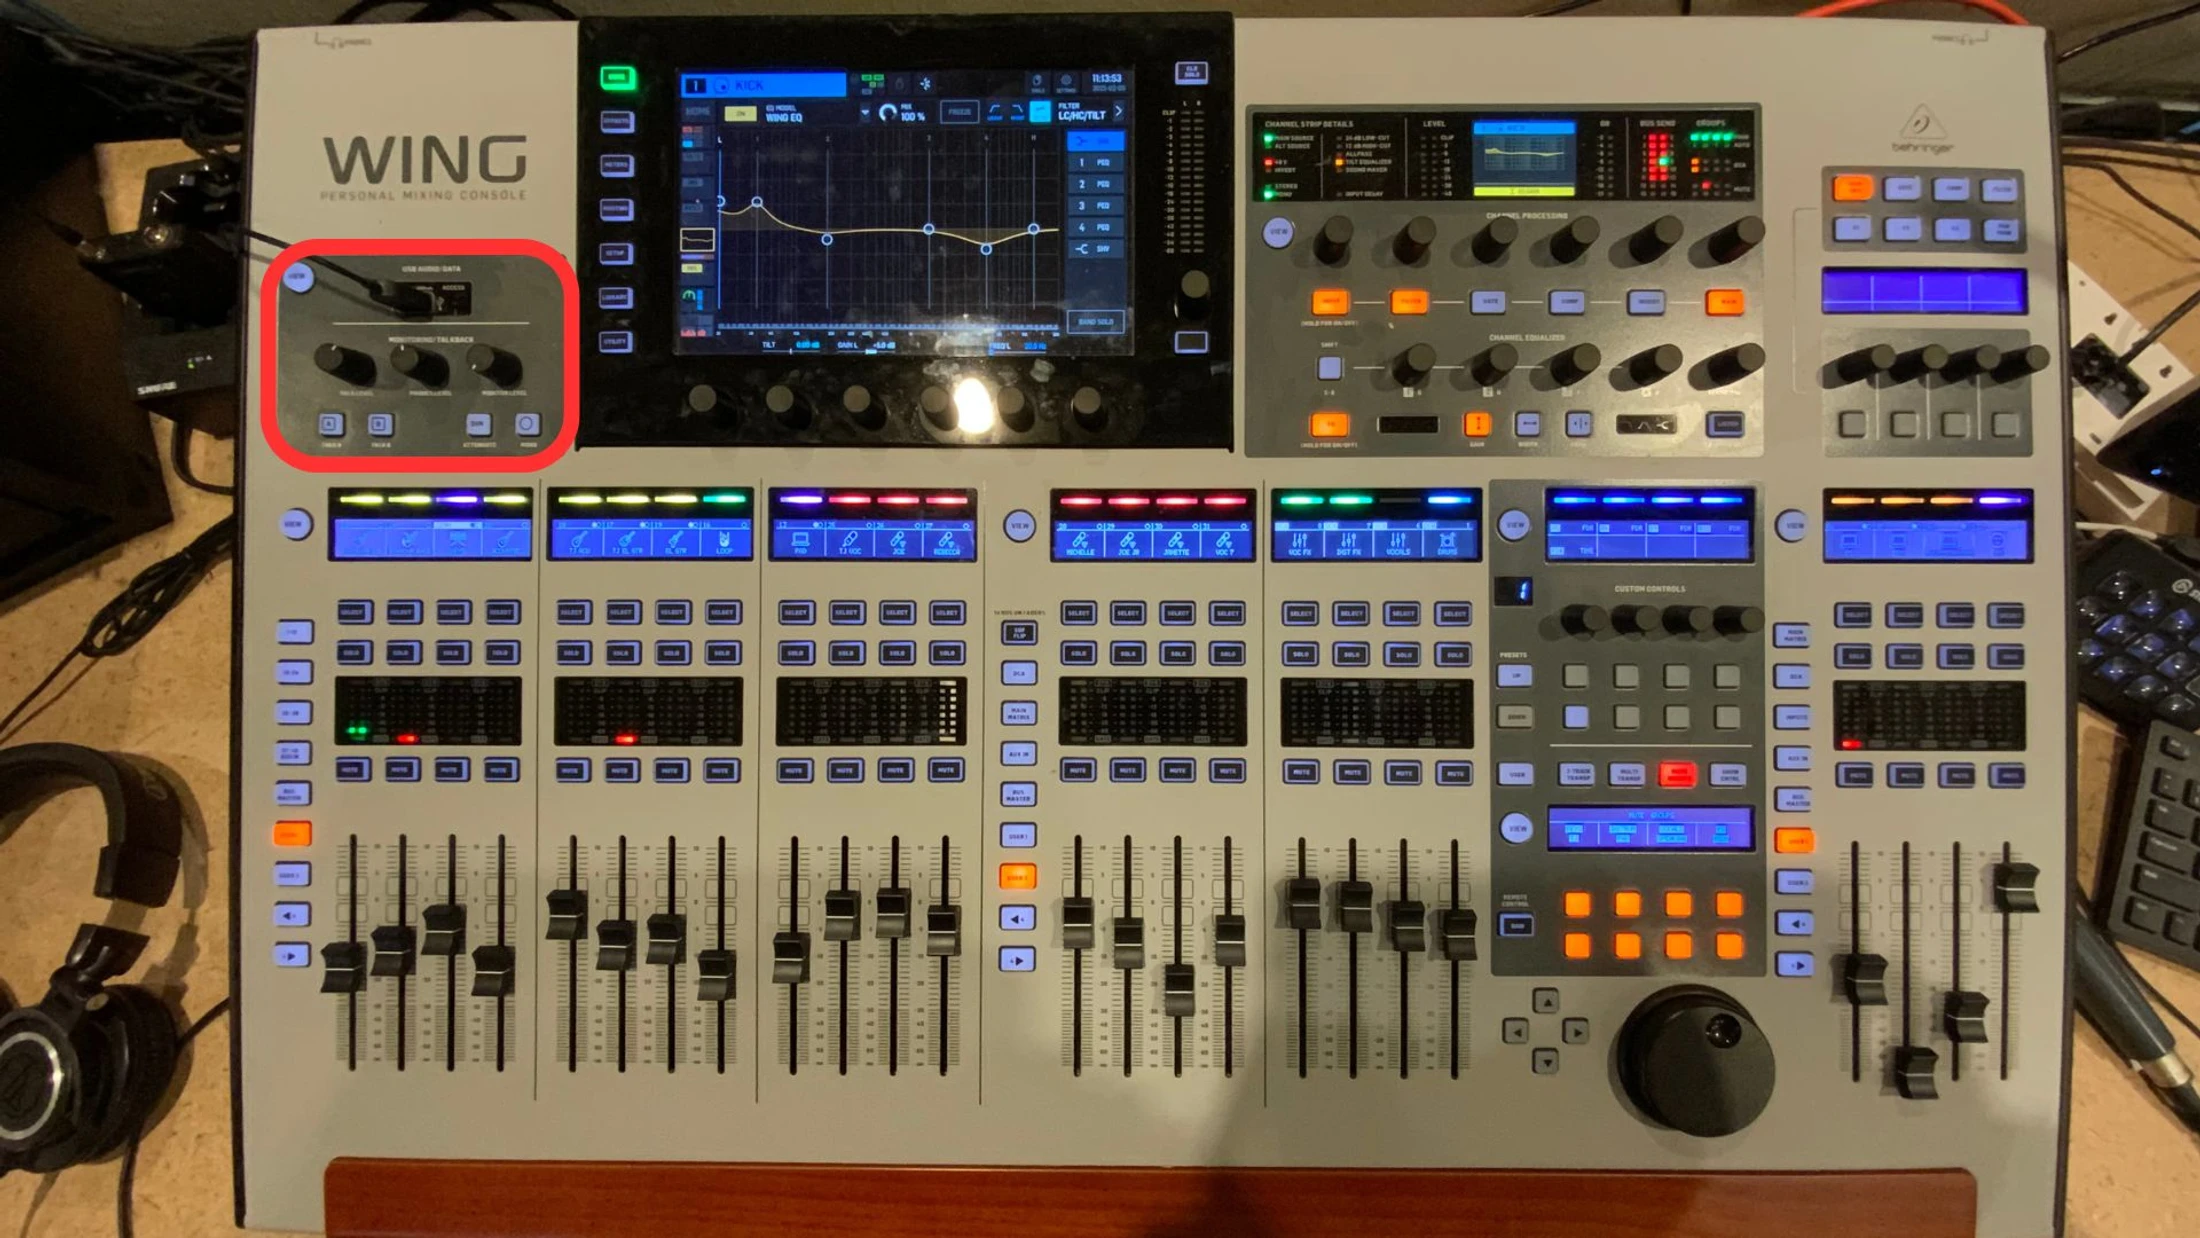
8. The talkback section is used to communicate with band members on stage through their IEMs. You press and hold the “Talk” button while using the mic to the right of the soundboard.
9. “Talk A” sends the whole band while “Talk B” send to the the music director.
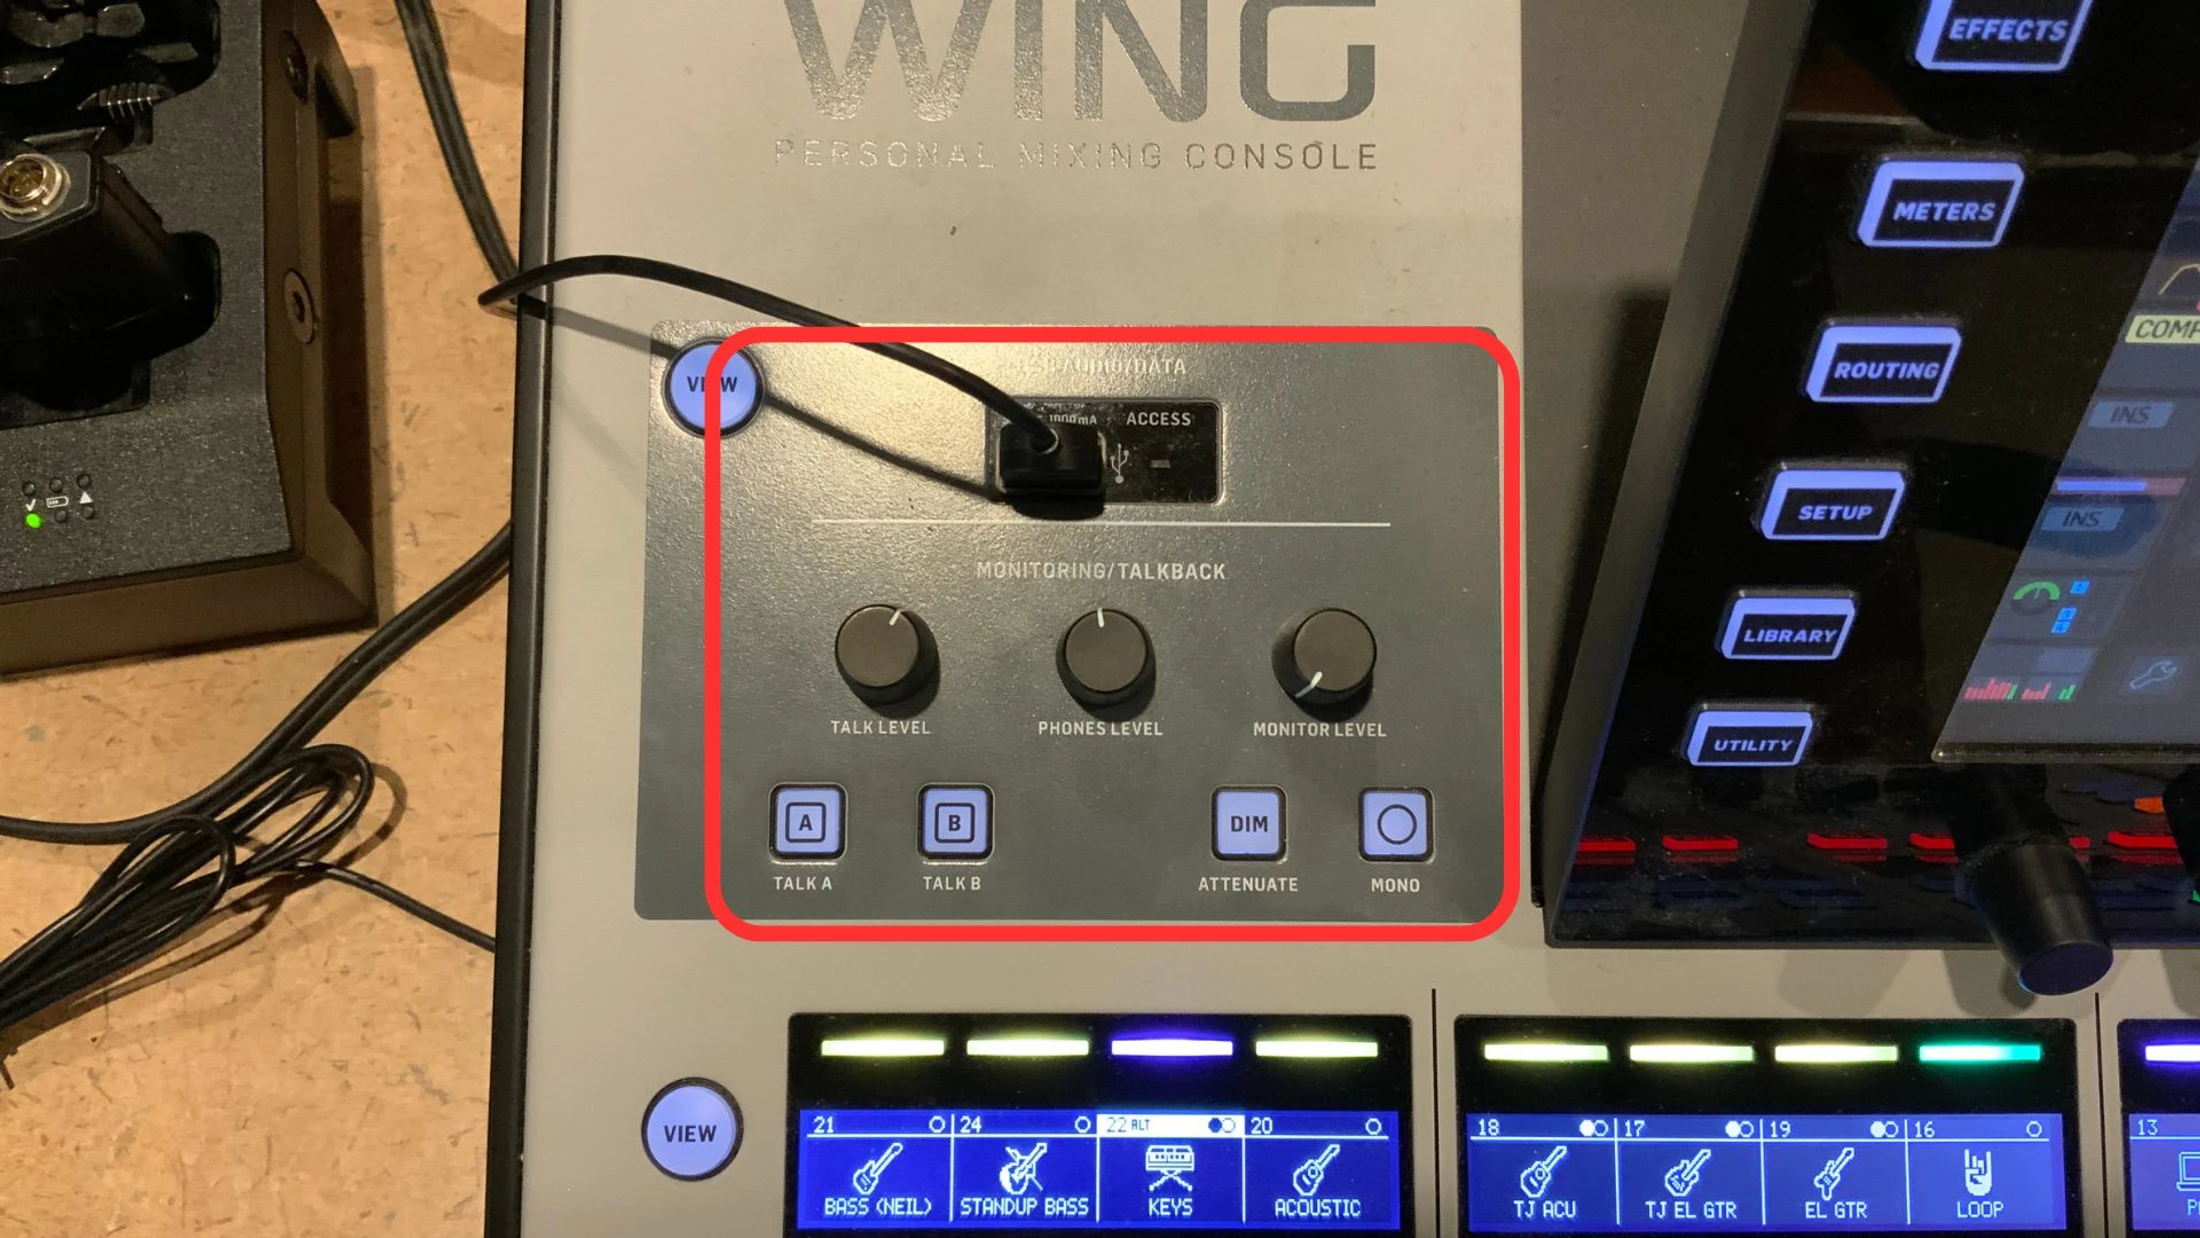
Soundboard Basic Layout
Function Buttons
Bank Layout
Channel Layout
Mute Group Layout and Function
Talkback Layout and Function
Soundbaord Routing
DO NOT TOUCH ROUTING UNLESS SPECIFICALLY TOLD TO
Channel Routing
DO NOT TOUCH ROUTING UNLESS SPECIFICALLY TOLD TO
How to load a library
(PLEASE READ) This function will set the whole board to a previously saved state. This operation should only me done by Hannah, TJ, or Daniel. Please do not do this function without first clearly communicating with one of those three.
1. Select Library function button. Navigate to “Hessel (Latest)” and press Load.
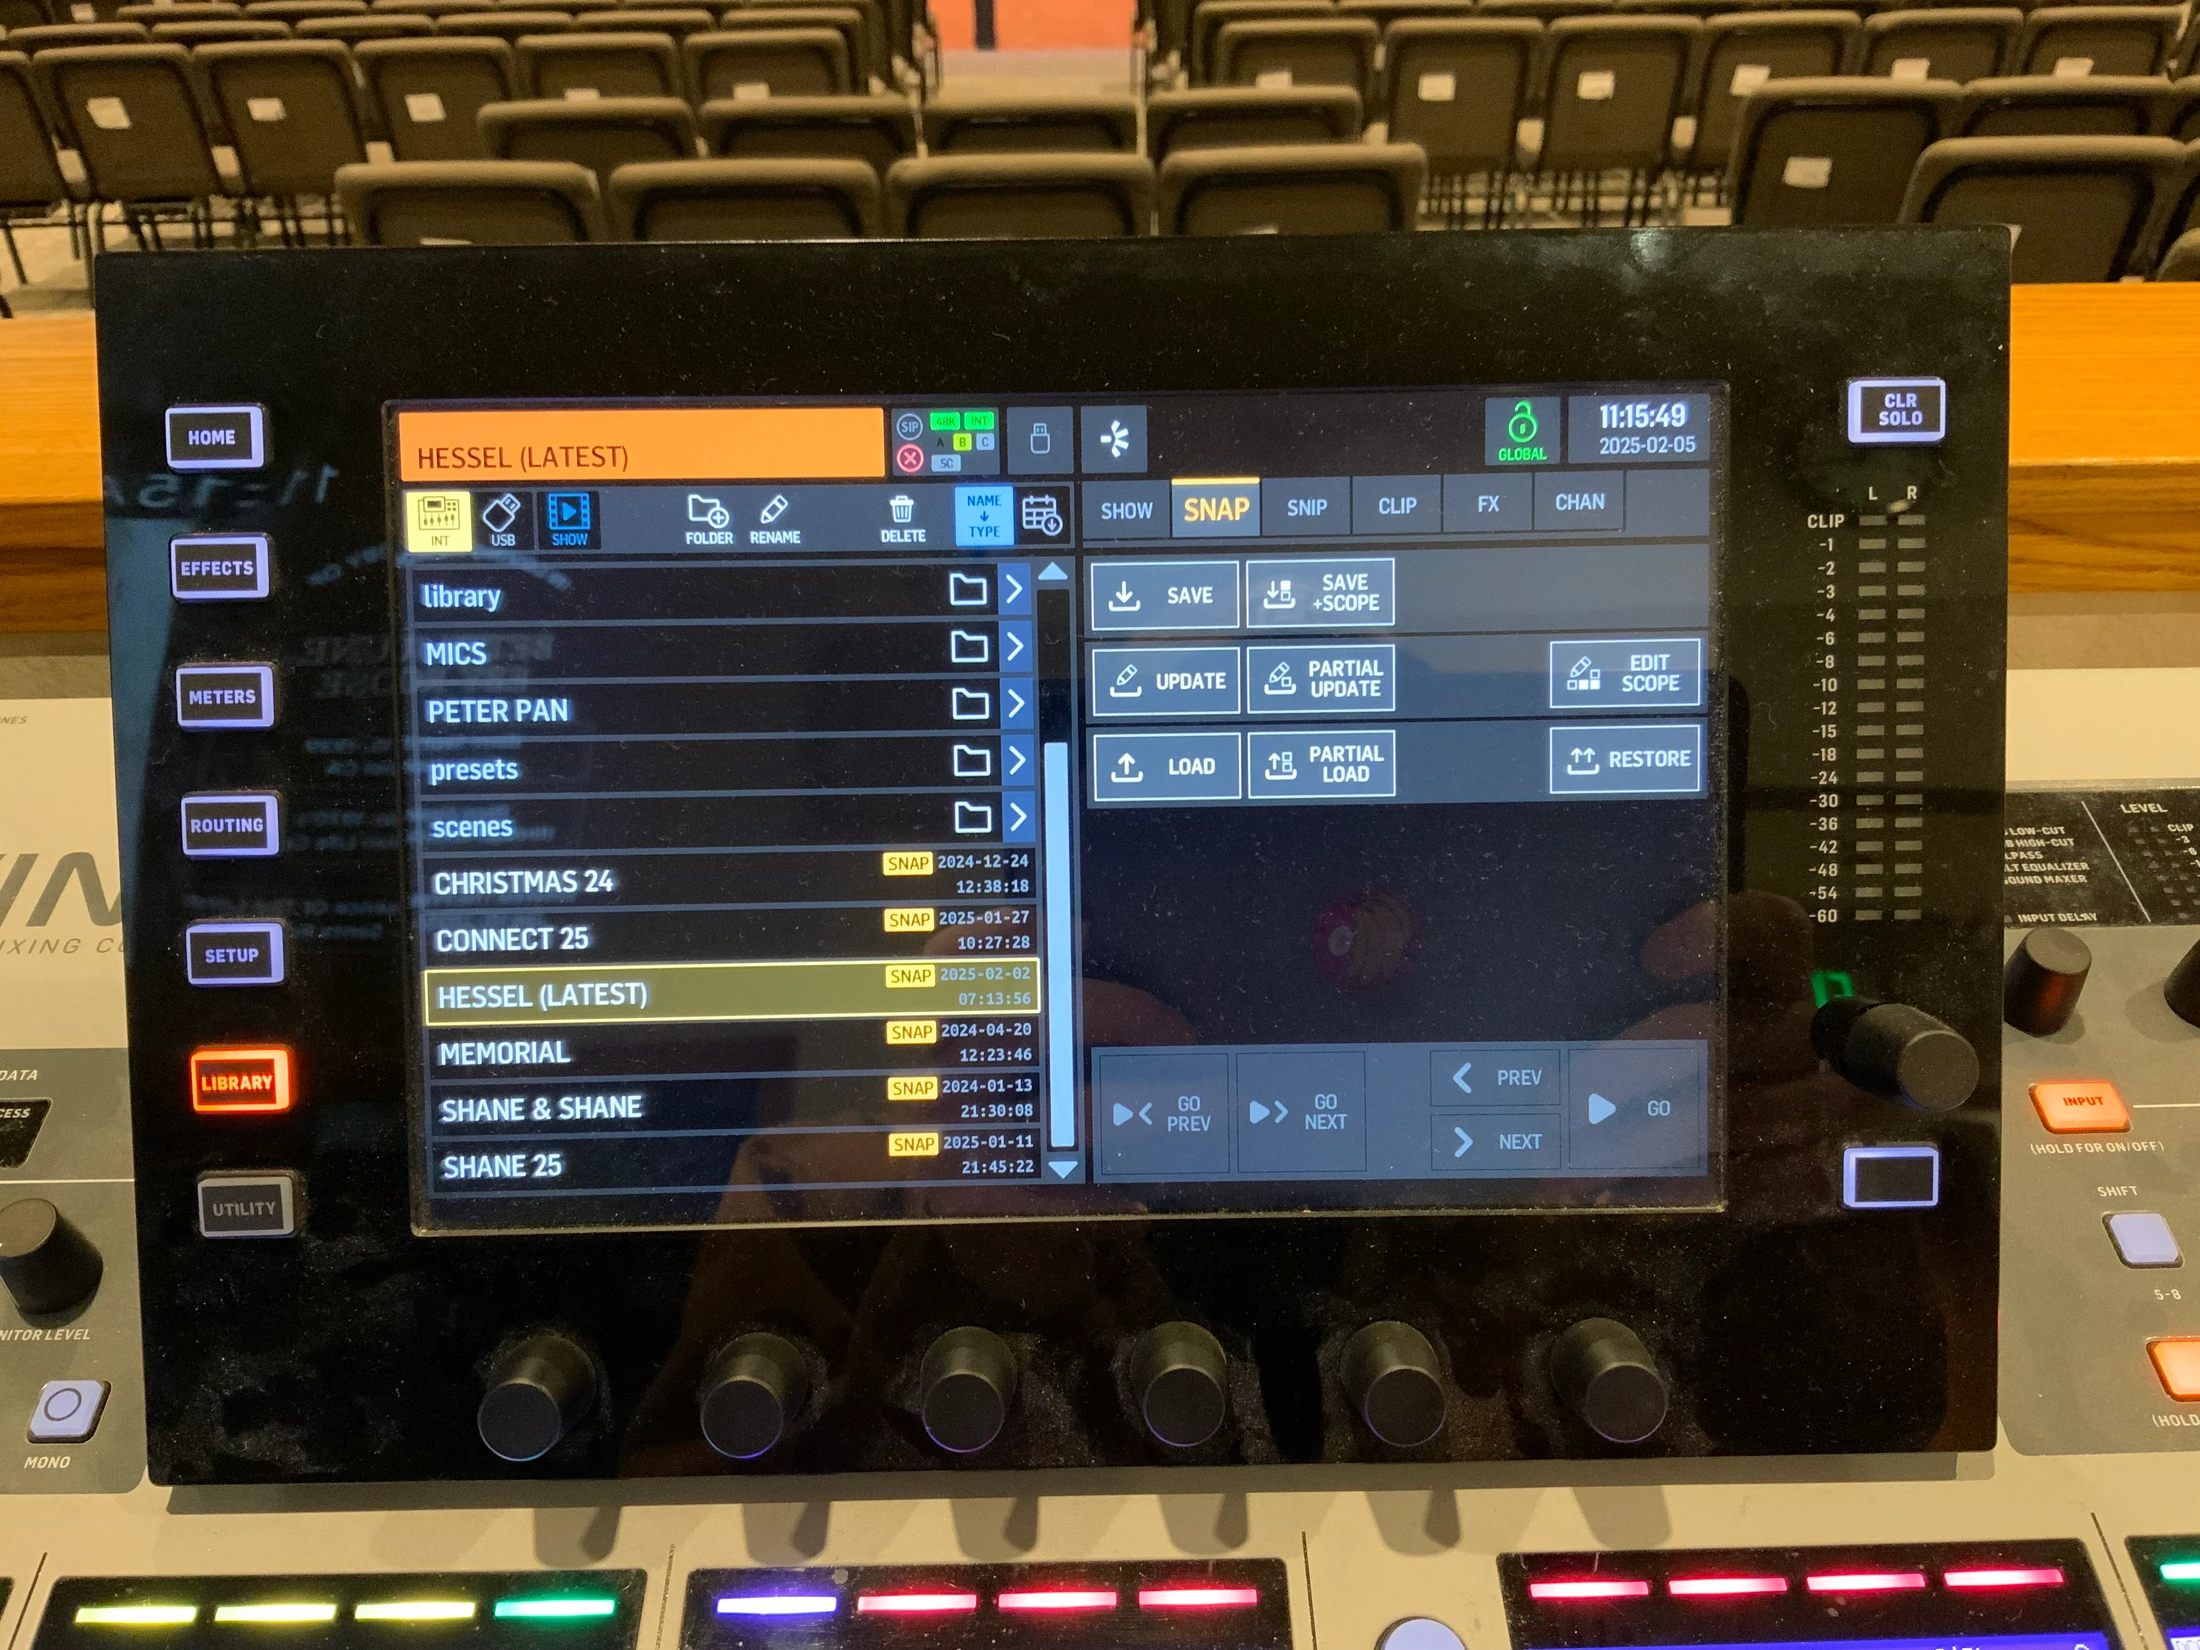
How to load a channel
This operation is used to load a specific fader to a certain person or instrument. This operation will be used to help dial in individual EQs.
1. Press “Select” button in the fade you would like to change
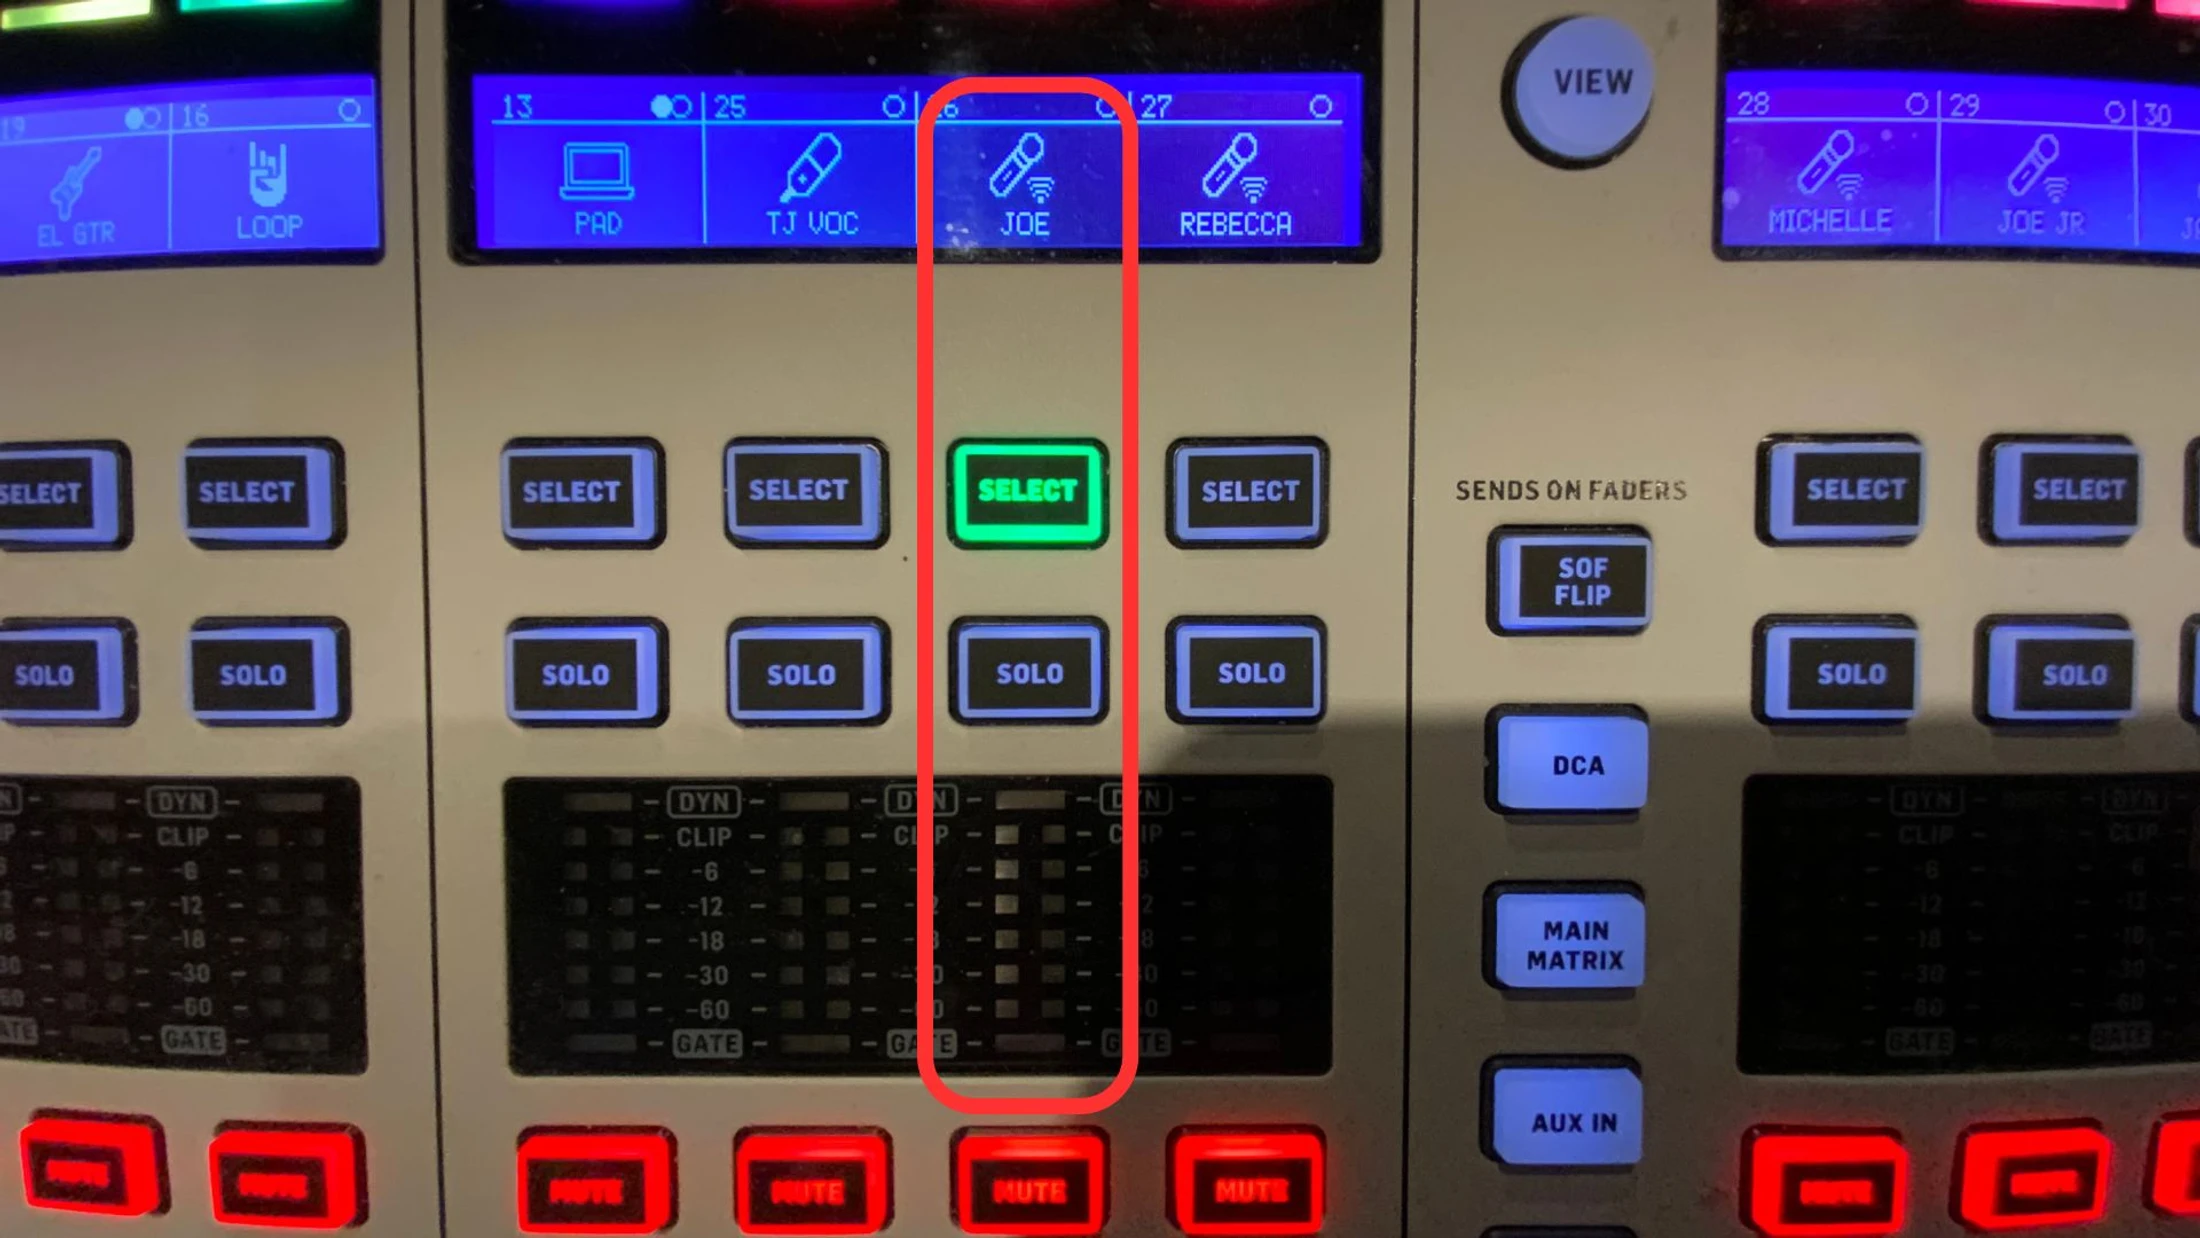
2. Navigate to Specifi “CHAN” you would like to load.
3. Press “Load” on the screen
__largepreview__.webp)
Loading a channel
Routing
These pages are to show you the basics of the routing chain. These are to not be changed under any circumstances without permission from TJ, Daniel, Or Hannah.
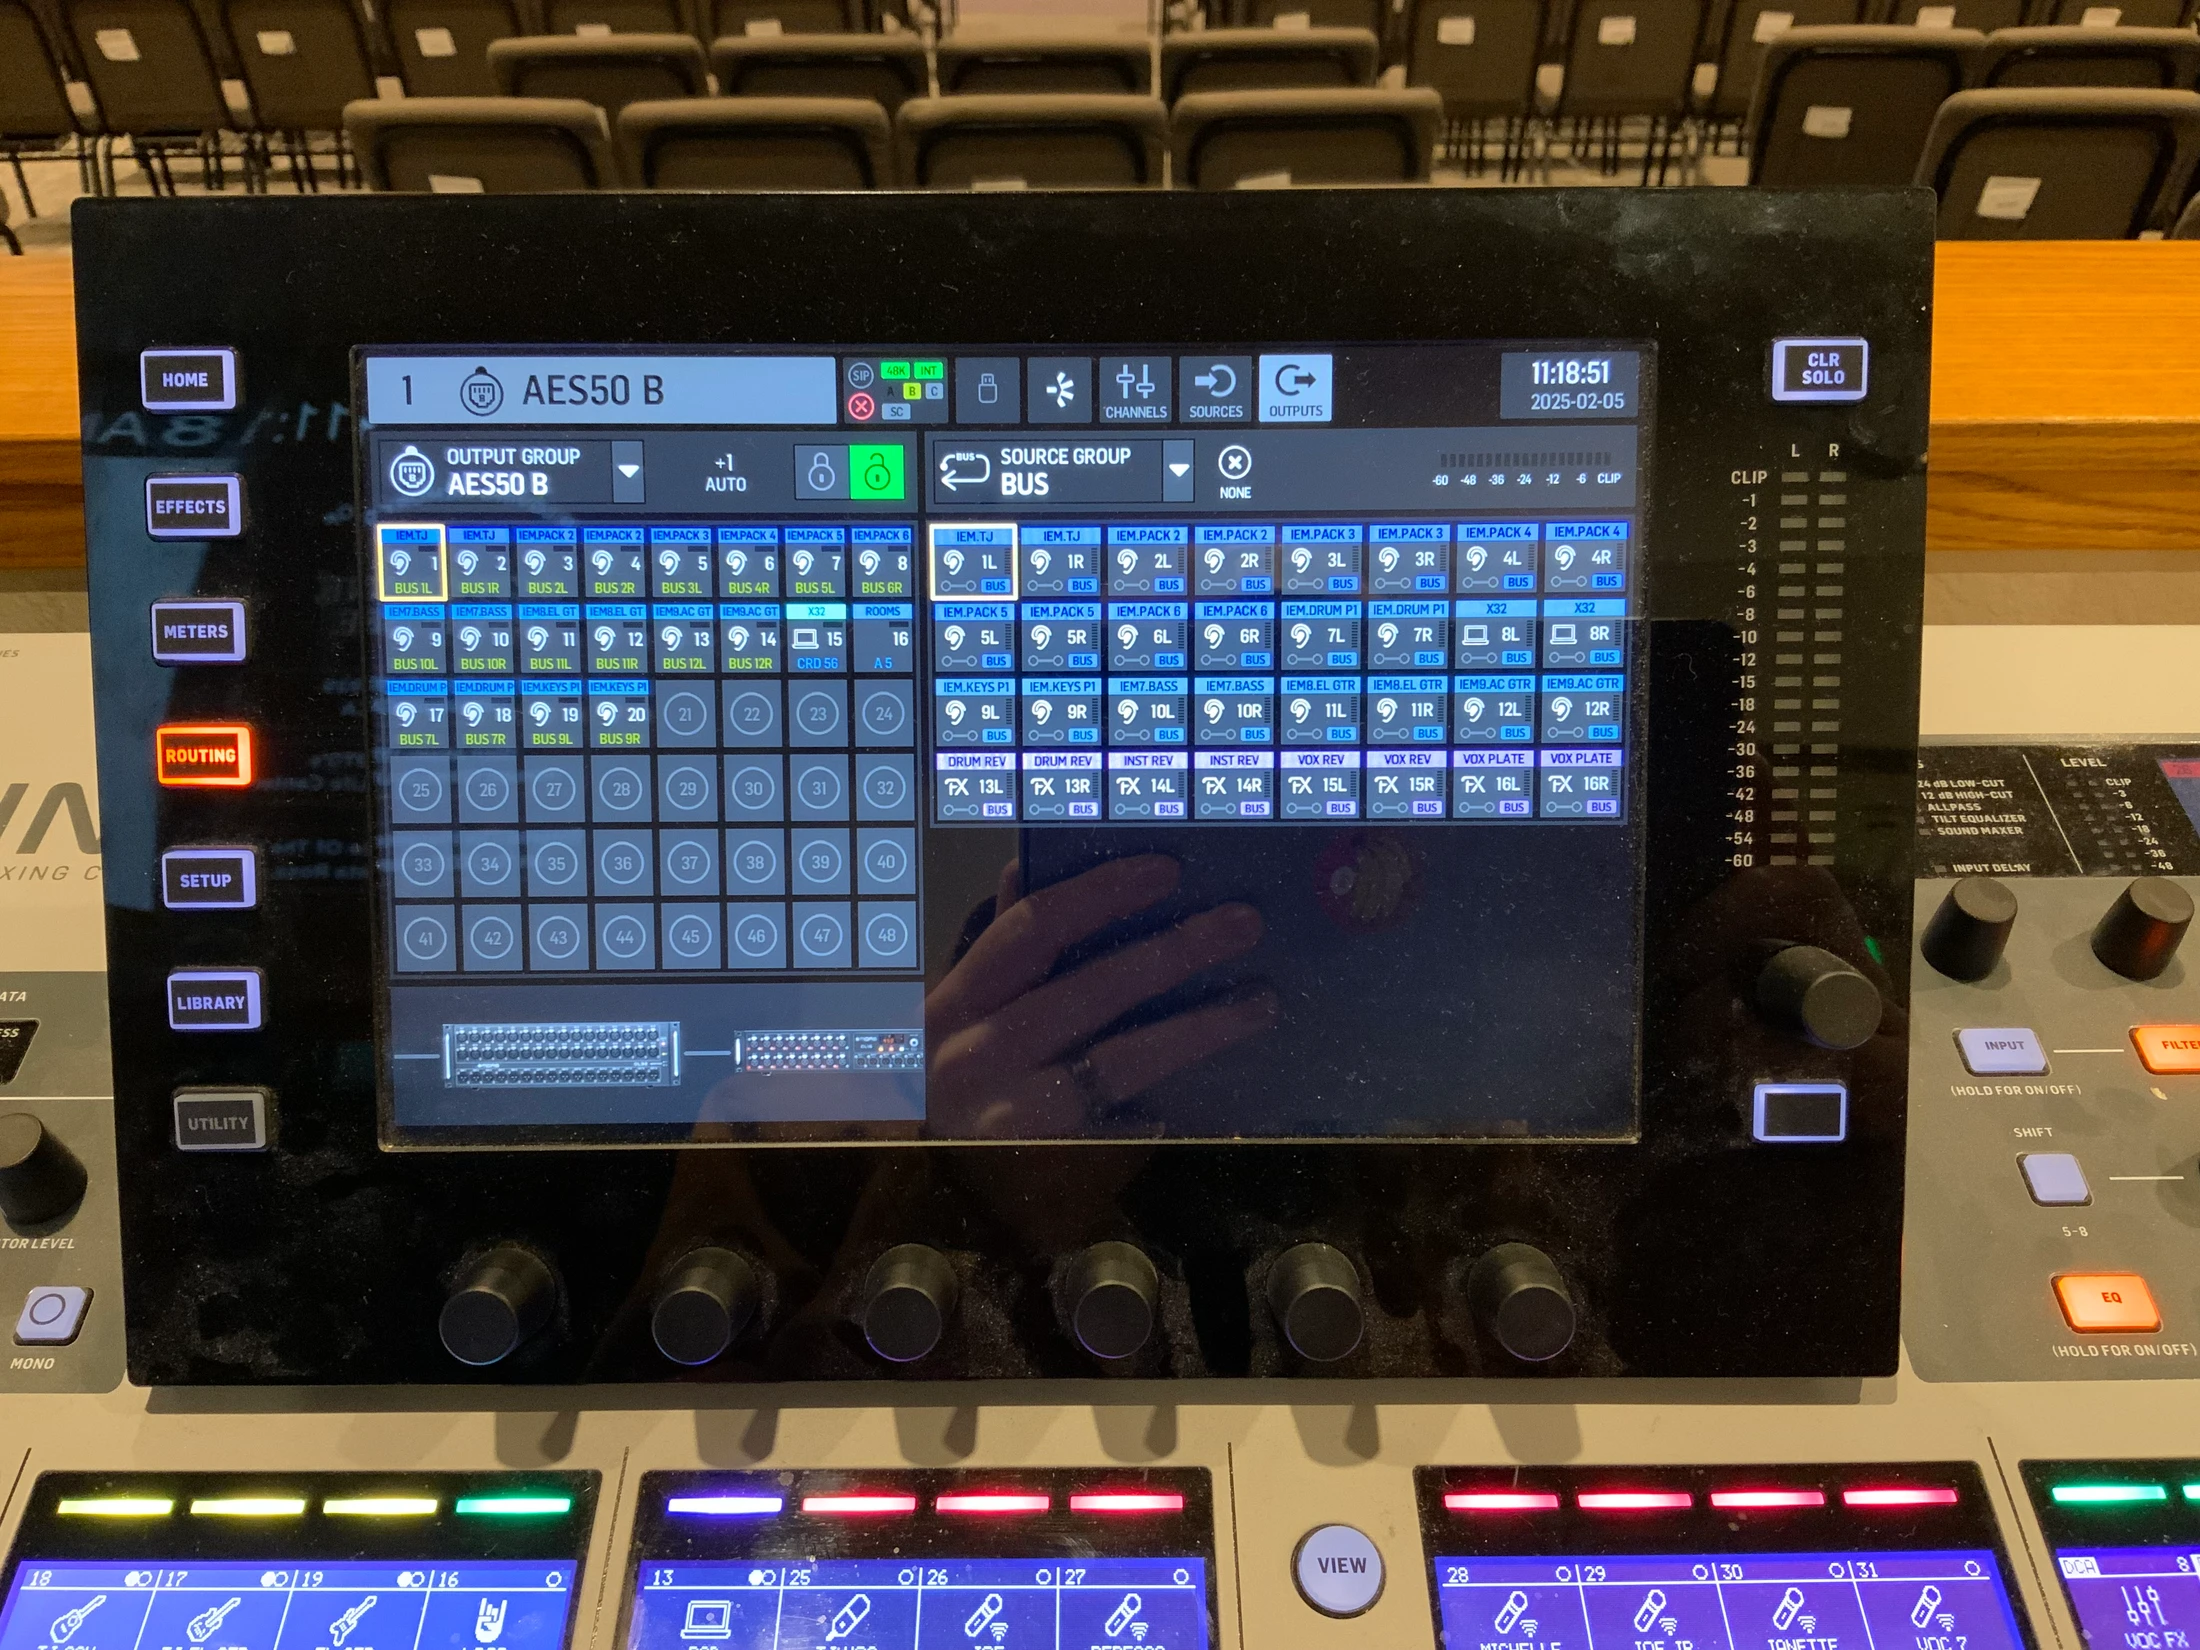
1. The routing can be found under the “Routing” Function Button. It is broken up into three main sections. Channels, Sources, & Outputs.
- - Sources are where we find everything that comes into the Board. We us a mixture of AES50 and Dante to bring sources into our board.
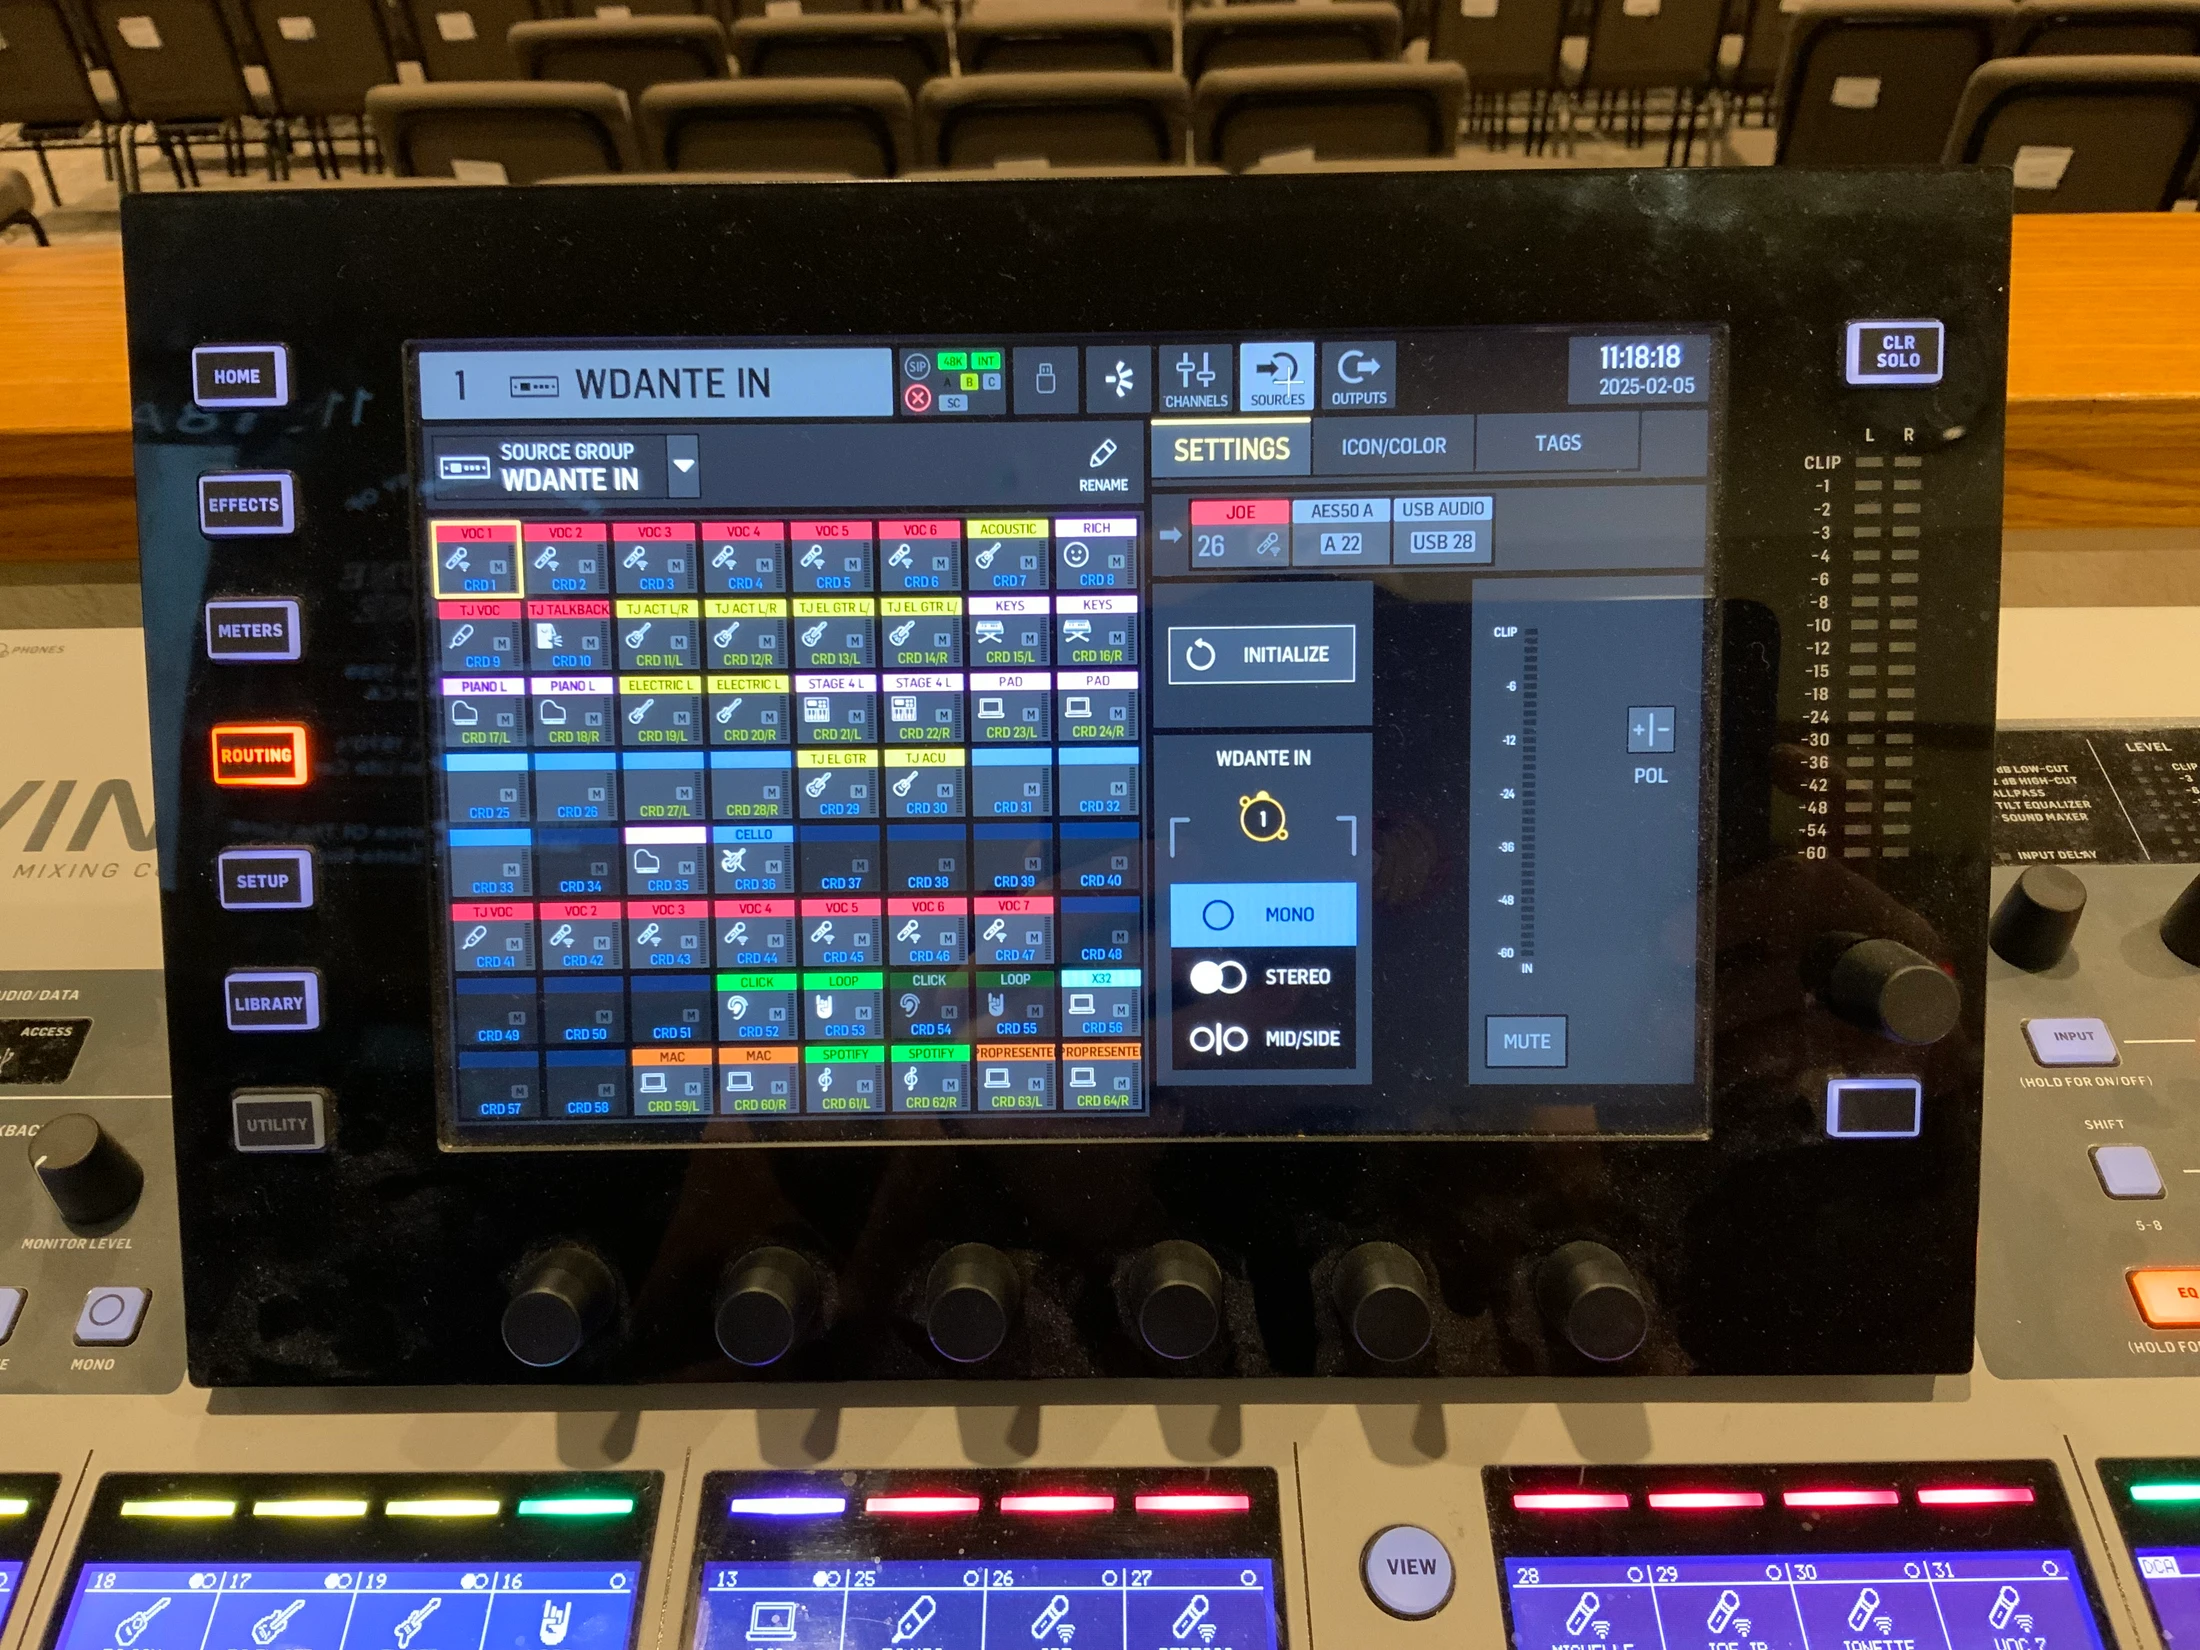
- Outputs are where we send audio to different areas of the worship center. Speakers, IEMs, Live Stream, Other areas on campus
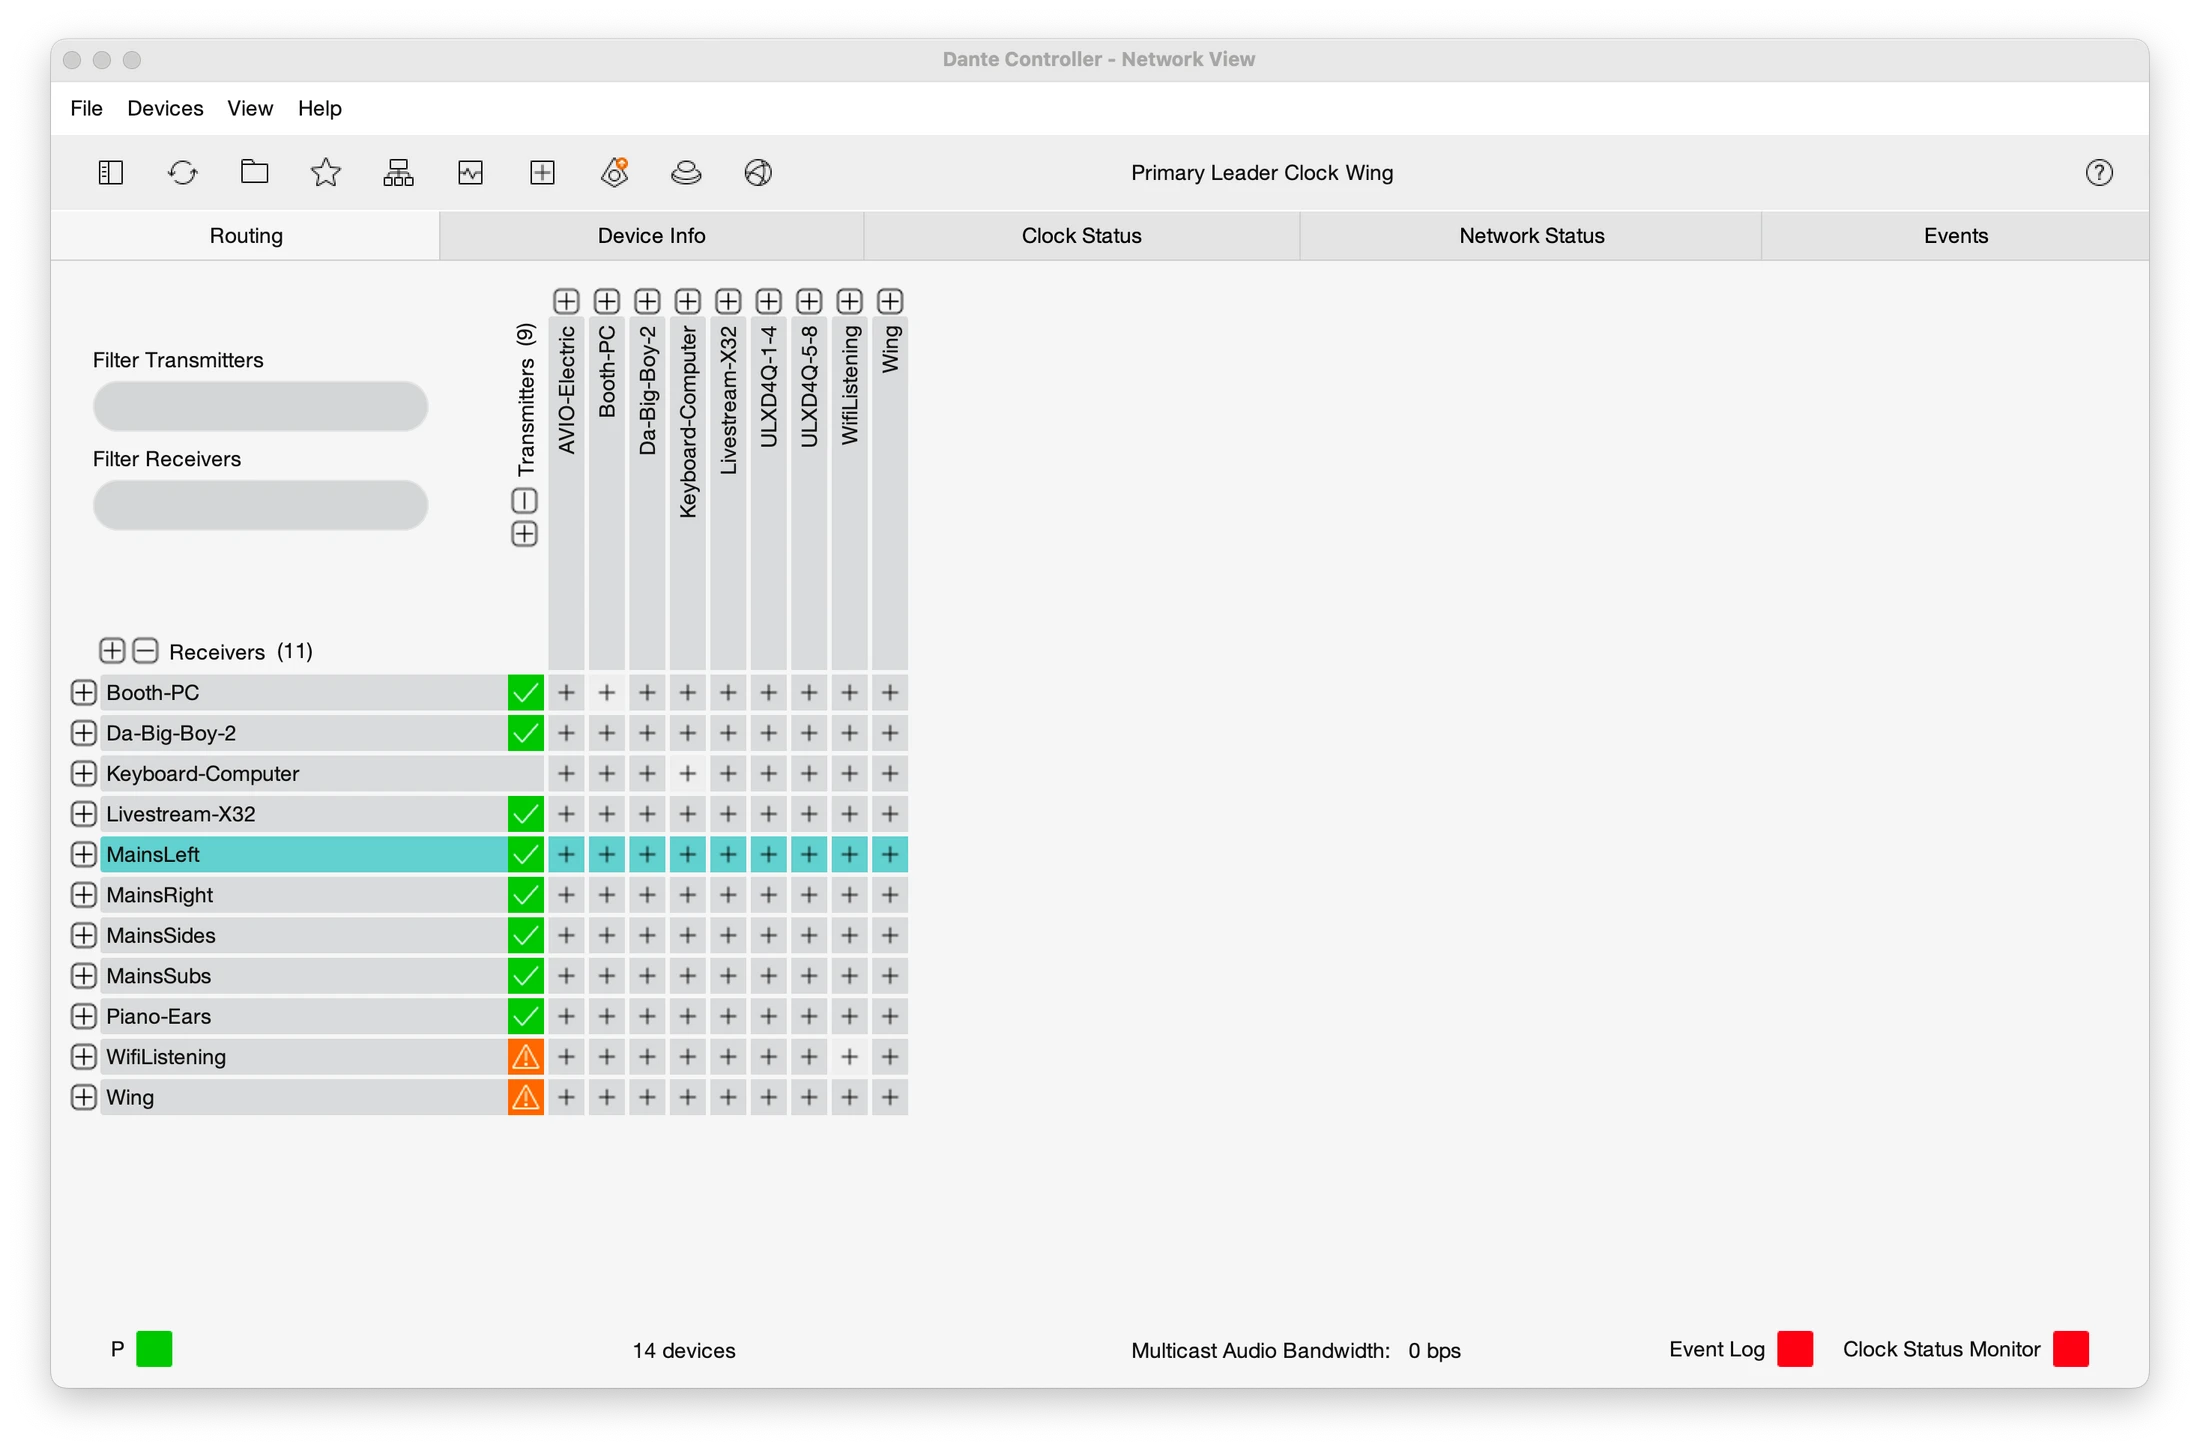
- Dante is a digital audio routing protocol that allows us to take audio signal over a network and rout them into the board and out of the board into the network.
Routing
Live Streaming
Hardware and how they function
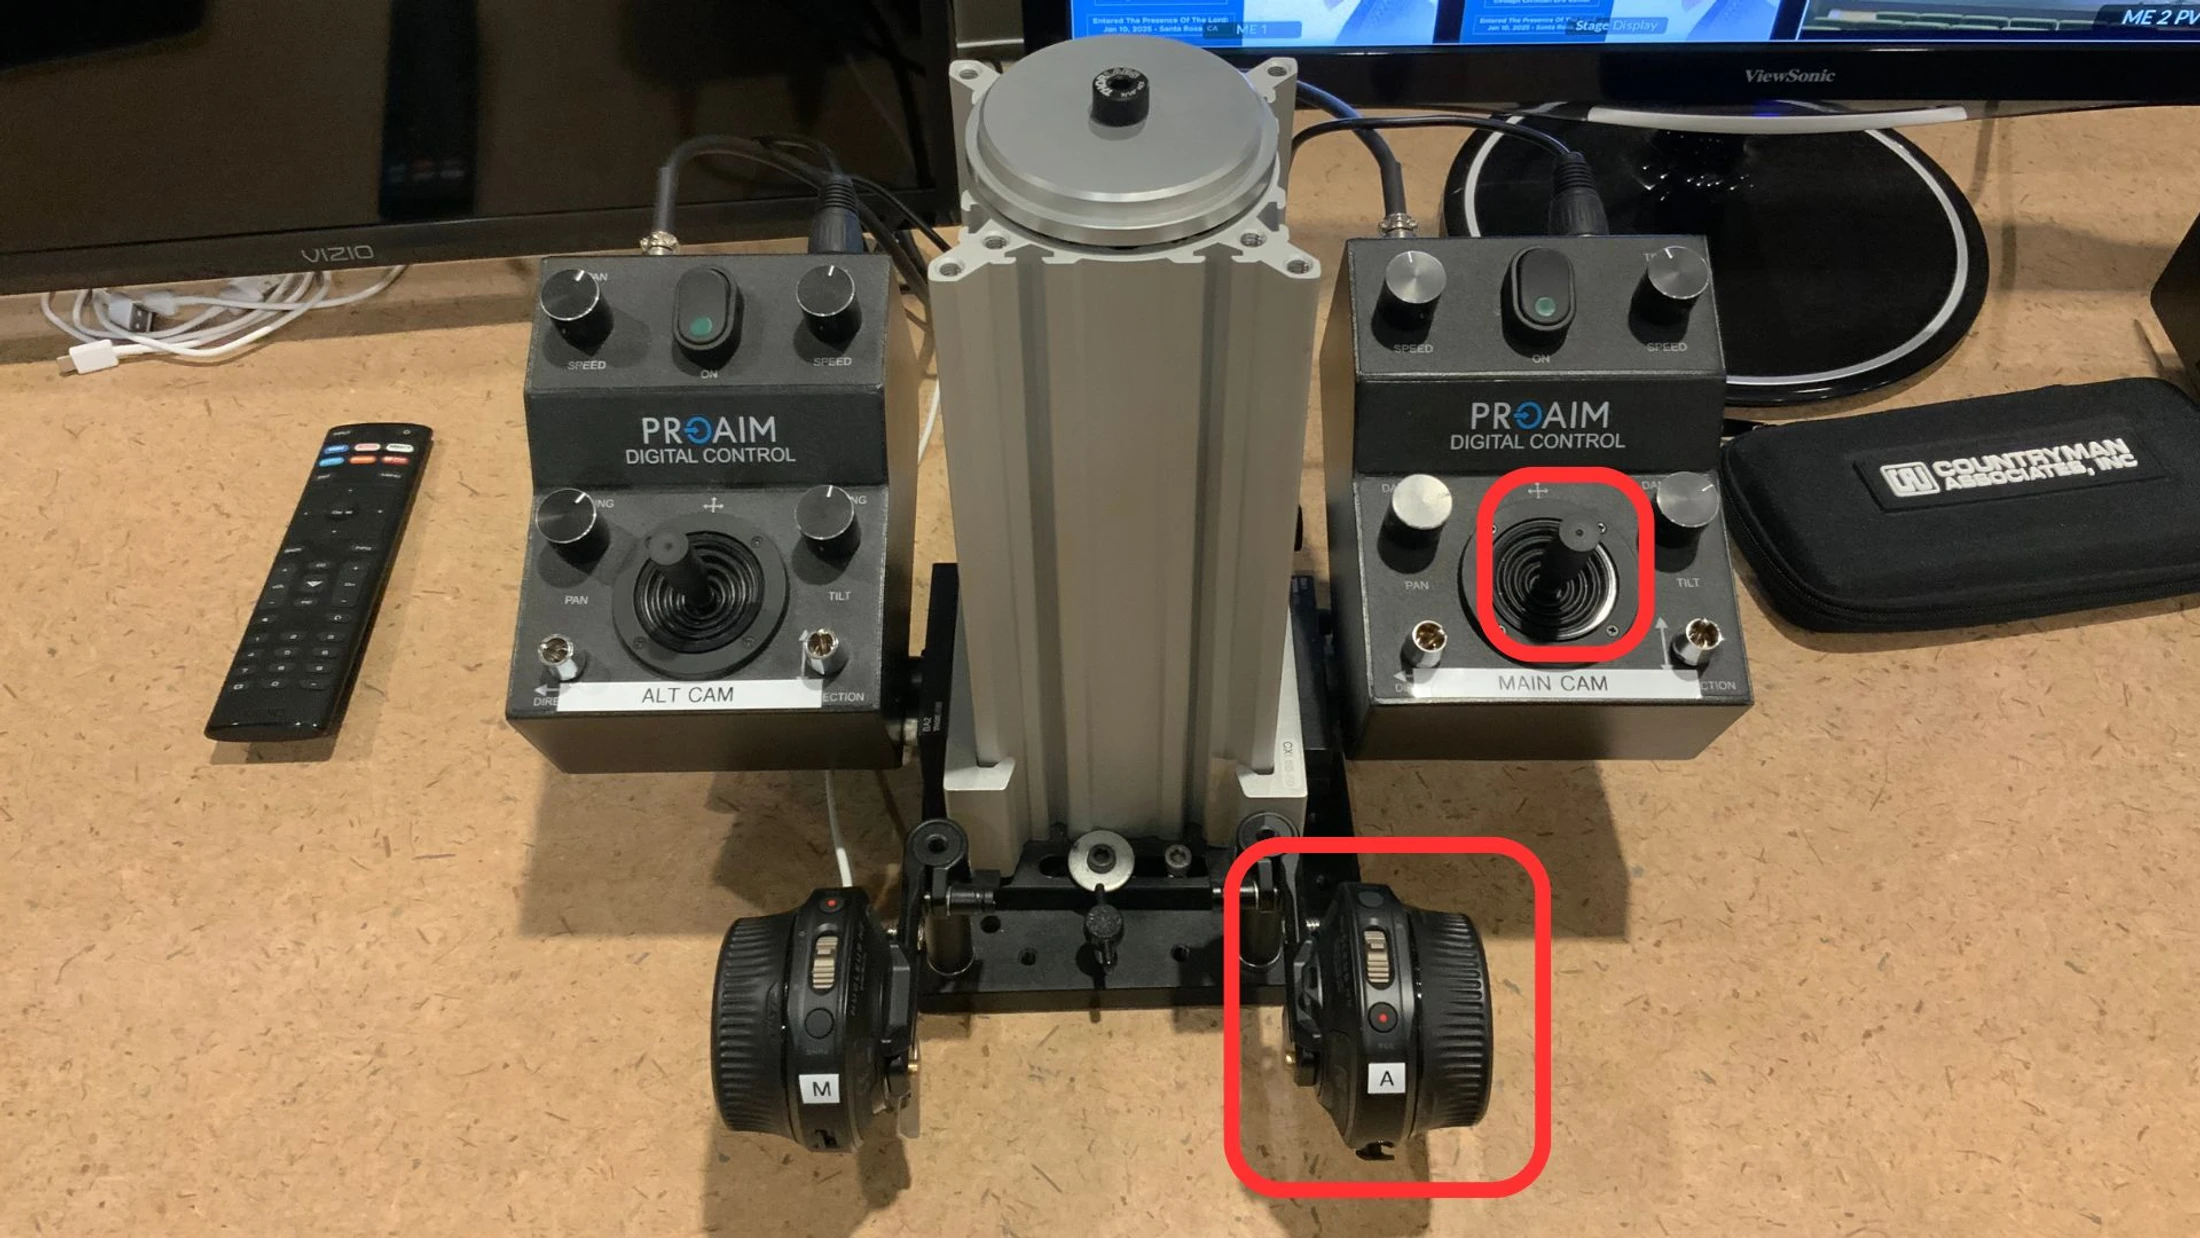
Our cameras are controlled from a central location using this controller. It’s a joystick for the each camera and a zoom wheel for each camera. We refer to these cameras as “Main” and “Alternate”
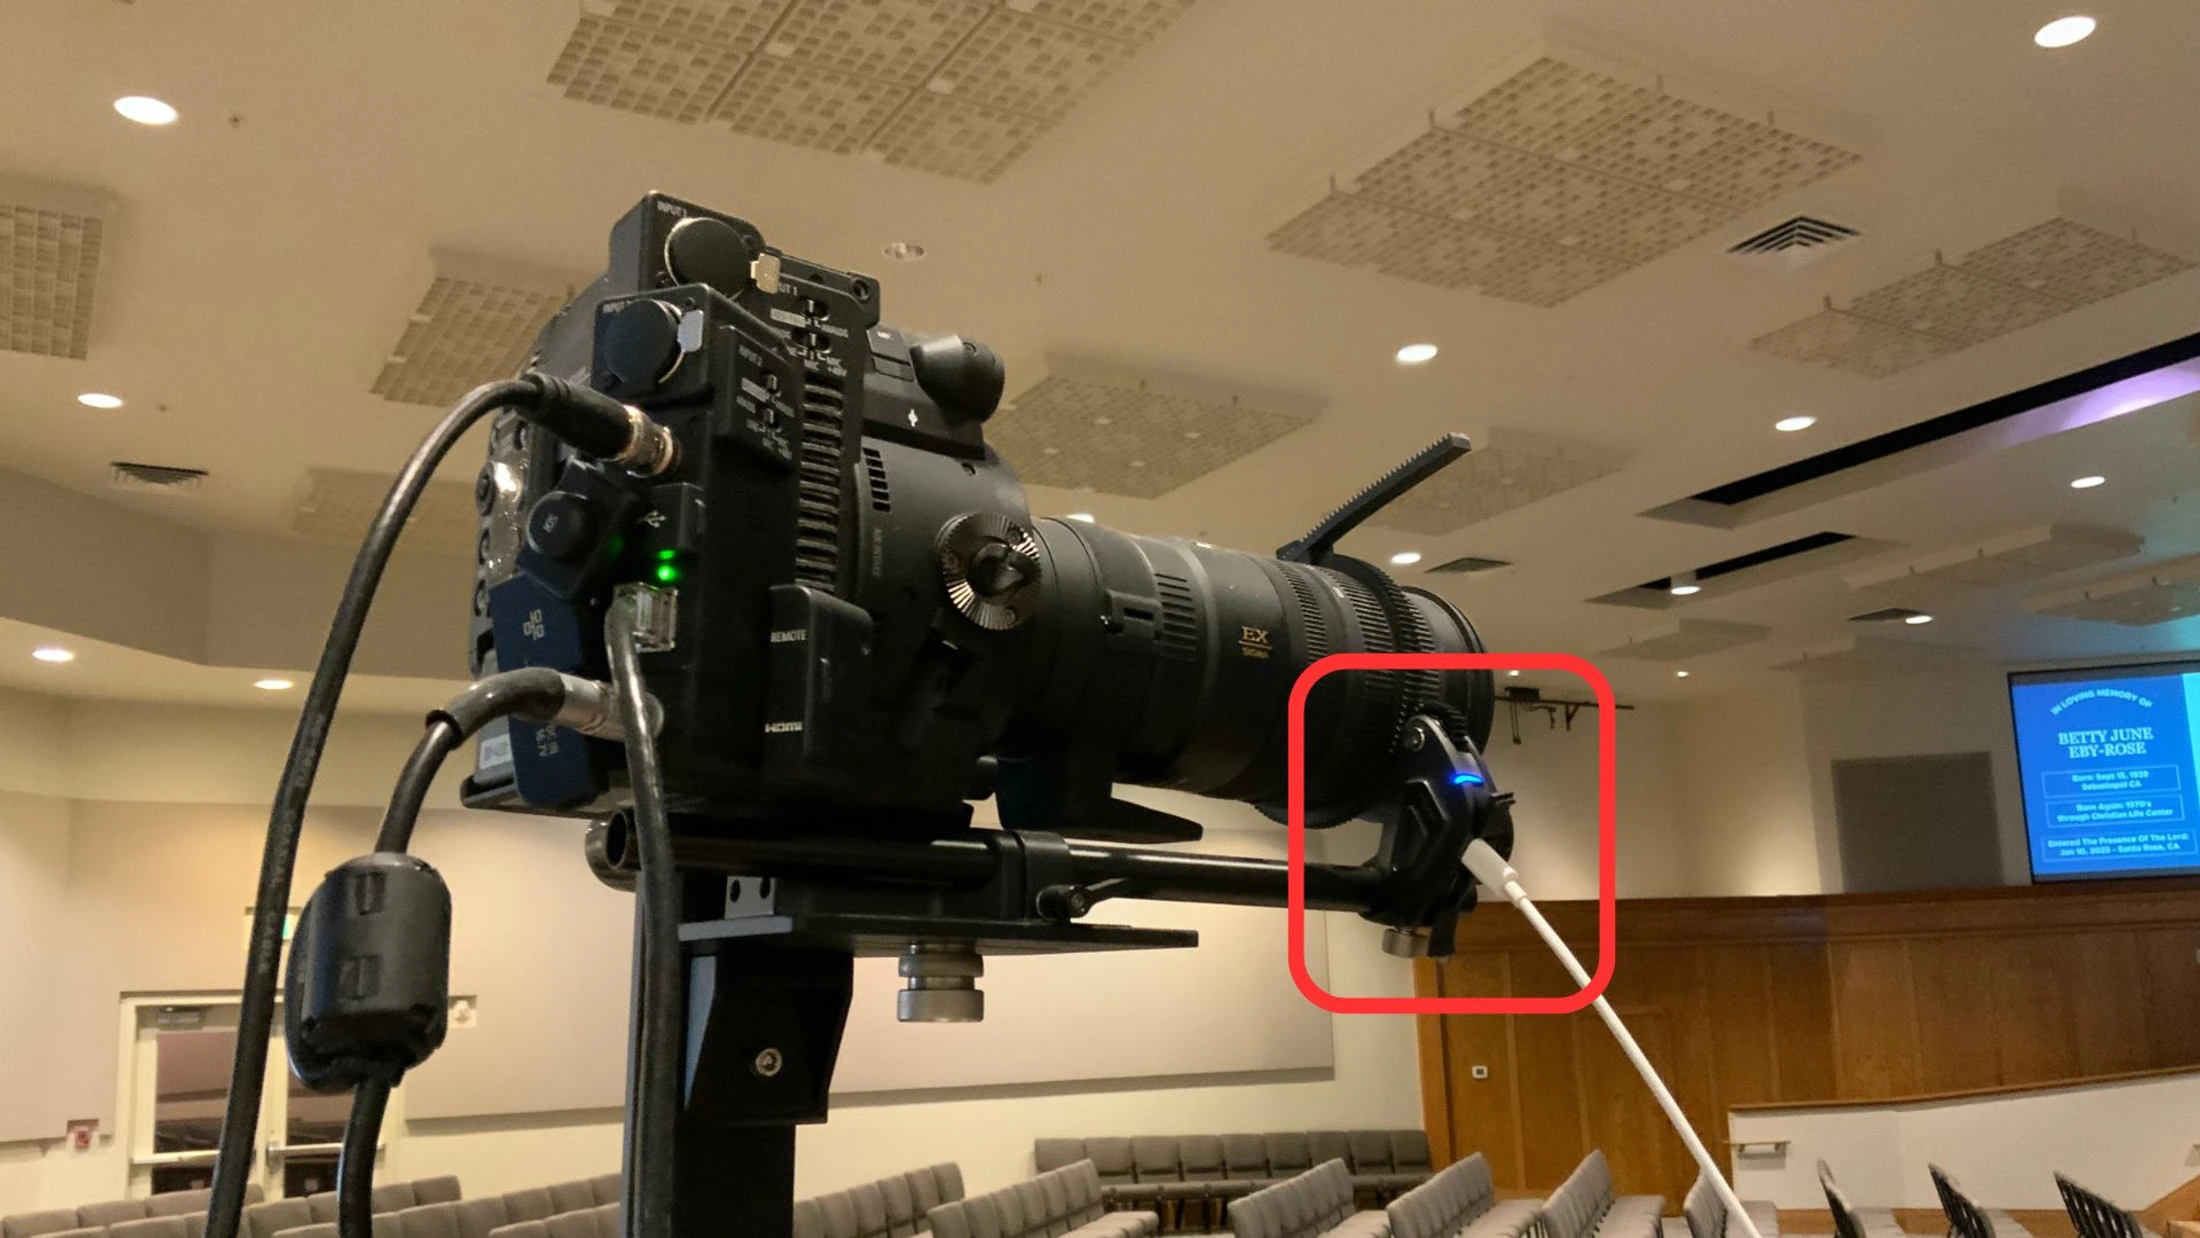
Each Camera has a wirless zoom wheel on it.
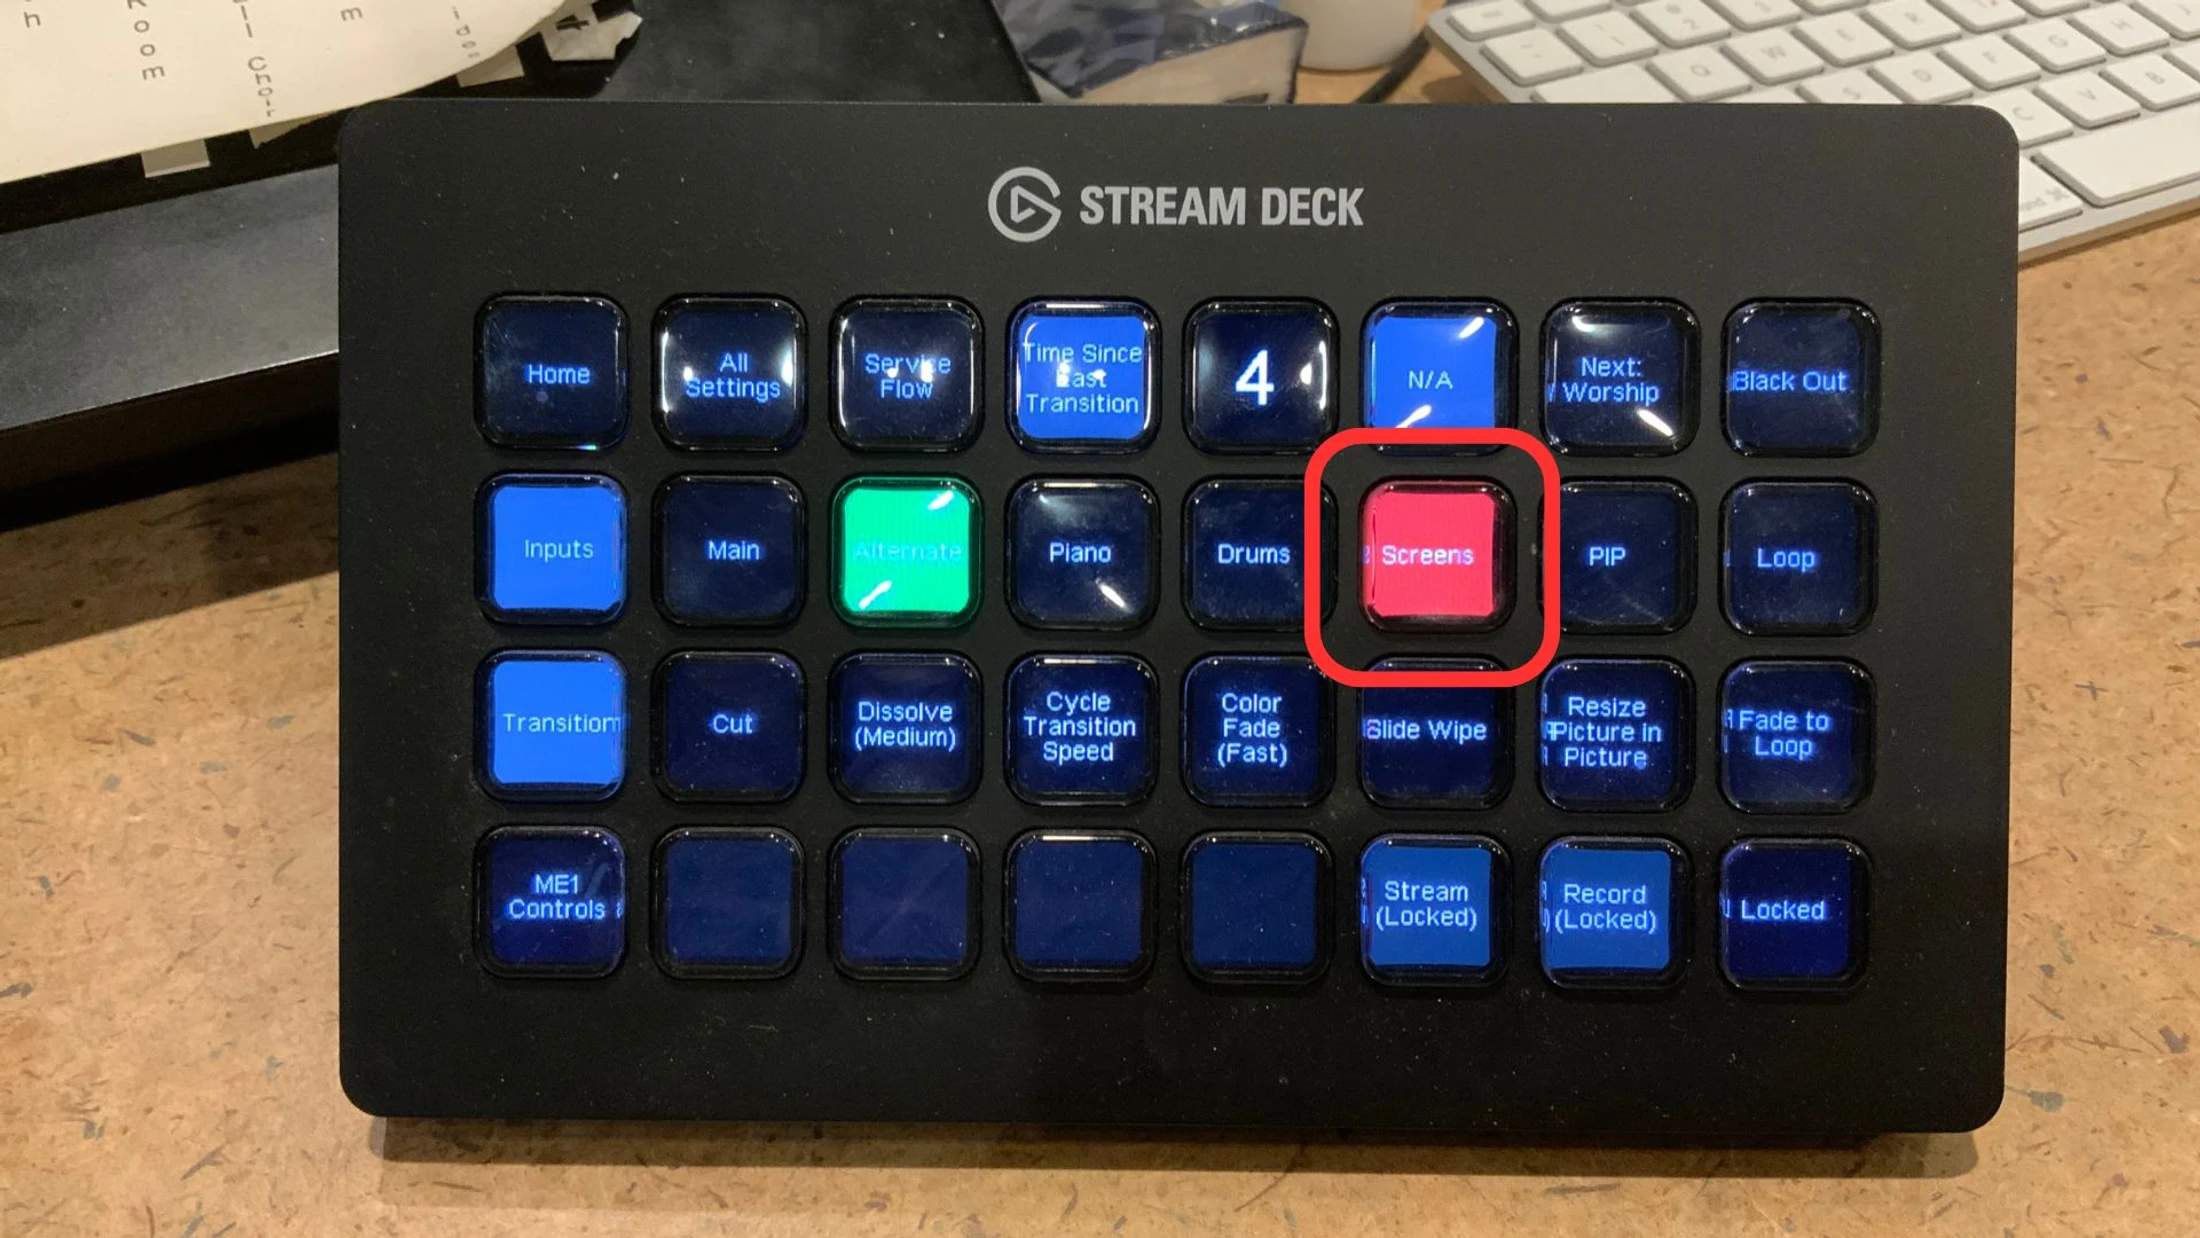
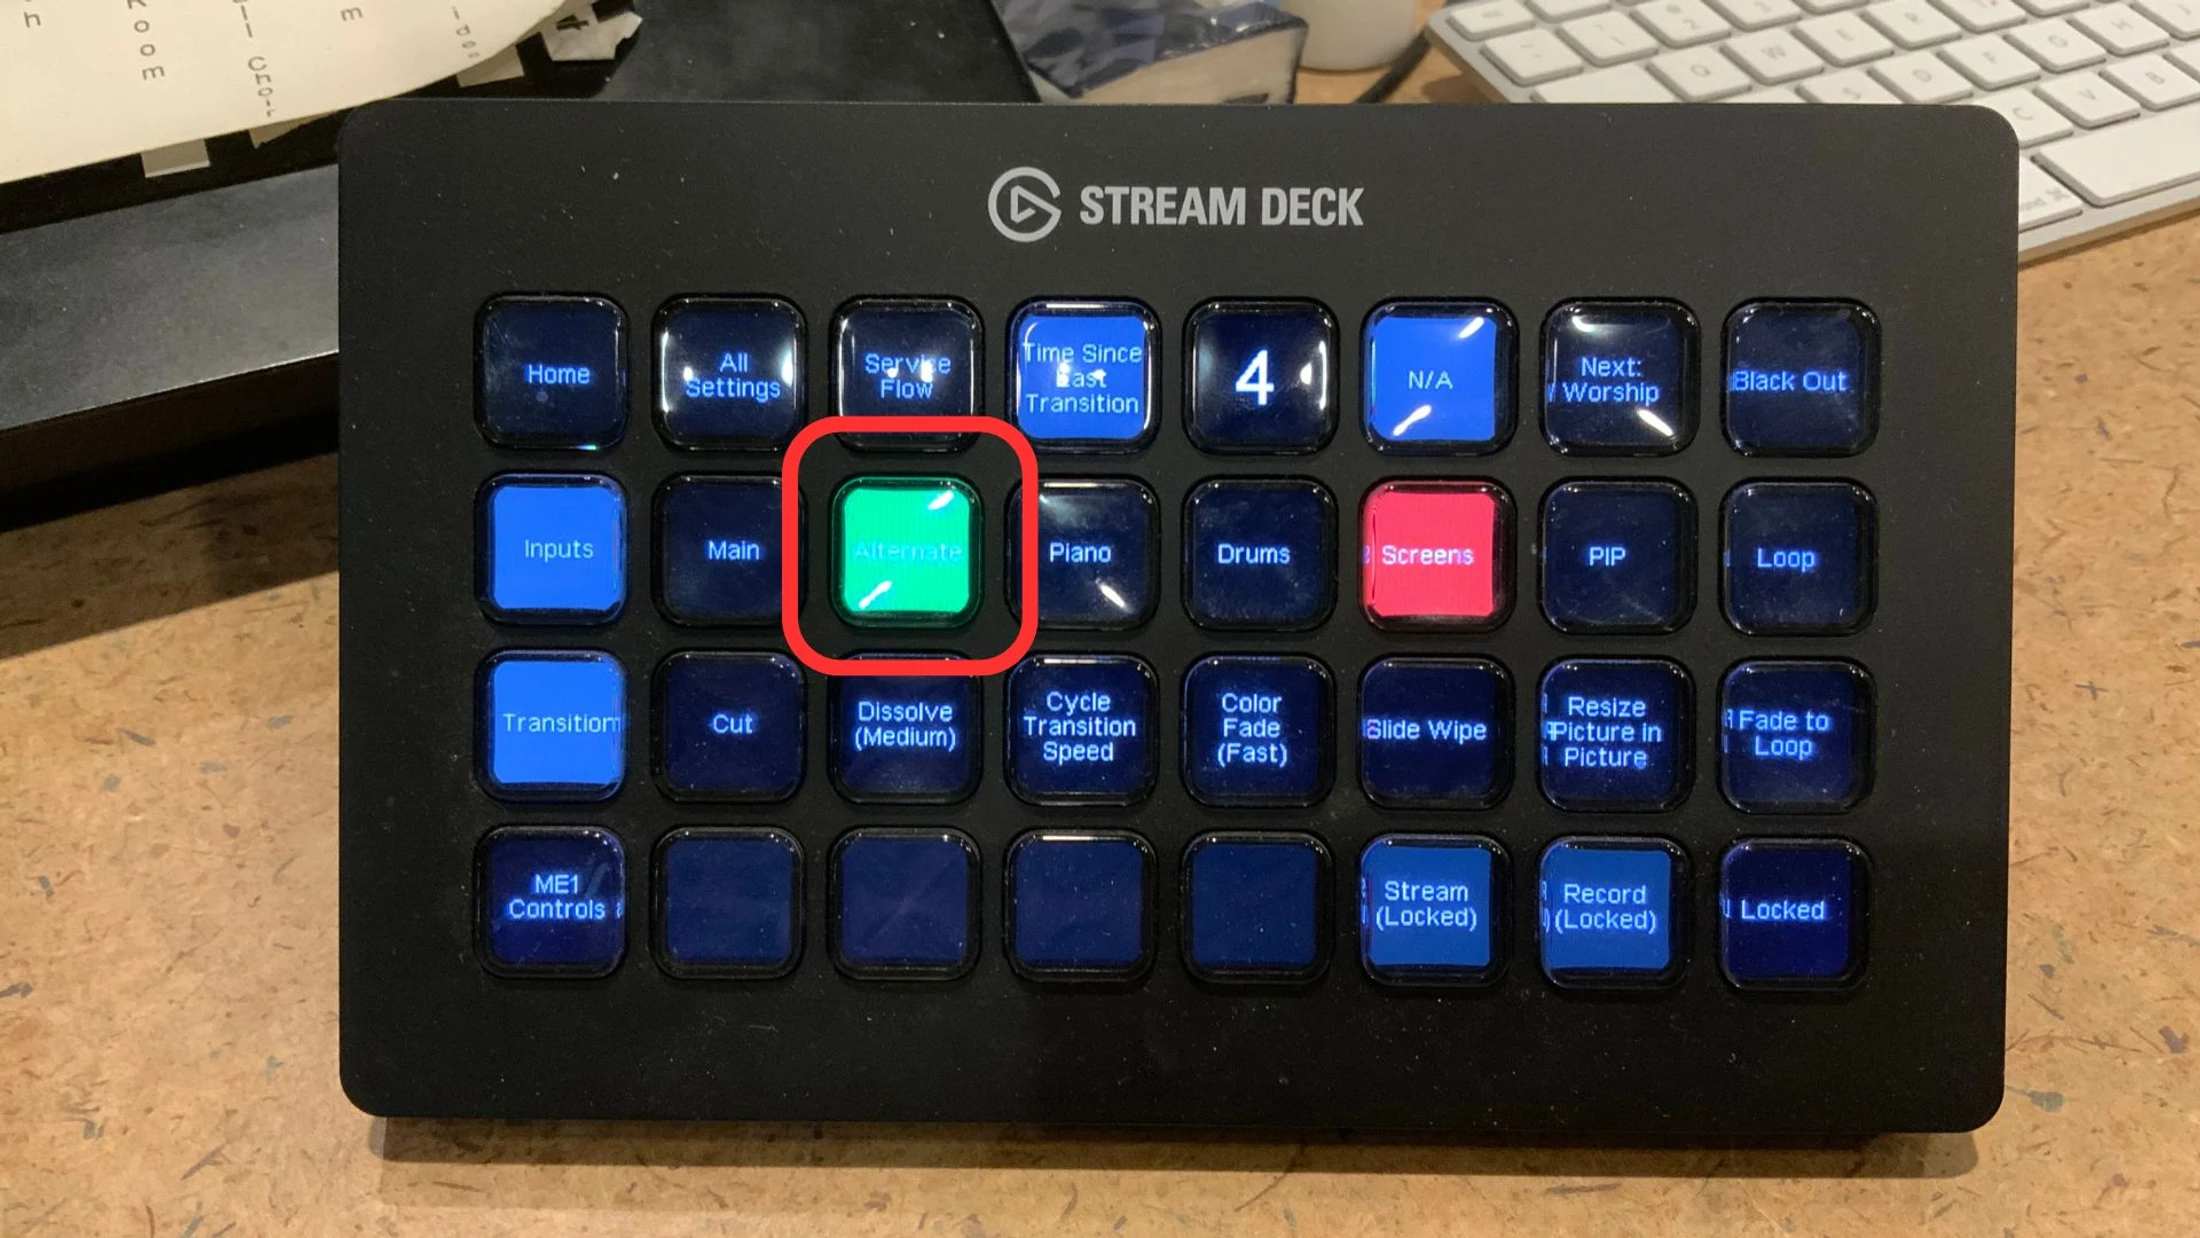
You will switch the camera views for the slides on a “Stream Deck”
- When a button is red that is the live shot
- When the button is green that is the queued shot ready to go live.
- To switch a view to the live shot, simply press the dissolve button
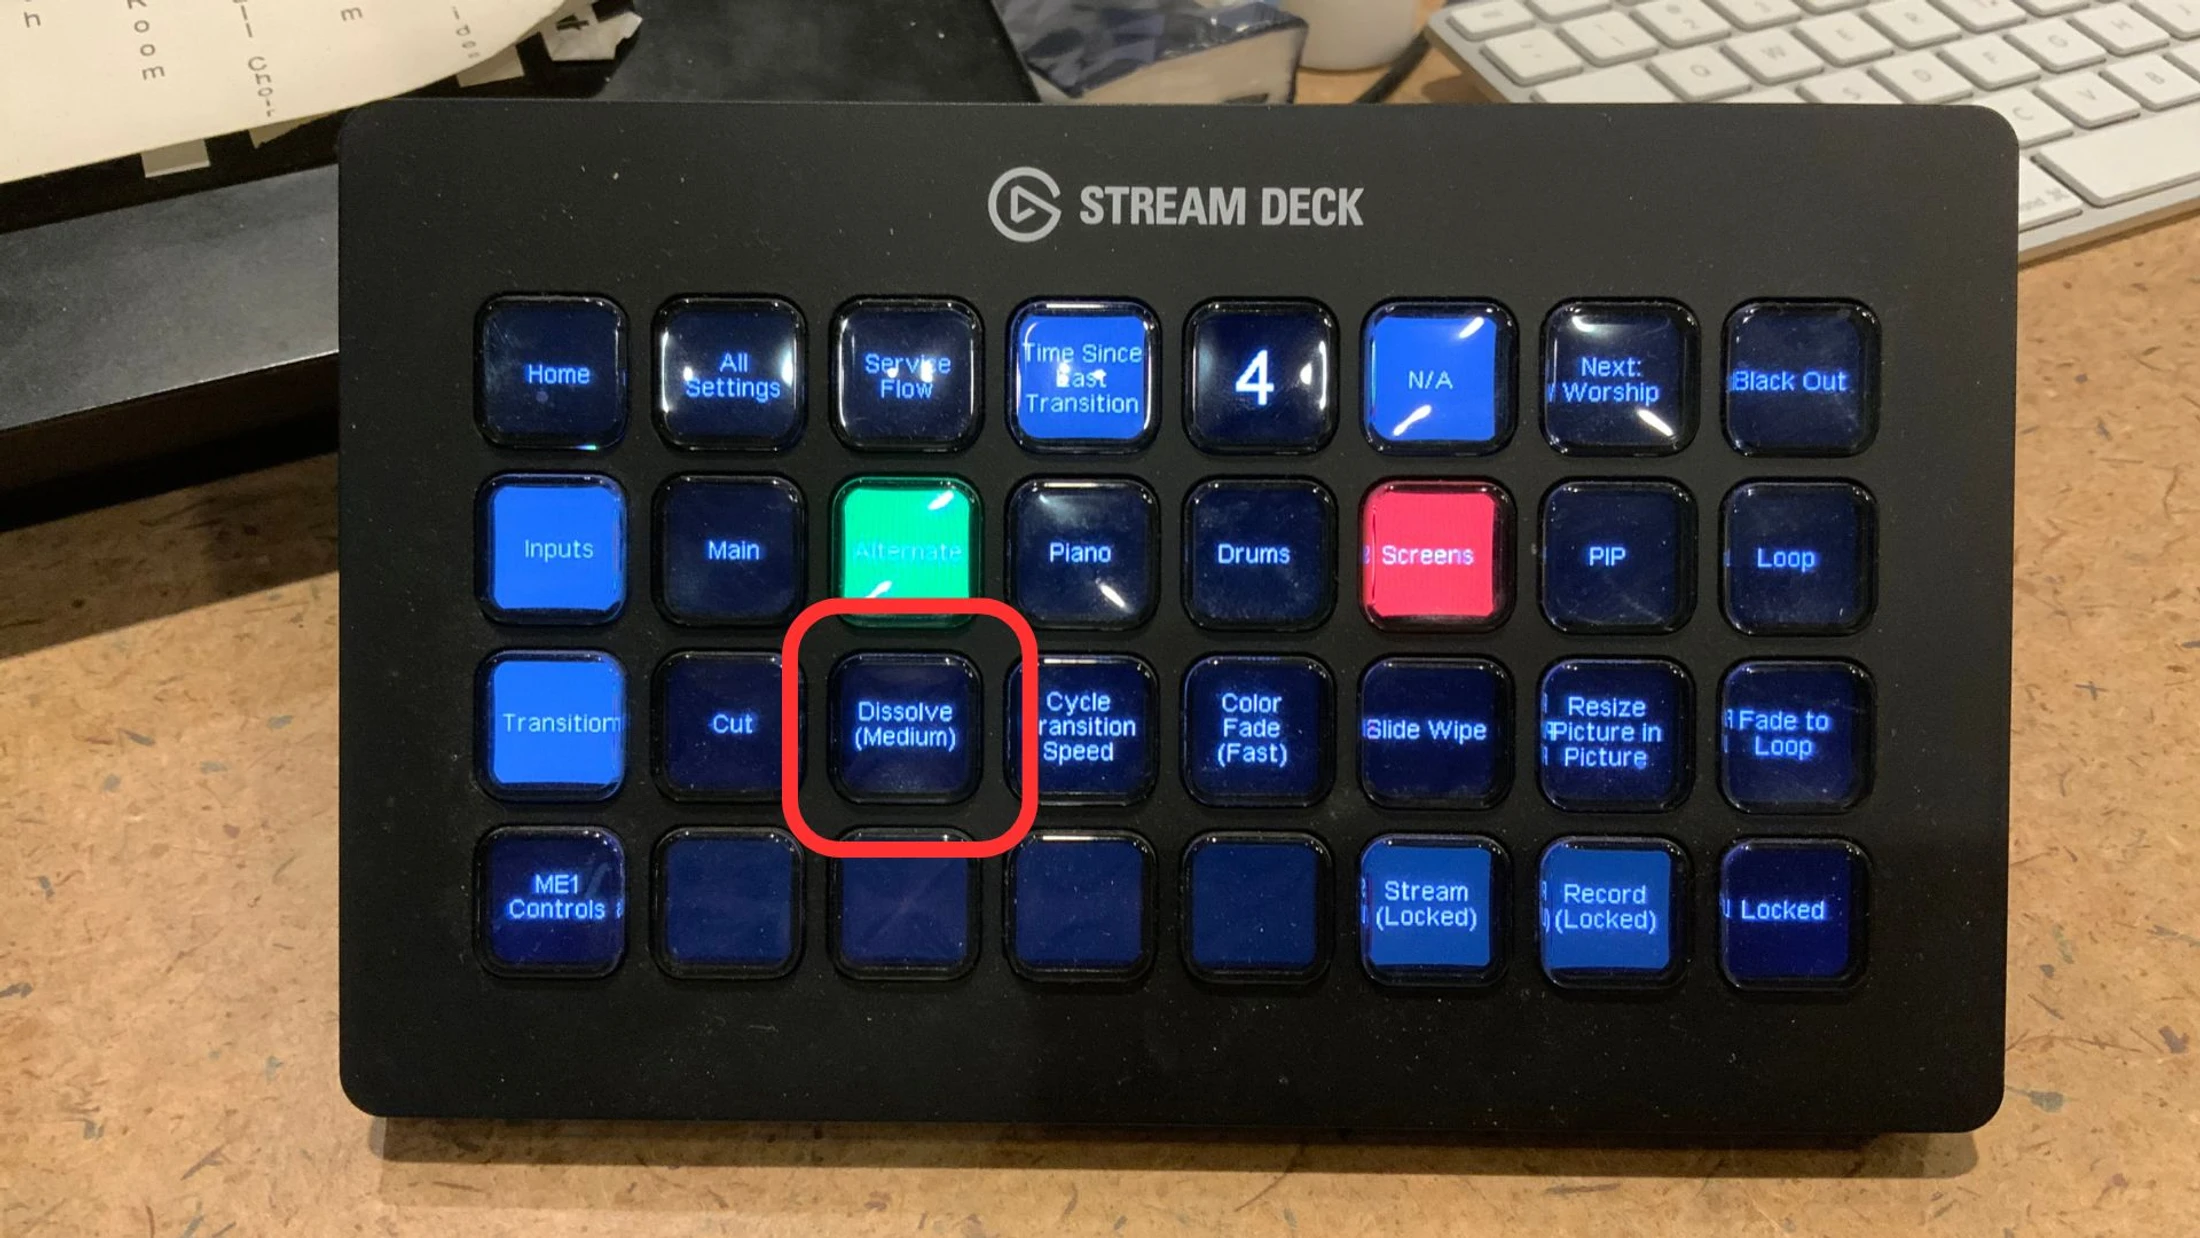
- The “Cycle Trantition Speed” buttion will change the “Dissolve” between “Fast”, “Medium”, “Slow”.
- Match the speed to the vibe of the music.
- Use “Medium” for the sermons
__largepreview__.webp)
Hardware Functions
Live Stream Set Up
1. Head to our youtube studio on the iMac
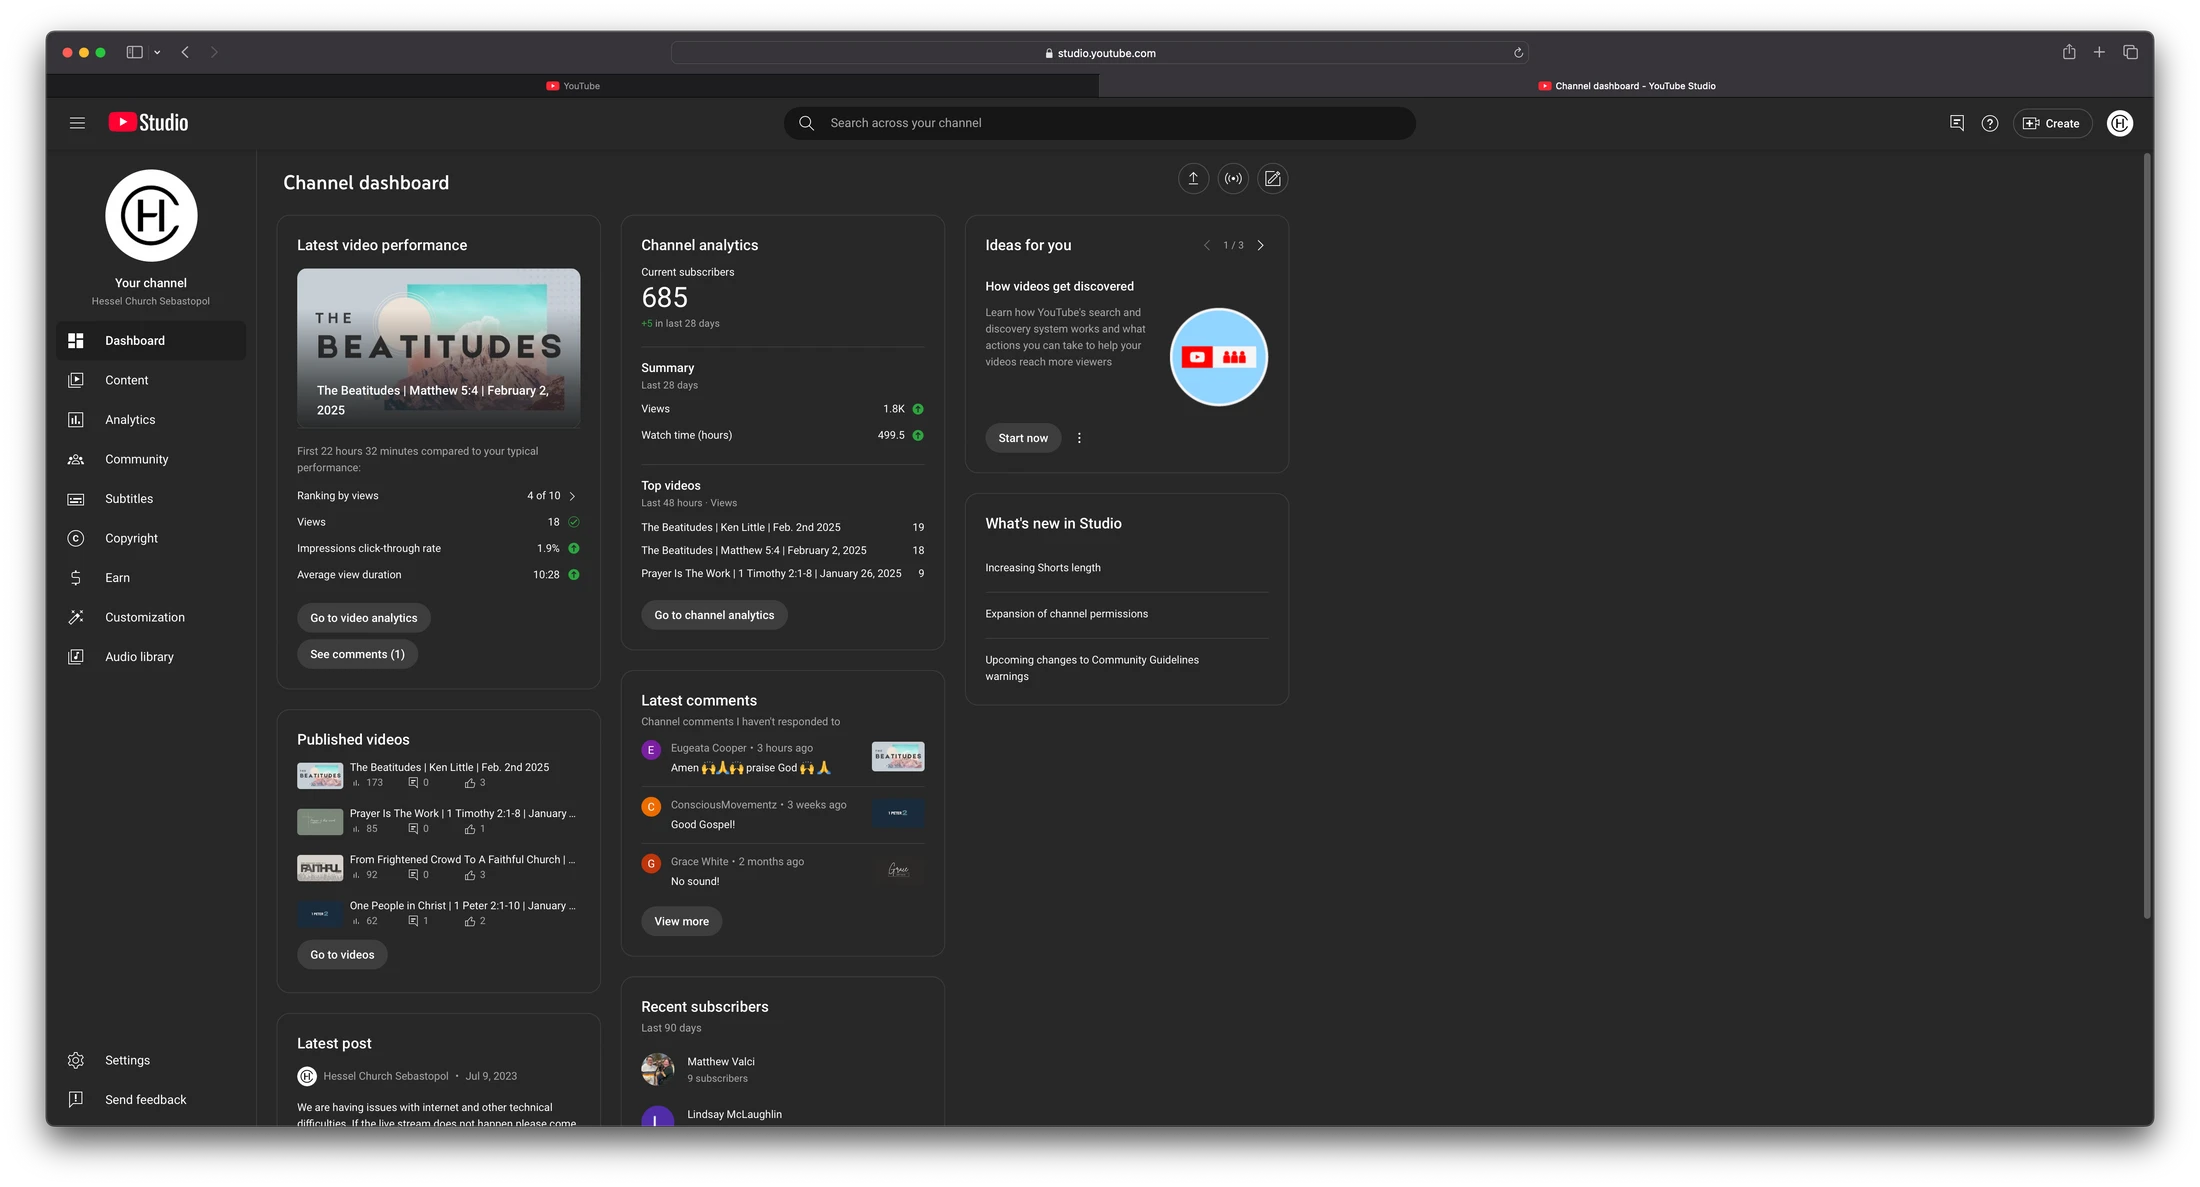
2. Select “Create” then “Go Live” in the top right corner of the window
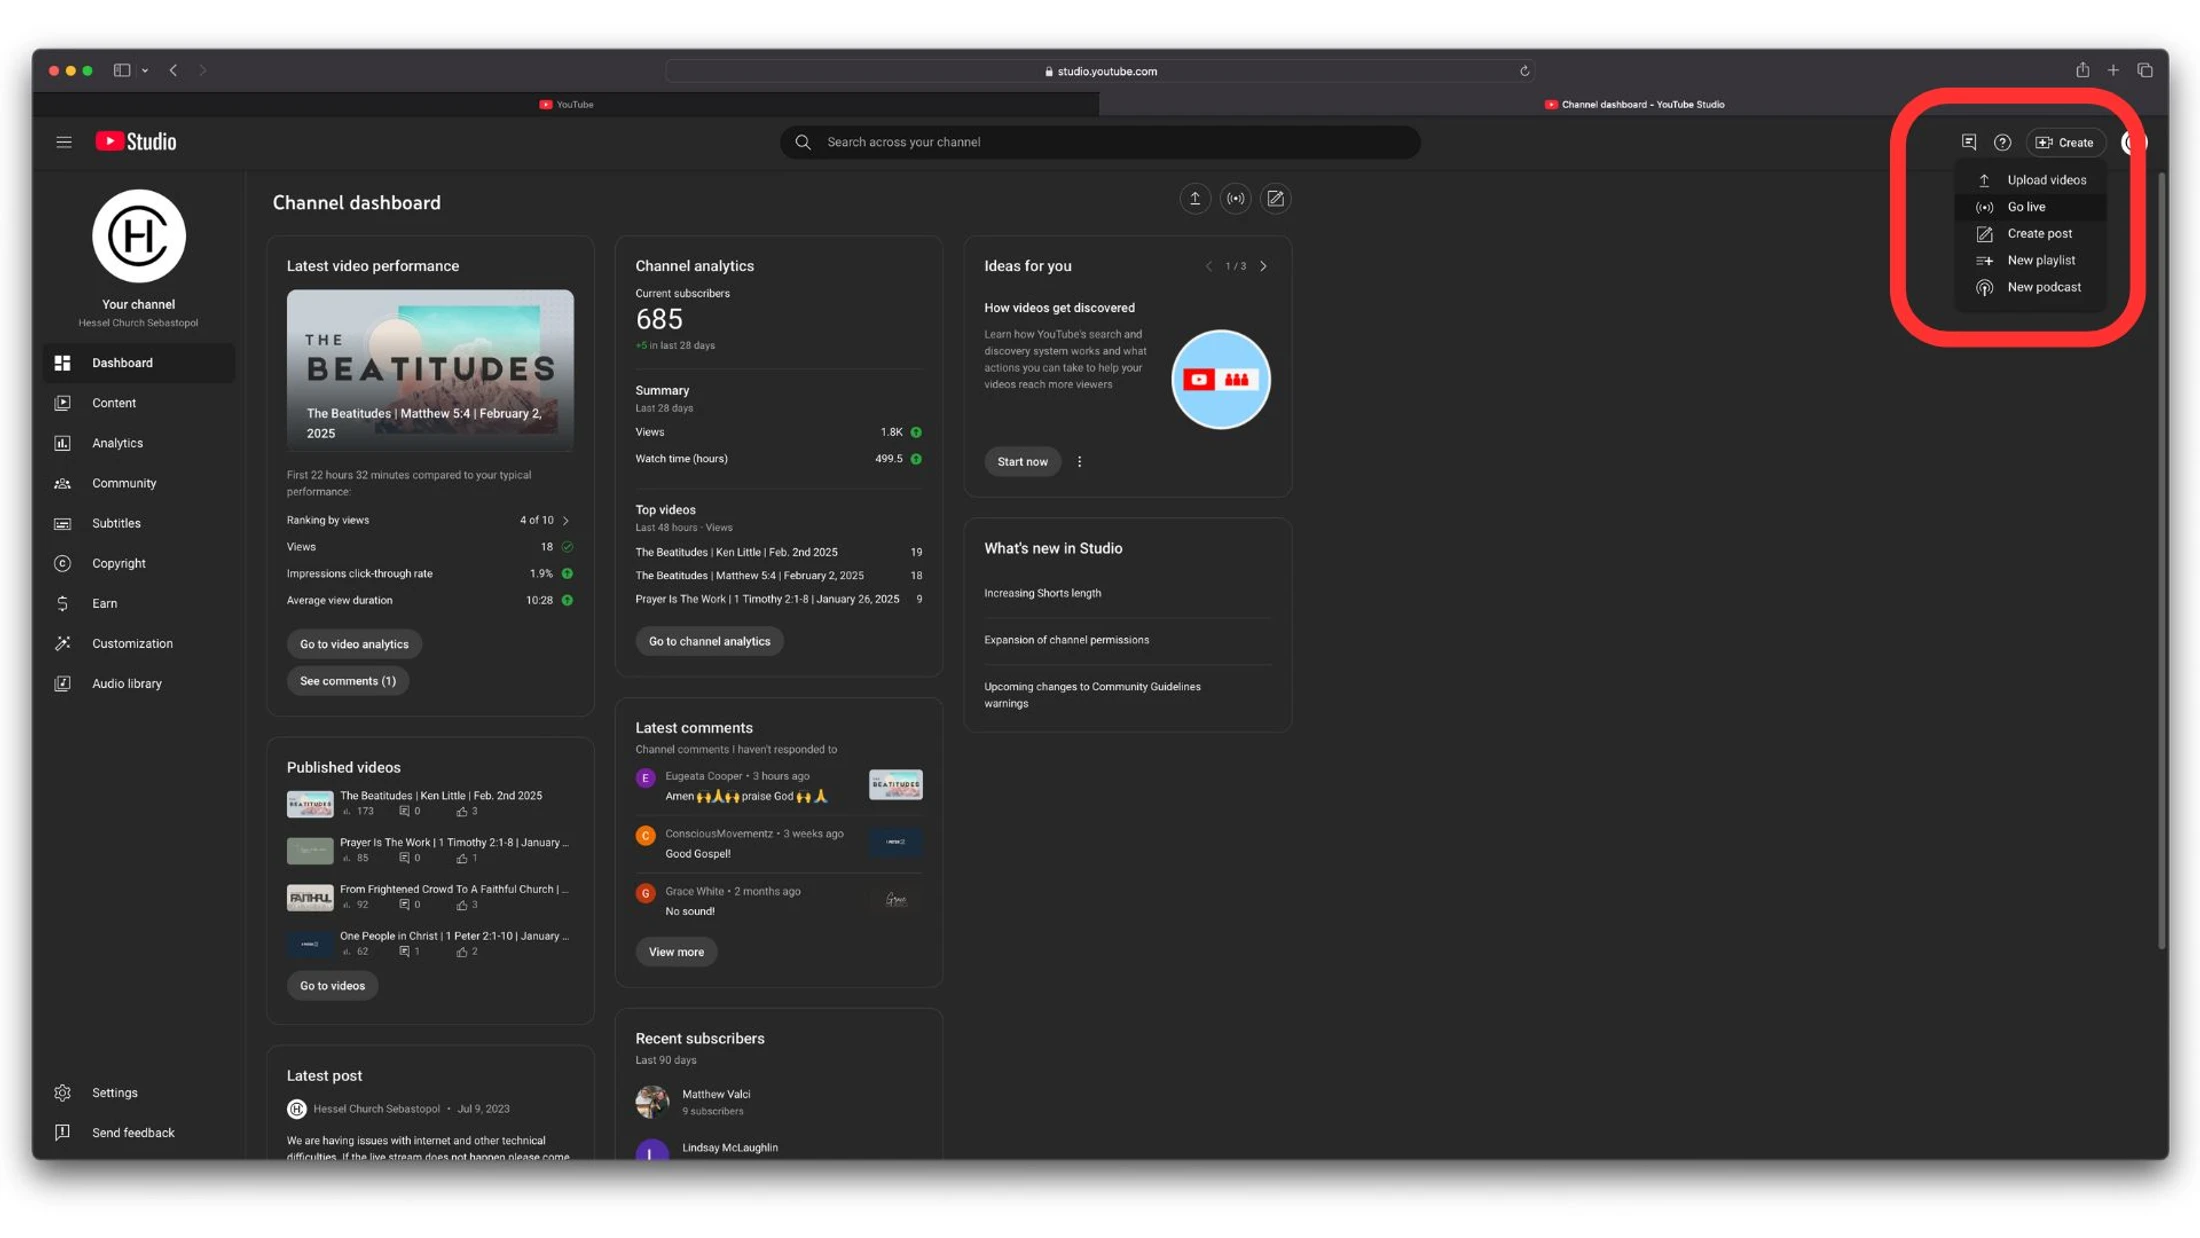
3. Select “Manage” In the left column then select “Schedule Stream” in the top right corner of the window
__largepreview__.webp)
4. Select “Reuse settings” In the window that pops up.
We will change some of these setting in the next steps
__largepreview__.webp)
5. Change the “Title” to reflect the current series. (the naming statured is… Series | Title or text | Speaker | Date… Plese make sure all live streams are titled in this manner.
__largepreview__.webp)
6. The standured for the discription is as follows. “Join us today online as “speaker” leads us in our “series tiitle” series.” Please fill in the blanks necessary for that sunday.
__largepreview__.webp)
7. Please Upload the approproate series slide if it is incorrect. Then press “Next”
__largepreview__.webp)
8. Please Check or leave checked the following Boxes… “Live chat”, “Live chat reply”, “Anyone”, “Live reactions”. Then press “Next”
__largepreview__.webp)
9. Make the service “Public”. The date should reflect the sunday of the live stream and the start time should be scheduled for 5 minuts before the service start time. Then press “Done”
__largepreview__.webp)
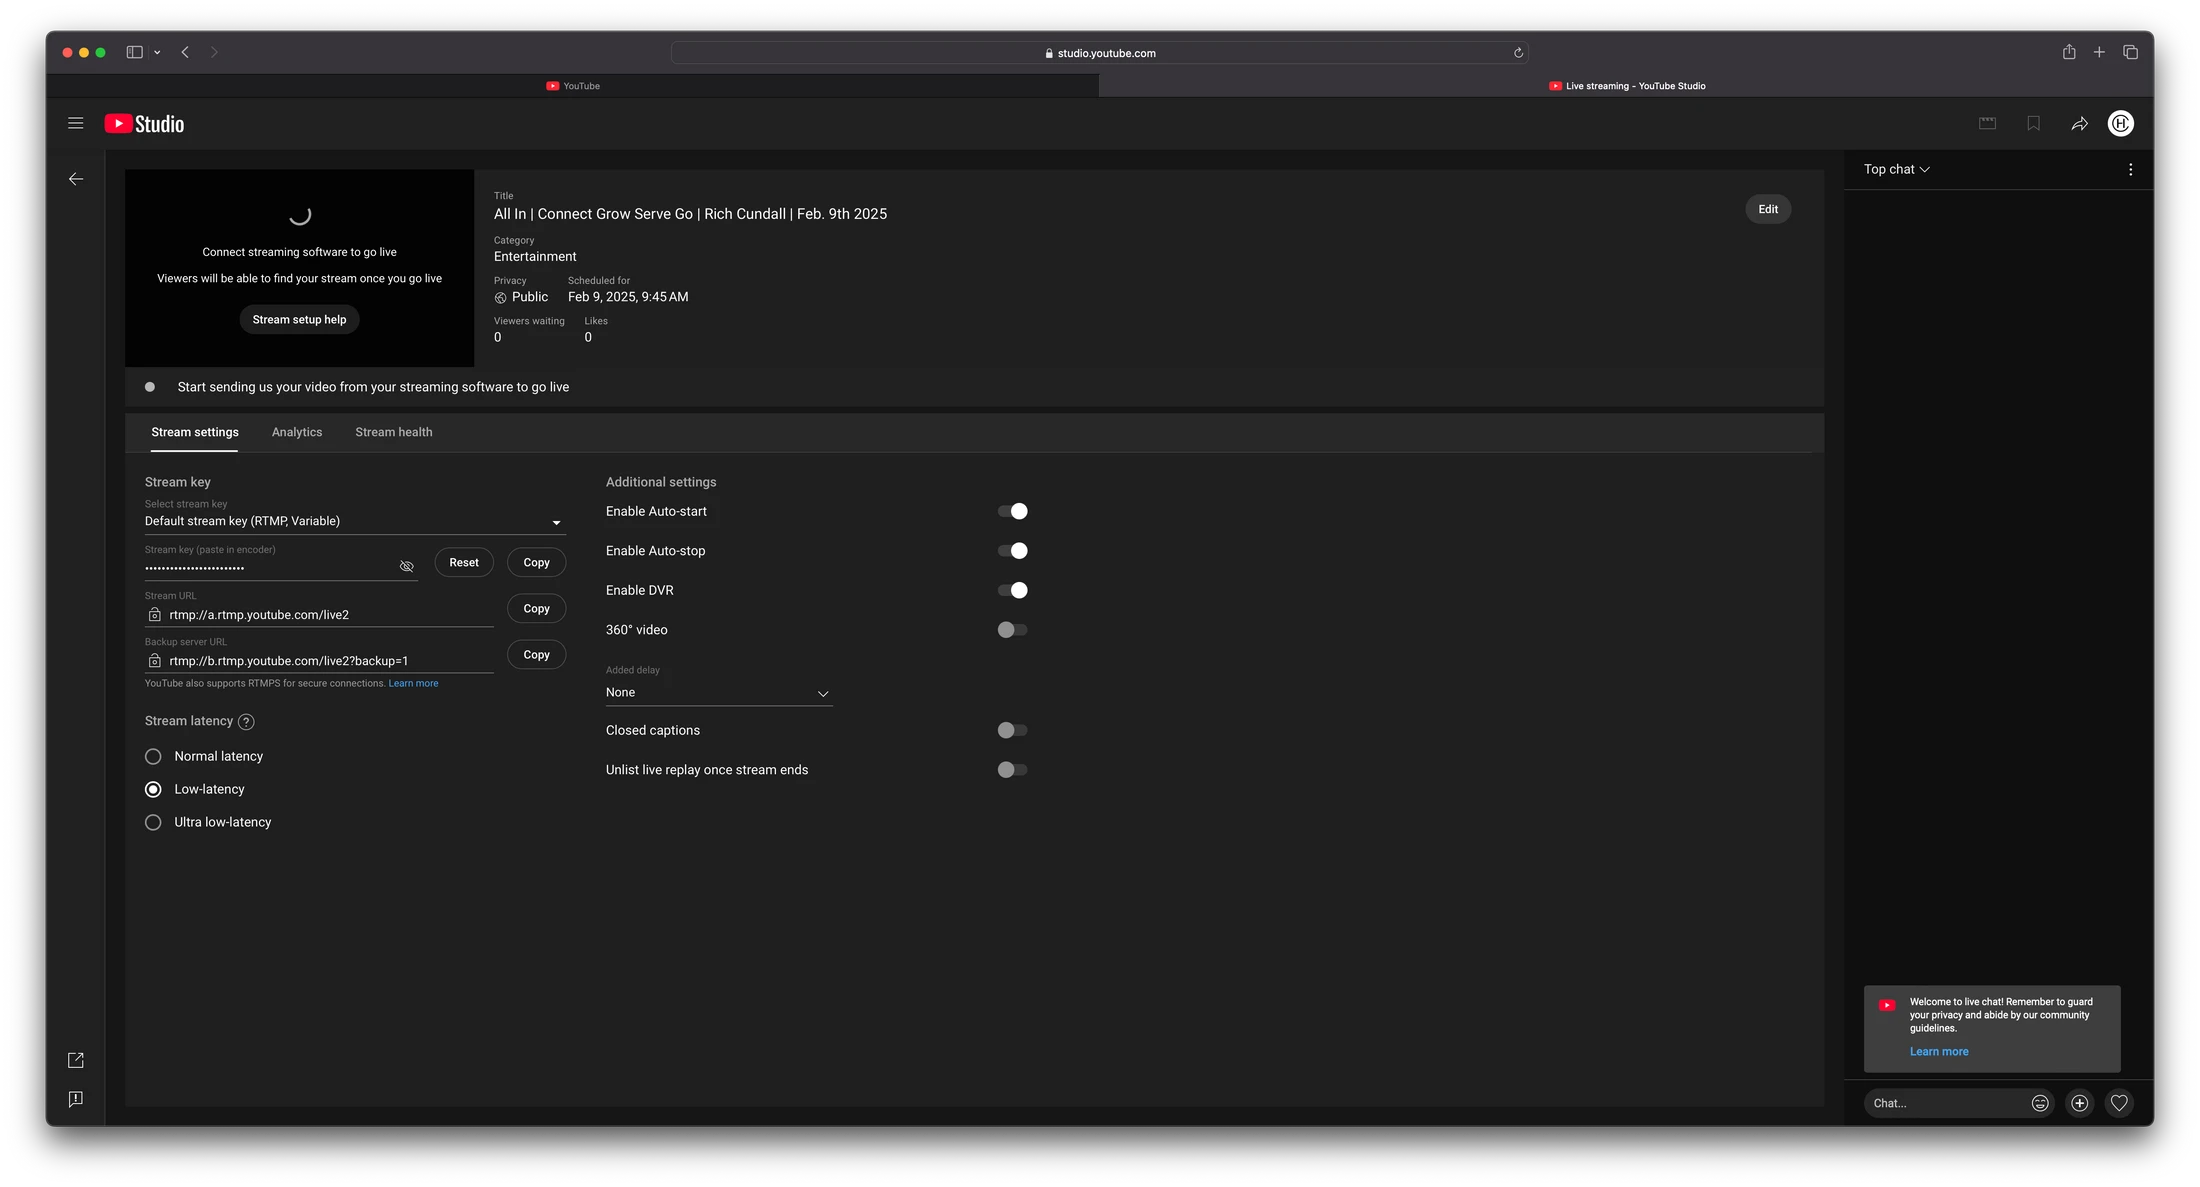
10. this window is where you can moitor and interact with the live stream.
Do not change any setting in this window
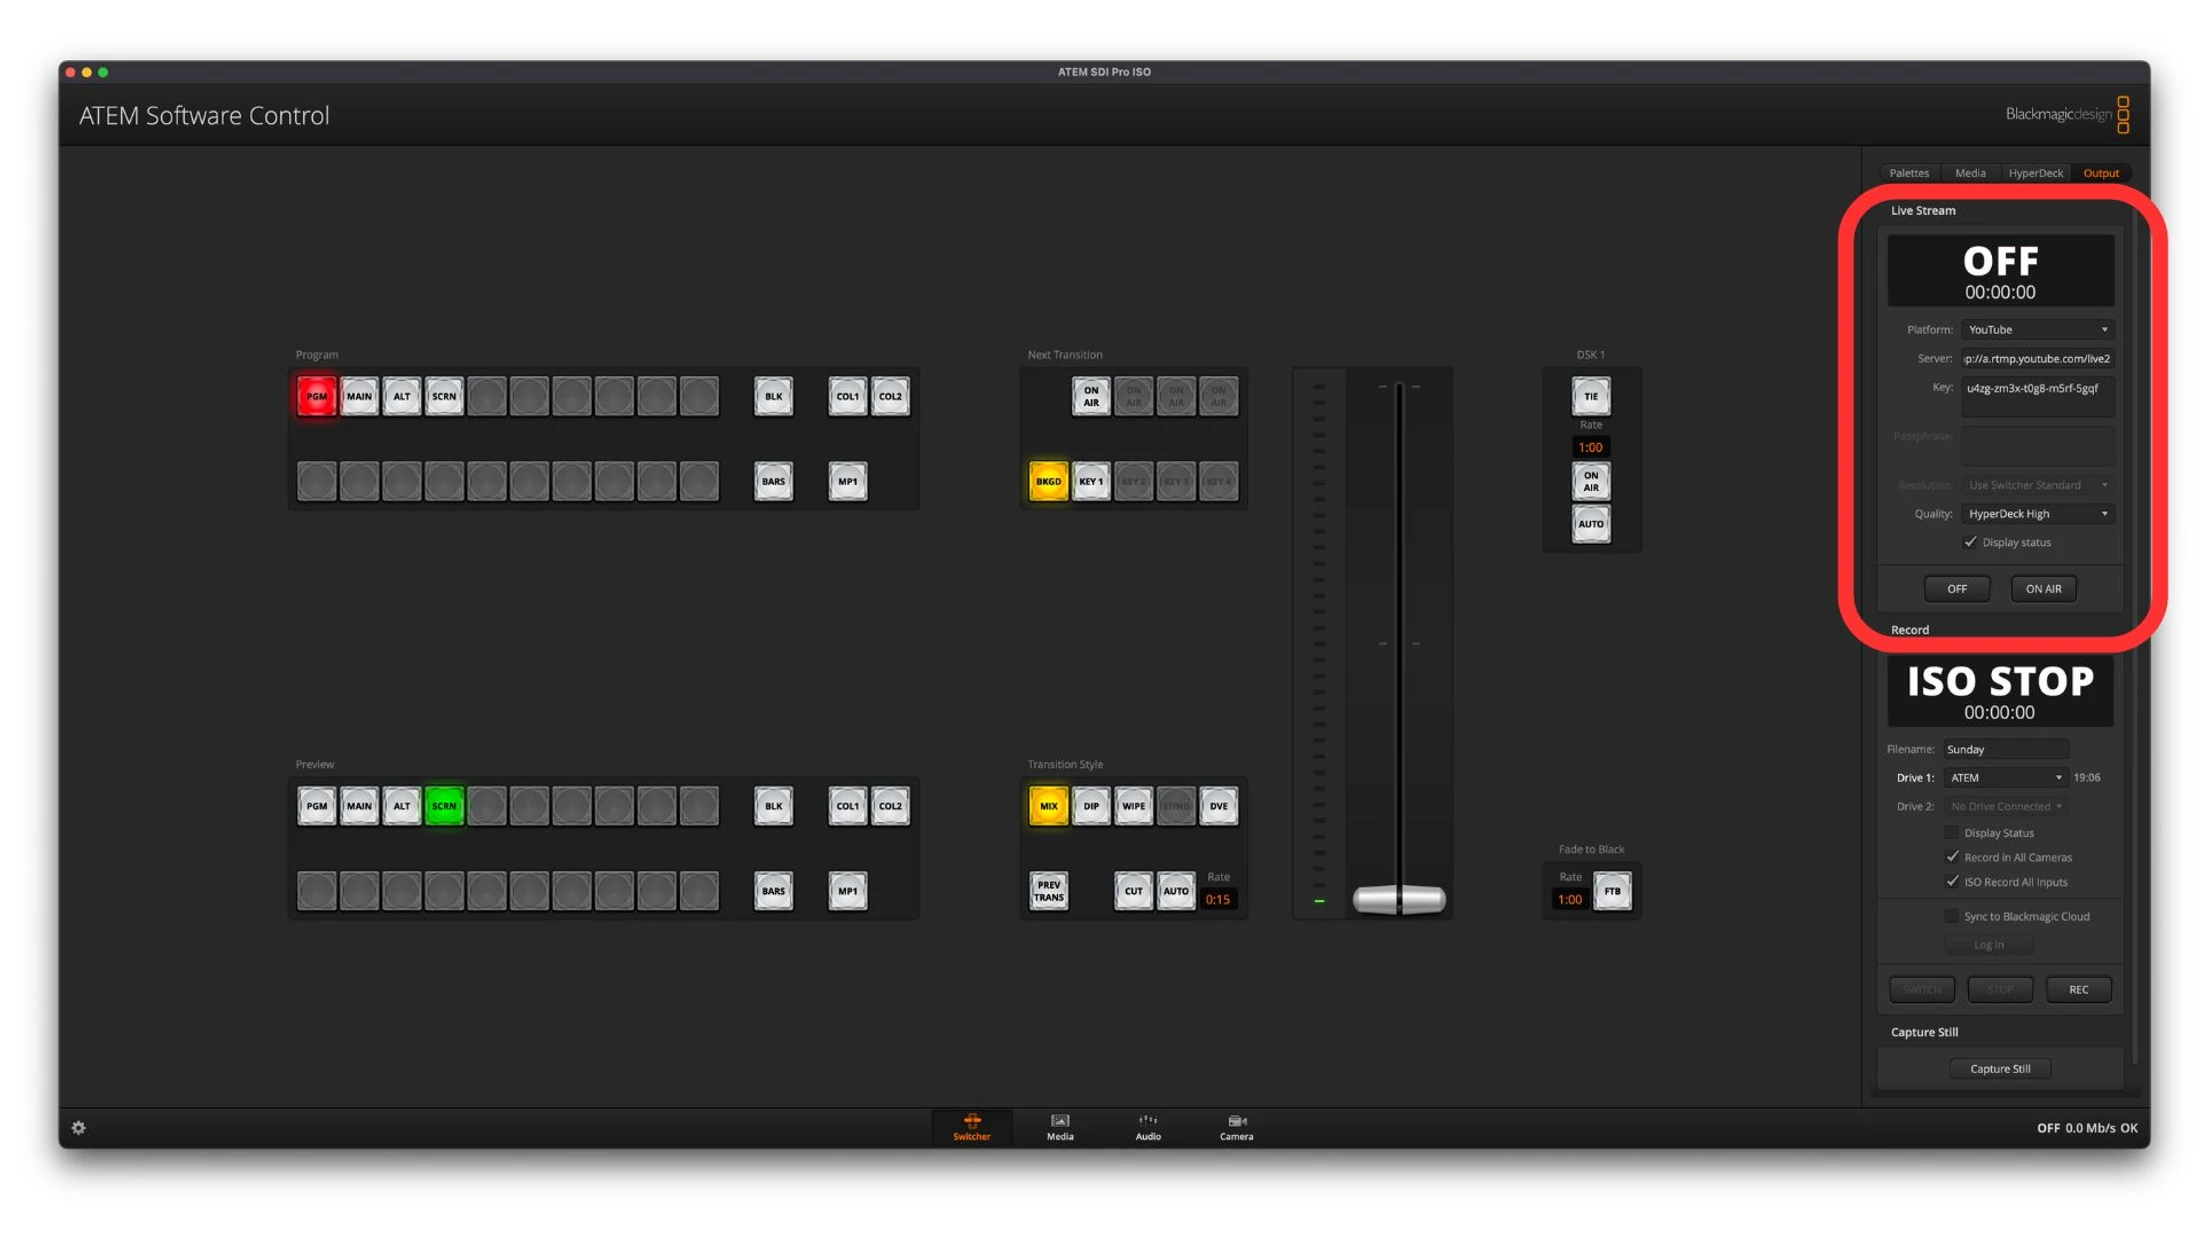
11. These are the “Live Stream” setting on the ATEM.
Do not under any circumstances change these settings
12. When you are ready to start the live stream press the “ON AIR” button. When the button is red it is sending the broadcast out for youtube to receive.
__largepreview__.webp)
13. These are the setting for the backup recording. Please change the filename to reflect date of that recording. “Sunday Feb 2nd, 2025”
__largepreview__.webp)
14. When you are ready to record press the “REC” button. When the button is red it is recording to an SSD attached to the ATEM.
__largepreview__.webp)
Setting up a live stream
Starting and monitoring a live stream
Here is here you can monitor the status of the live stream
1. This window is where you can monitor and interact with the live stream.
Do not change any setting in this window

2. These windows are where you can monitor the live stream and recording times/Statuses
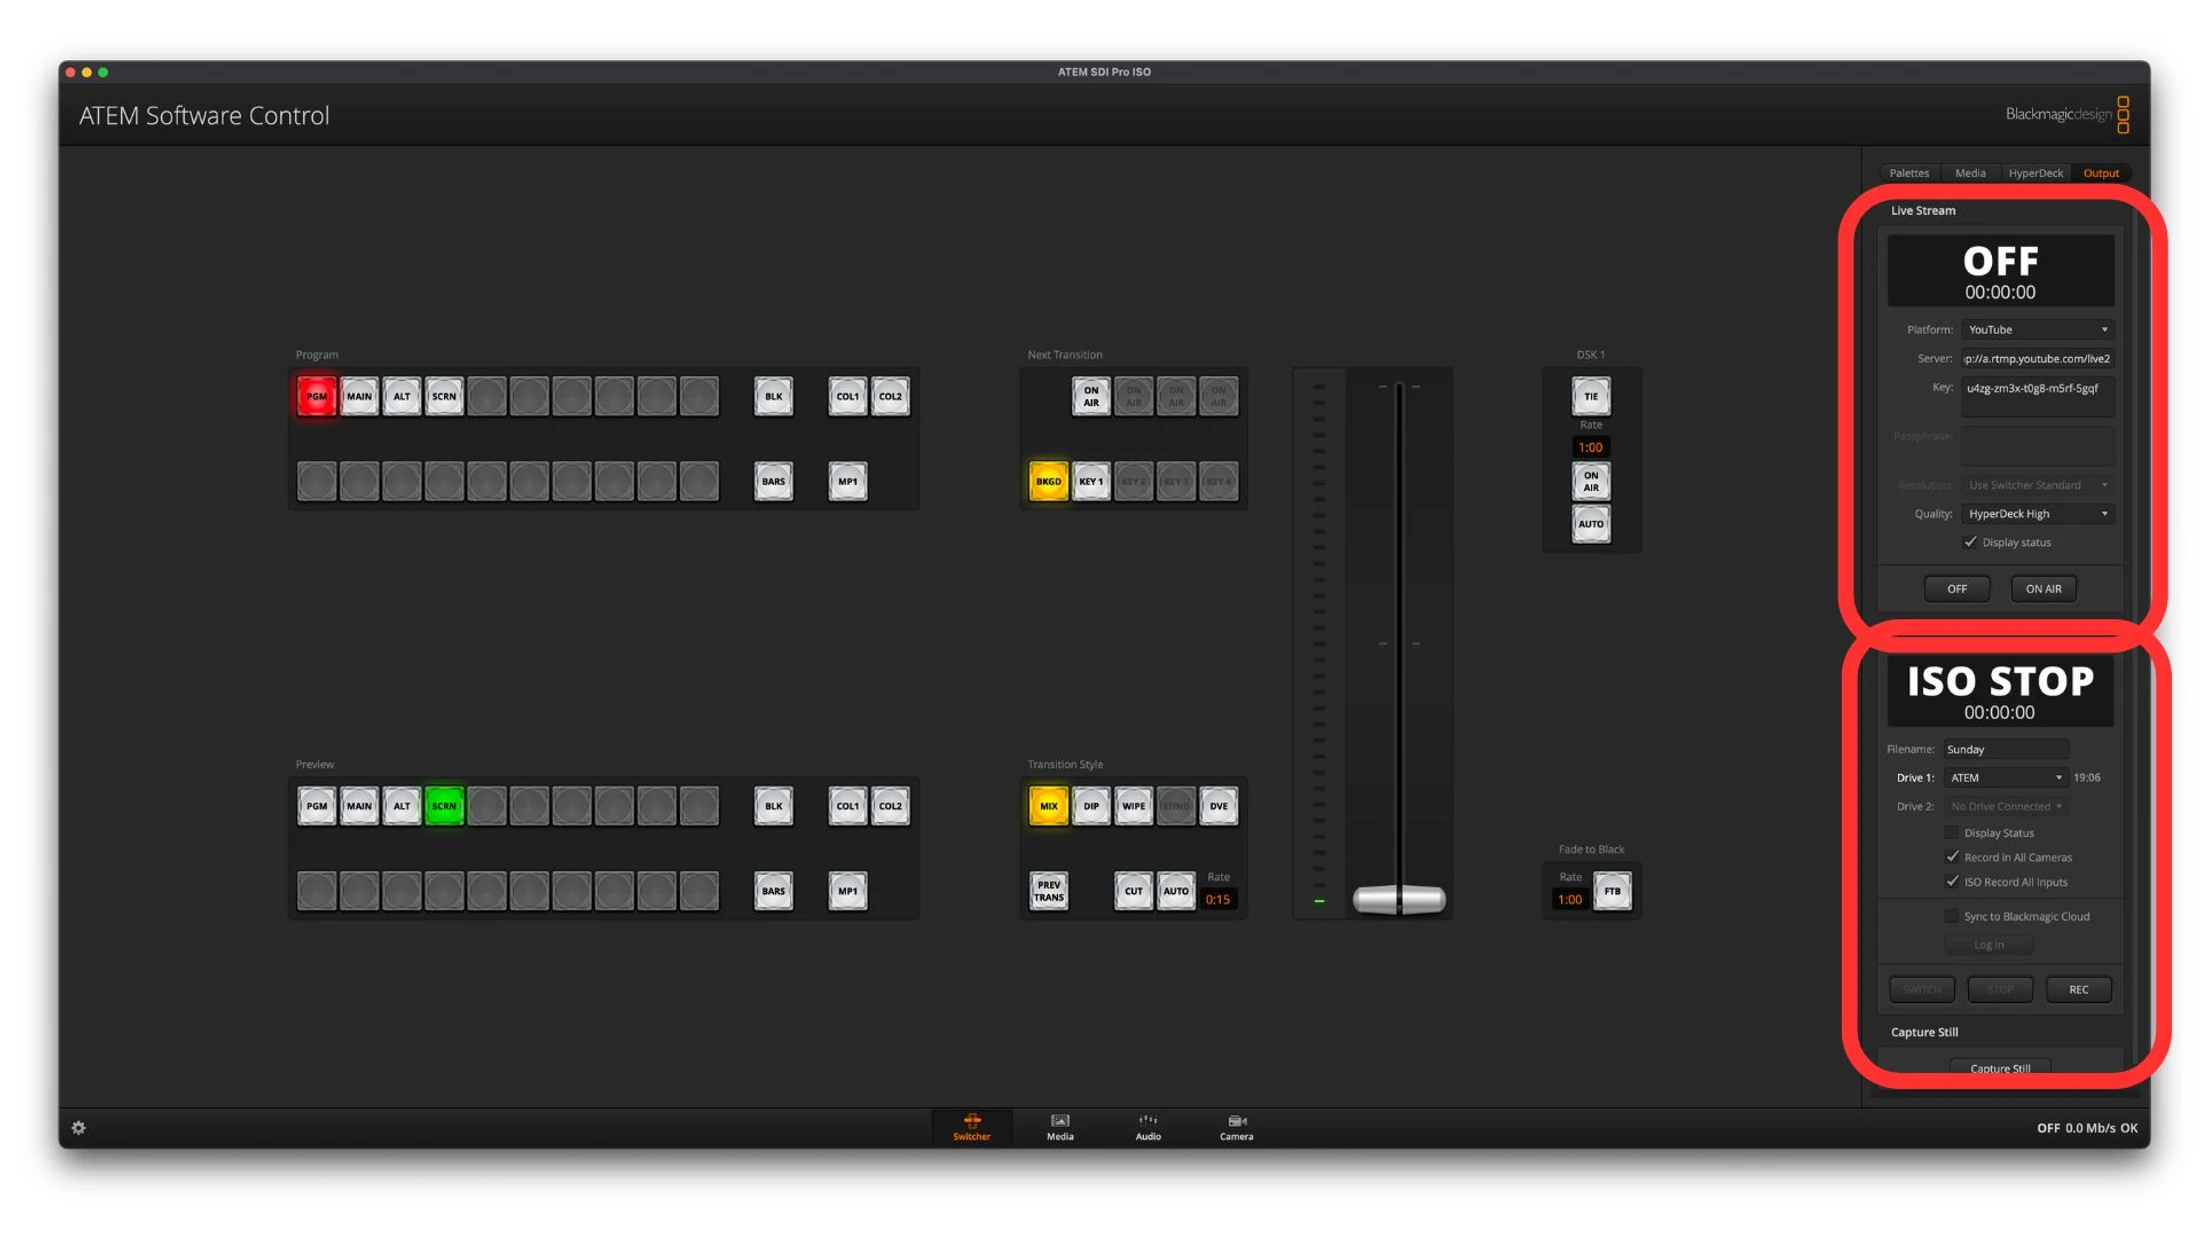
3. The ATEM has 4 buttons in the top right. “REC”, “ON AIR”, “STOP” stops recording, and “OFF” stops the live stream.
__largepreview__.webp)
4. When the SSD is pluged into the ATEM properly the green “DISK” light will illuminate.
__largepreview__.webp)
Starting and monitoring a live stream
ProPresenter
Basic Layout
1. The library. Where all the presentation items are kept
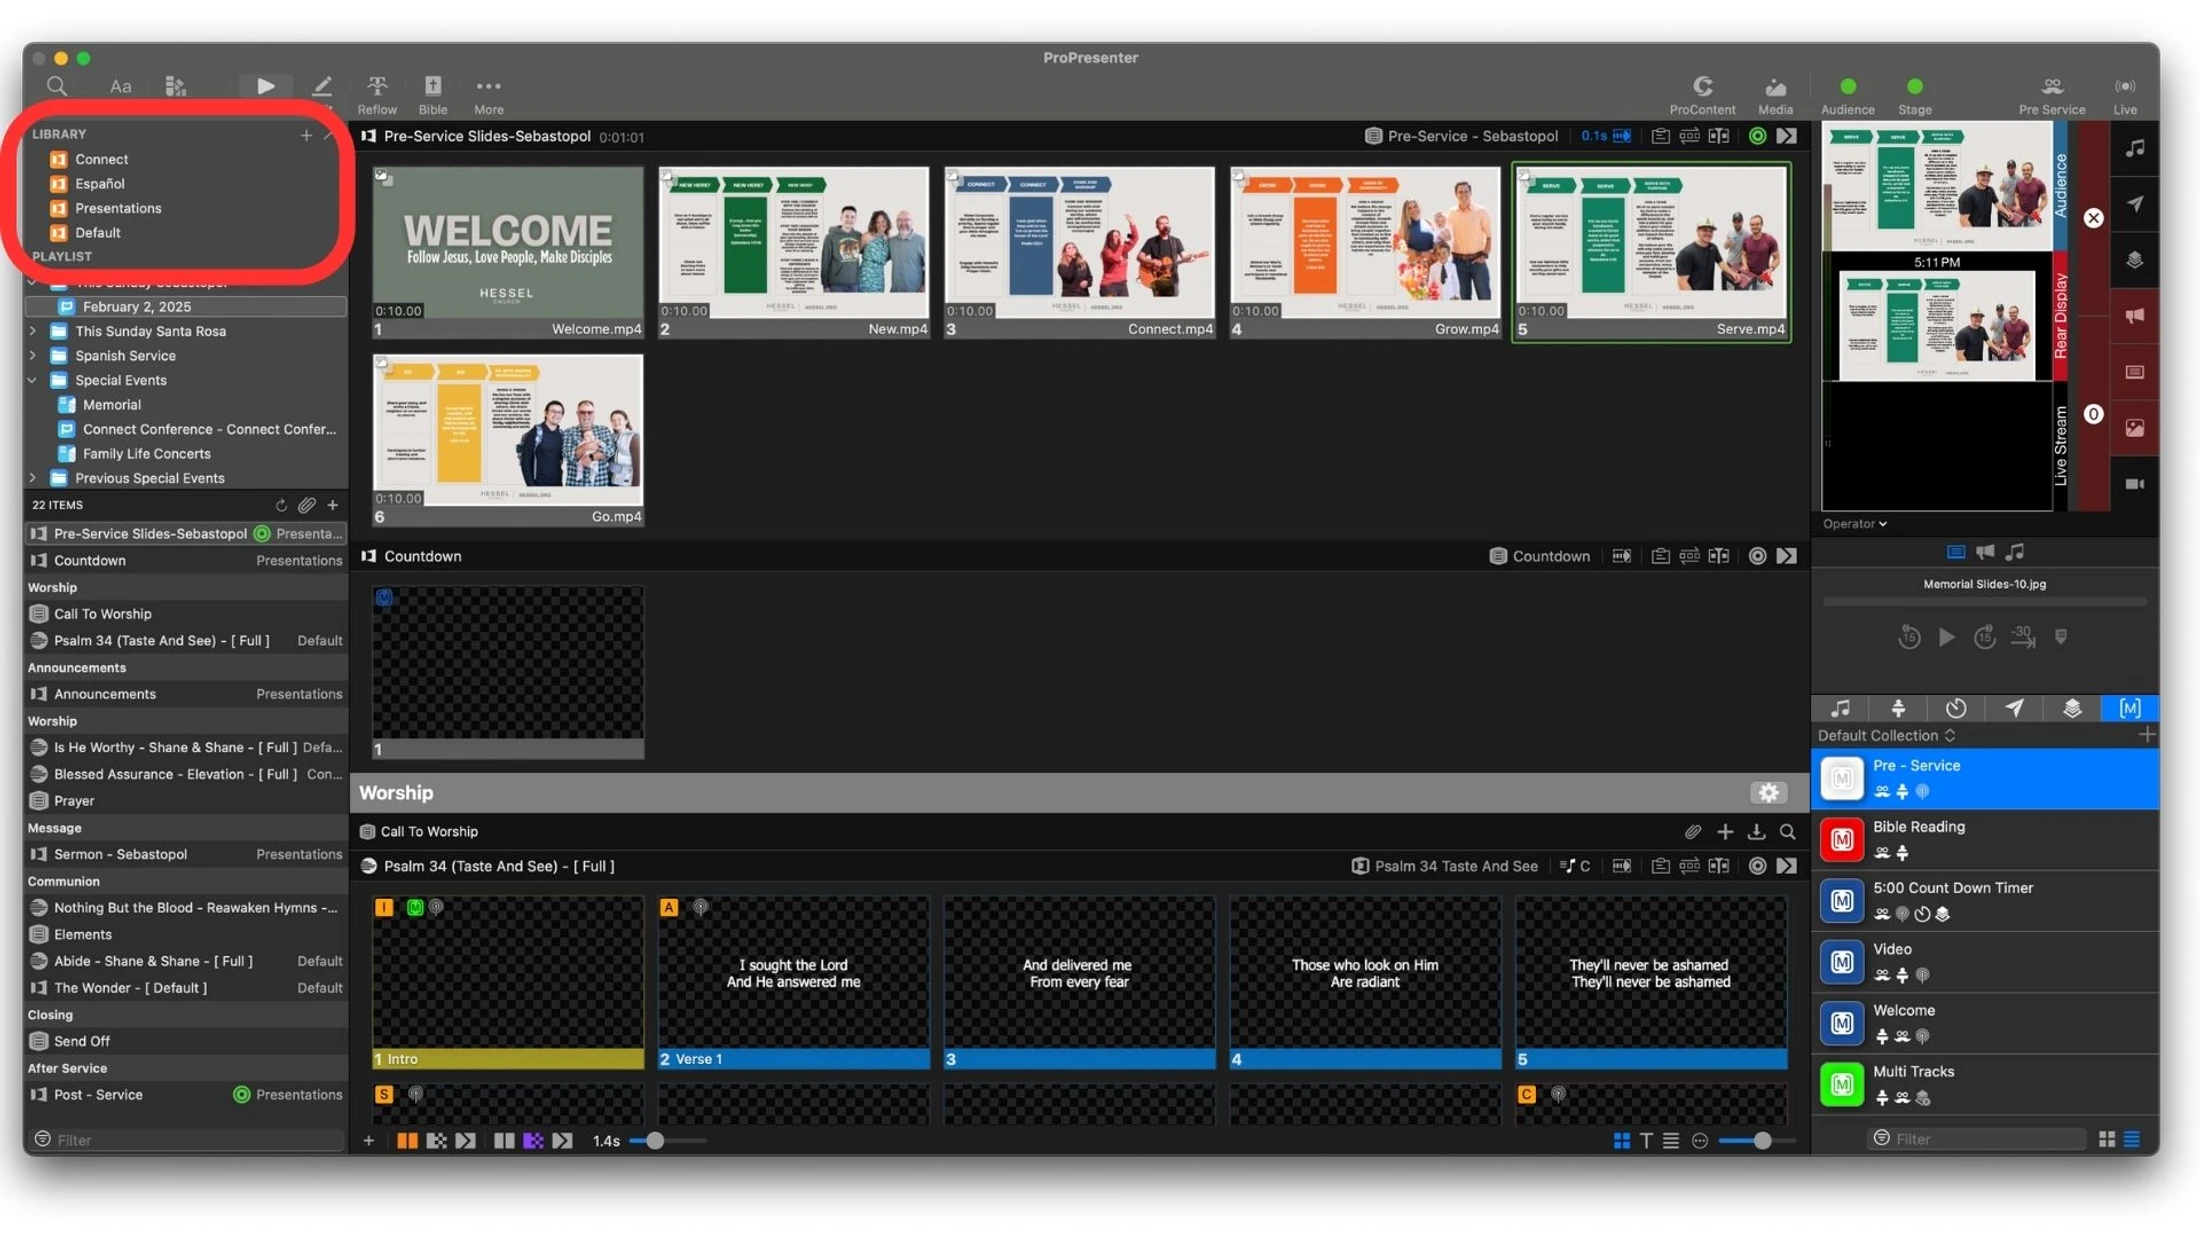
2. Playlist. Where the presentation are organized into a service
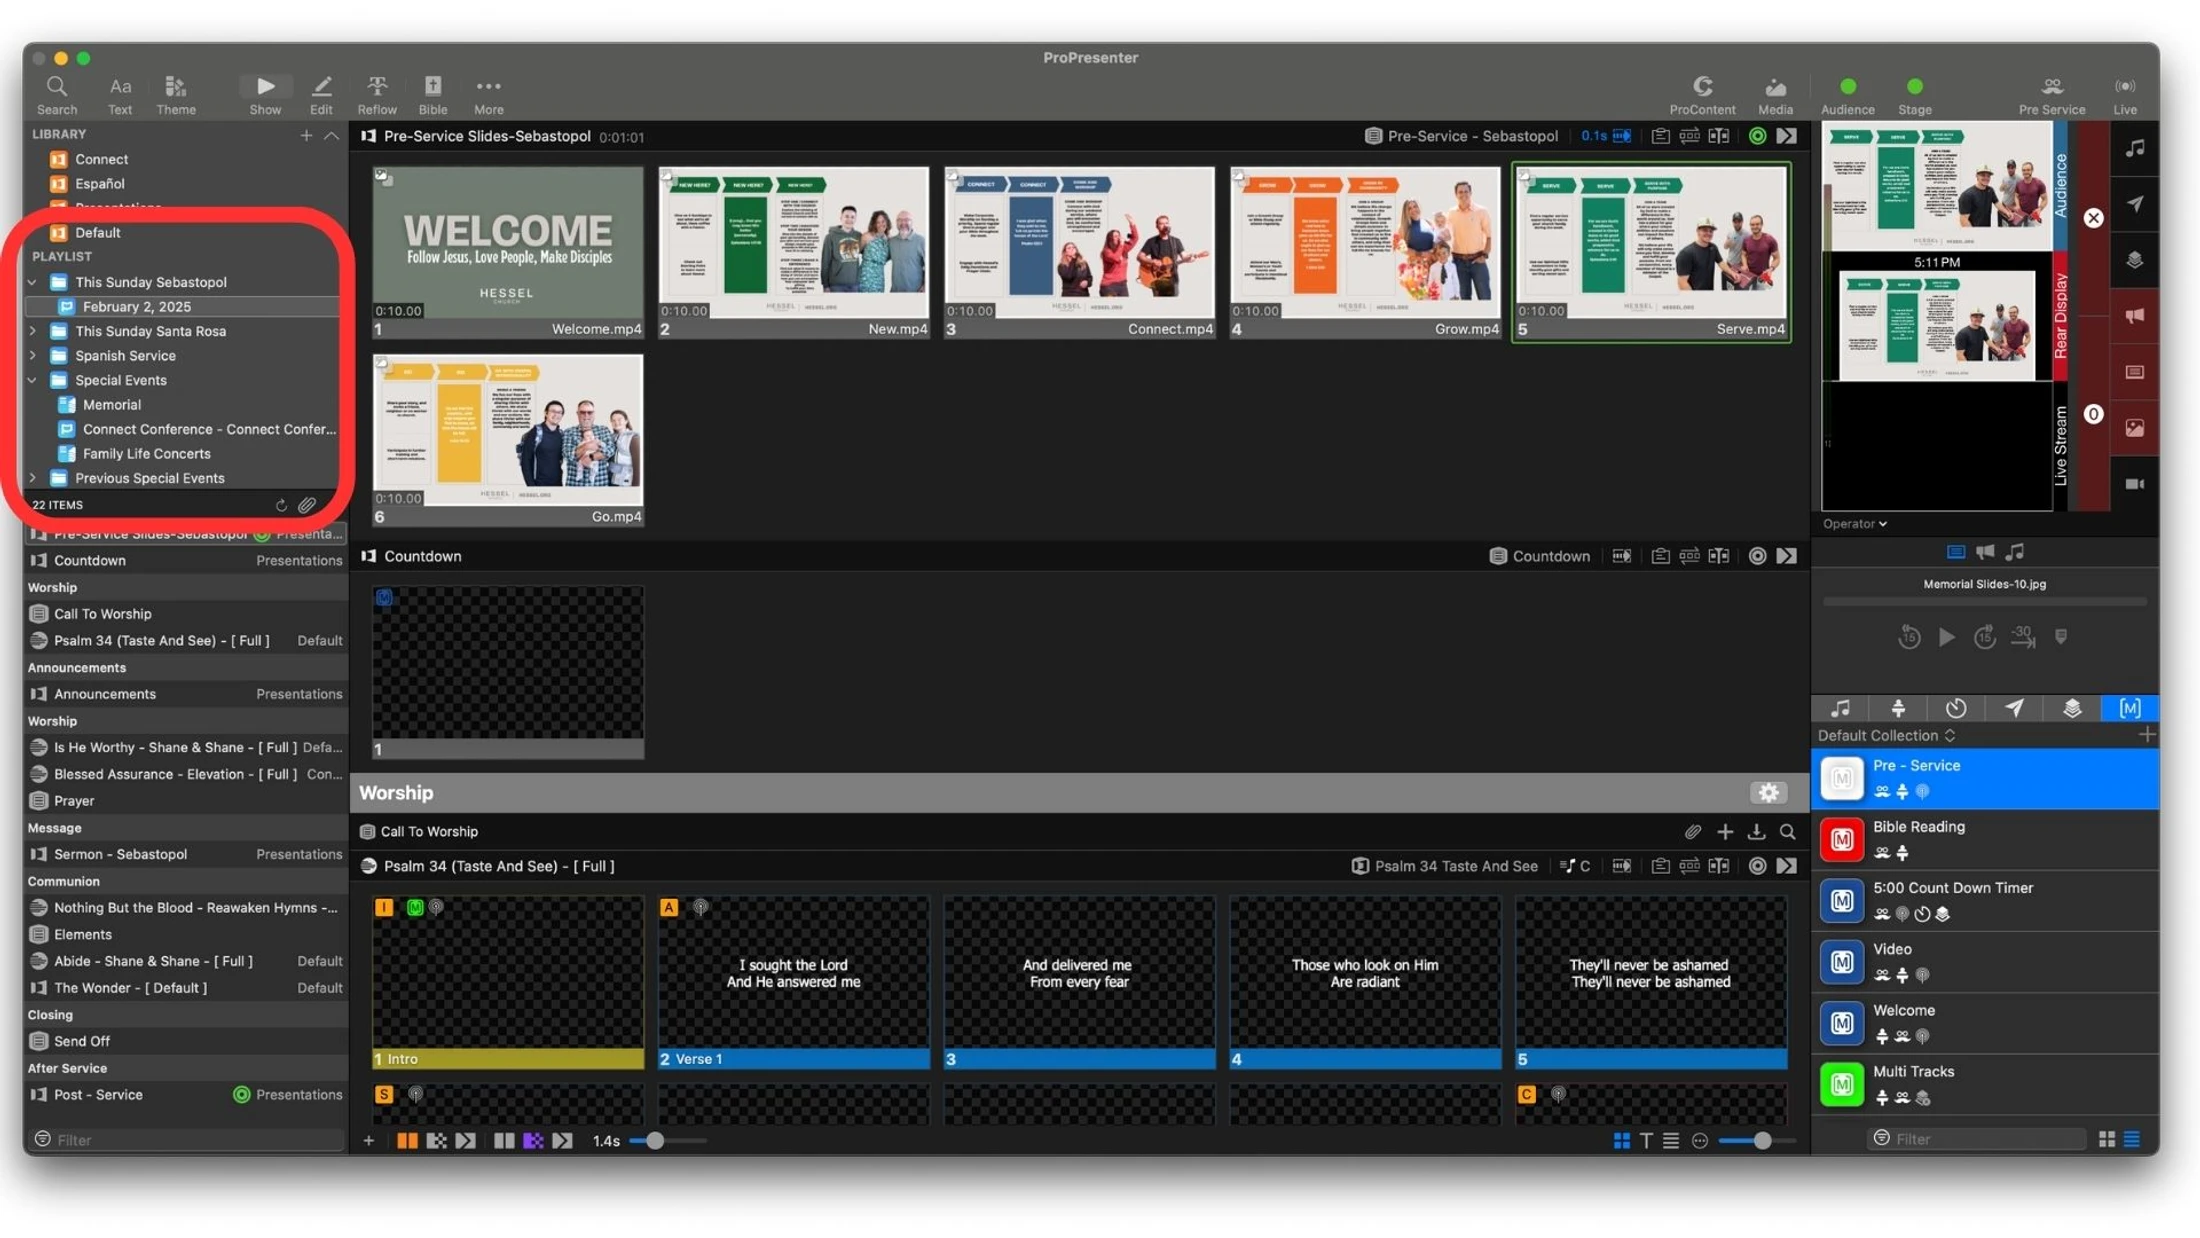
3. Playlist Items. The presentations or service flow in the playlist
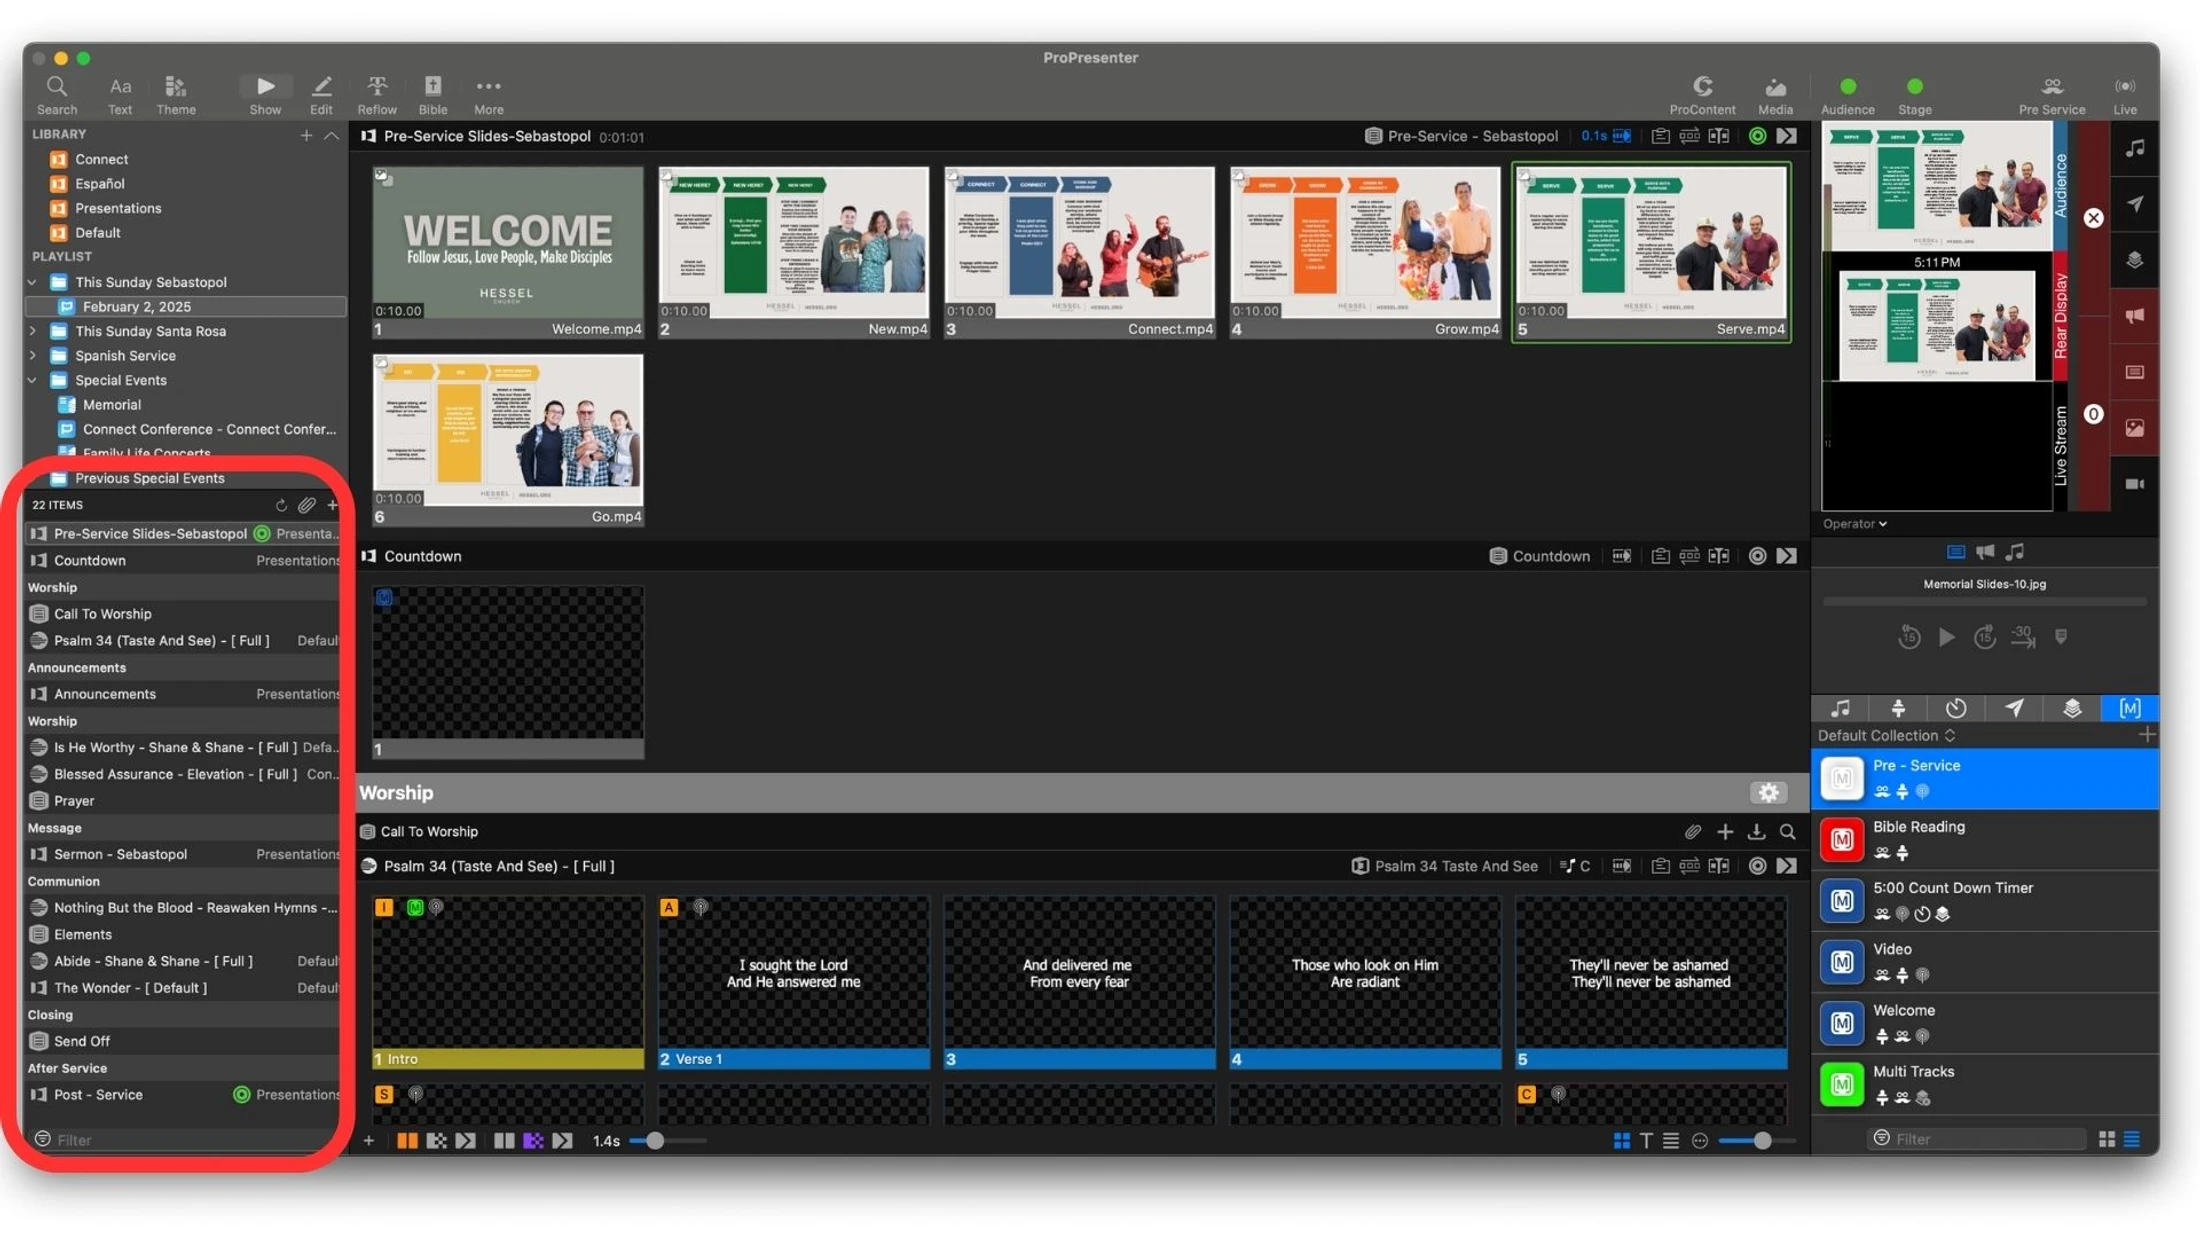
4. Show controls. The slides in each presentation
__largepreview__.webp)
5. Macros. Show controls for audience display, lighting, and stage displays

6. Preview. preview of what is being sent to each display
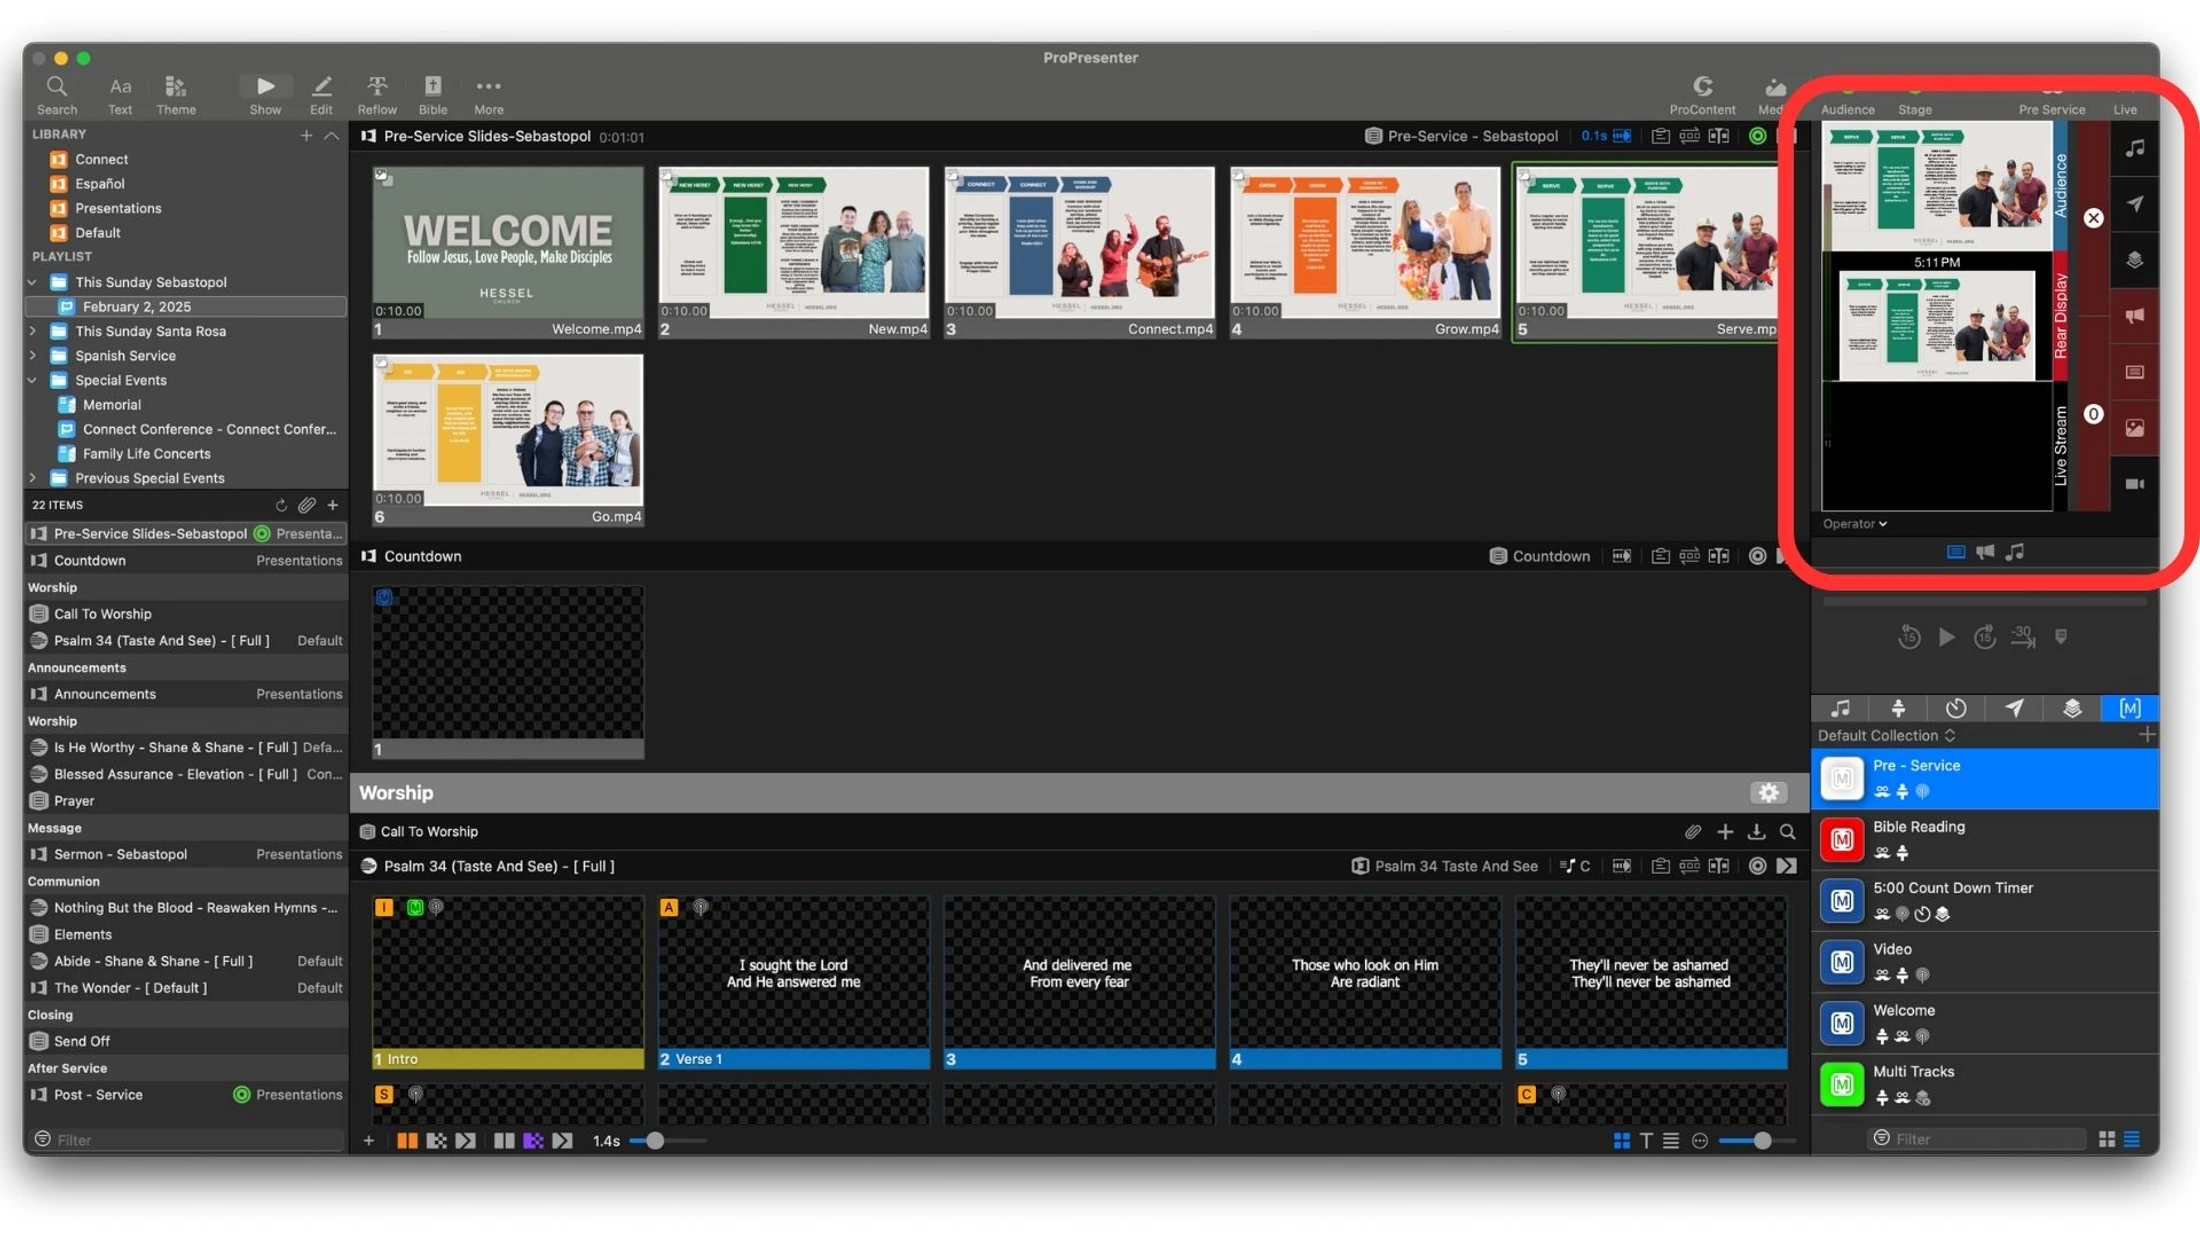
ProPresenter Layout
How To Add A Service Playlist
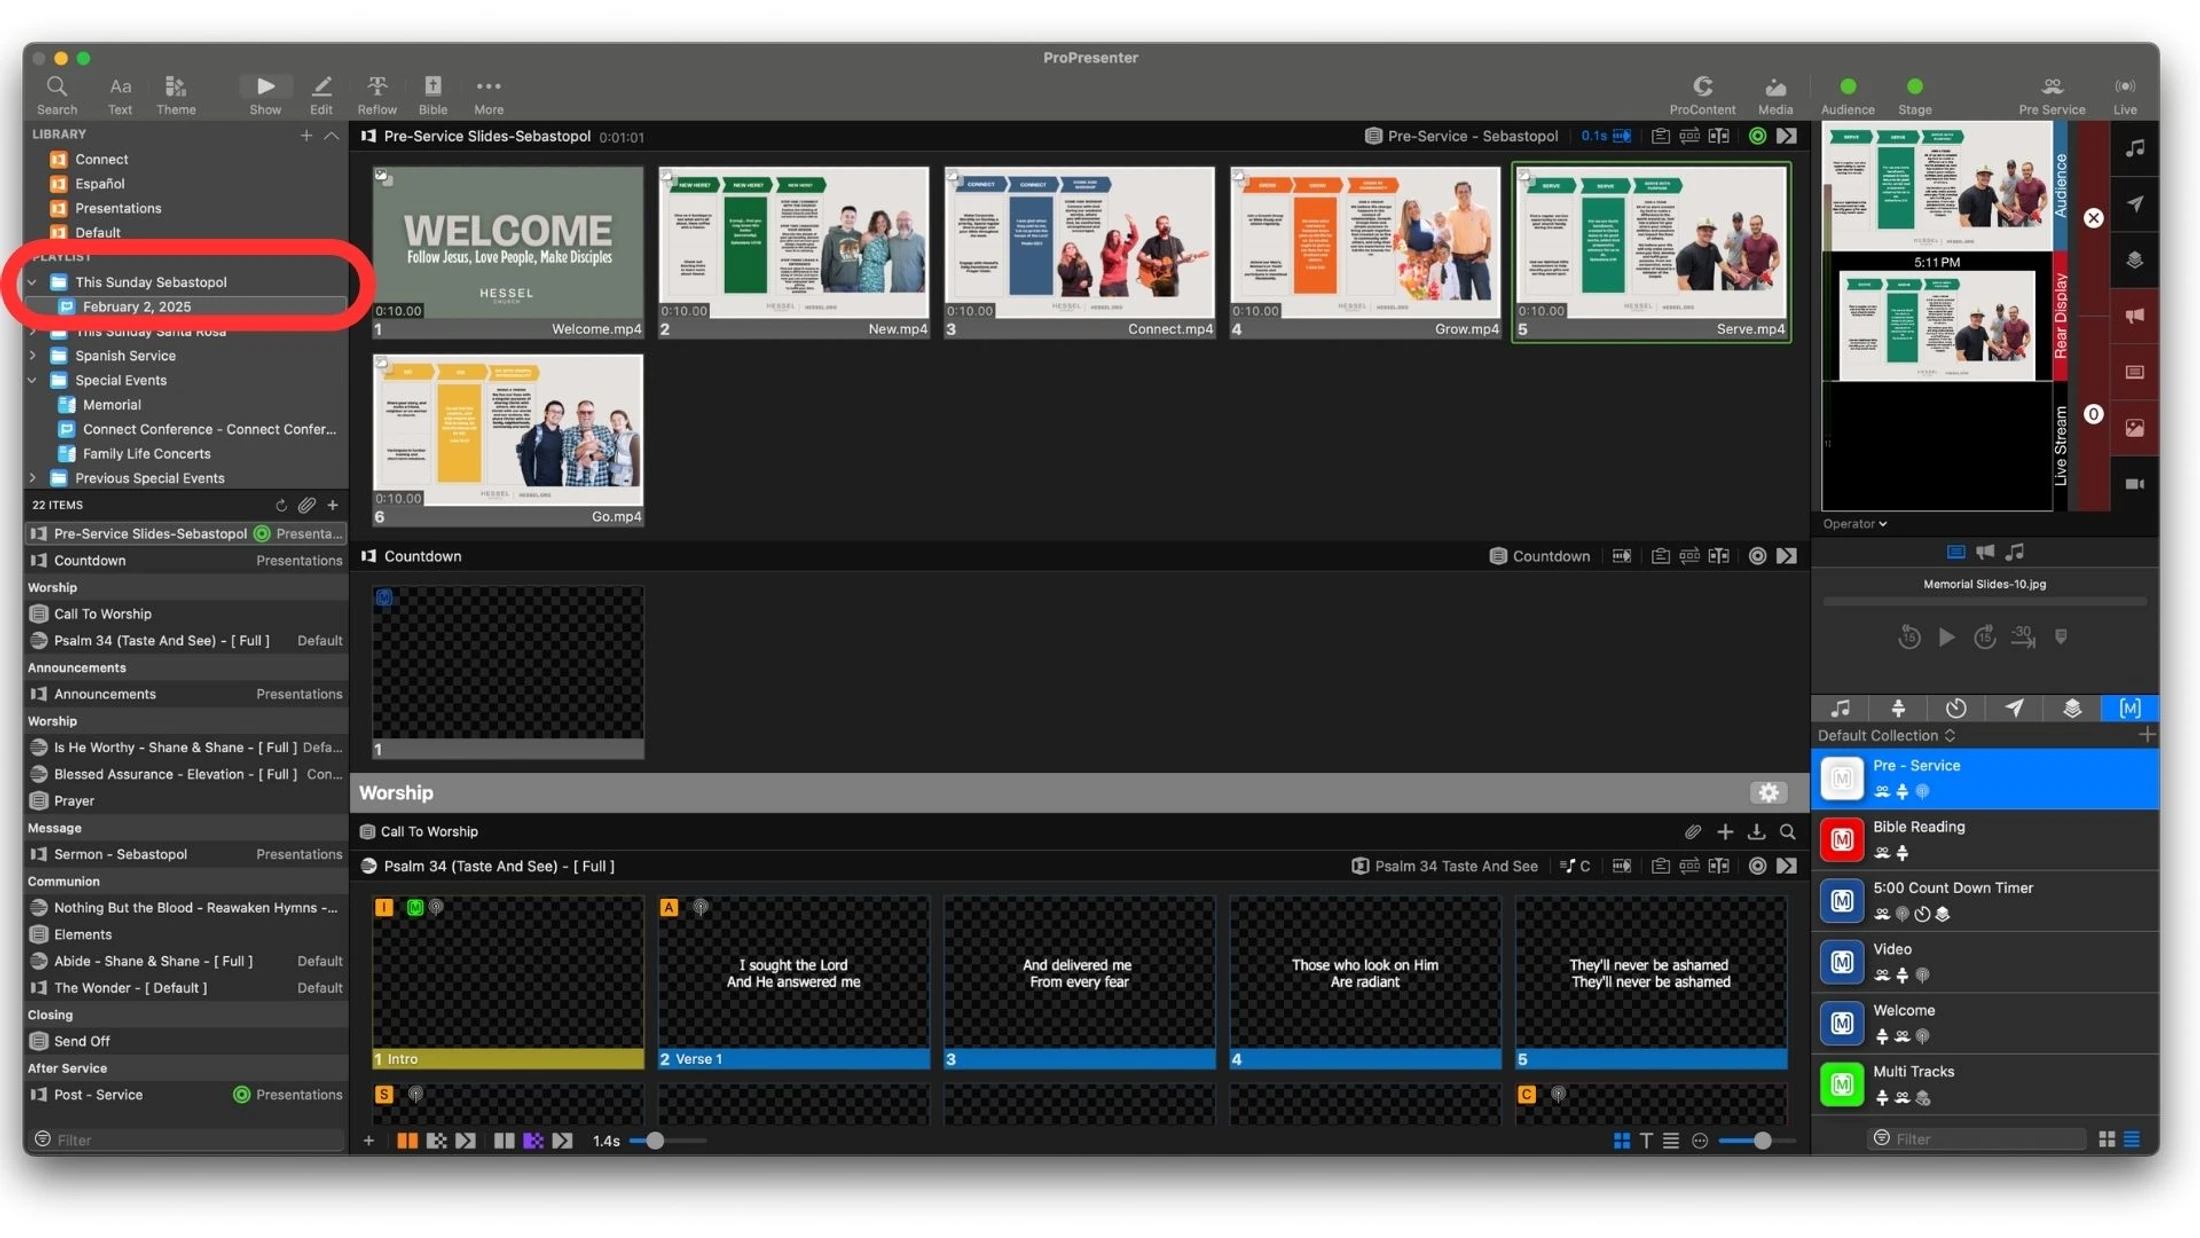
1. Highlight the playlist folder you are going to add a service too
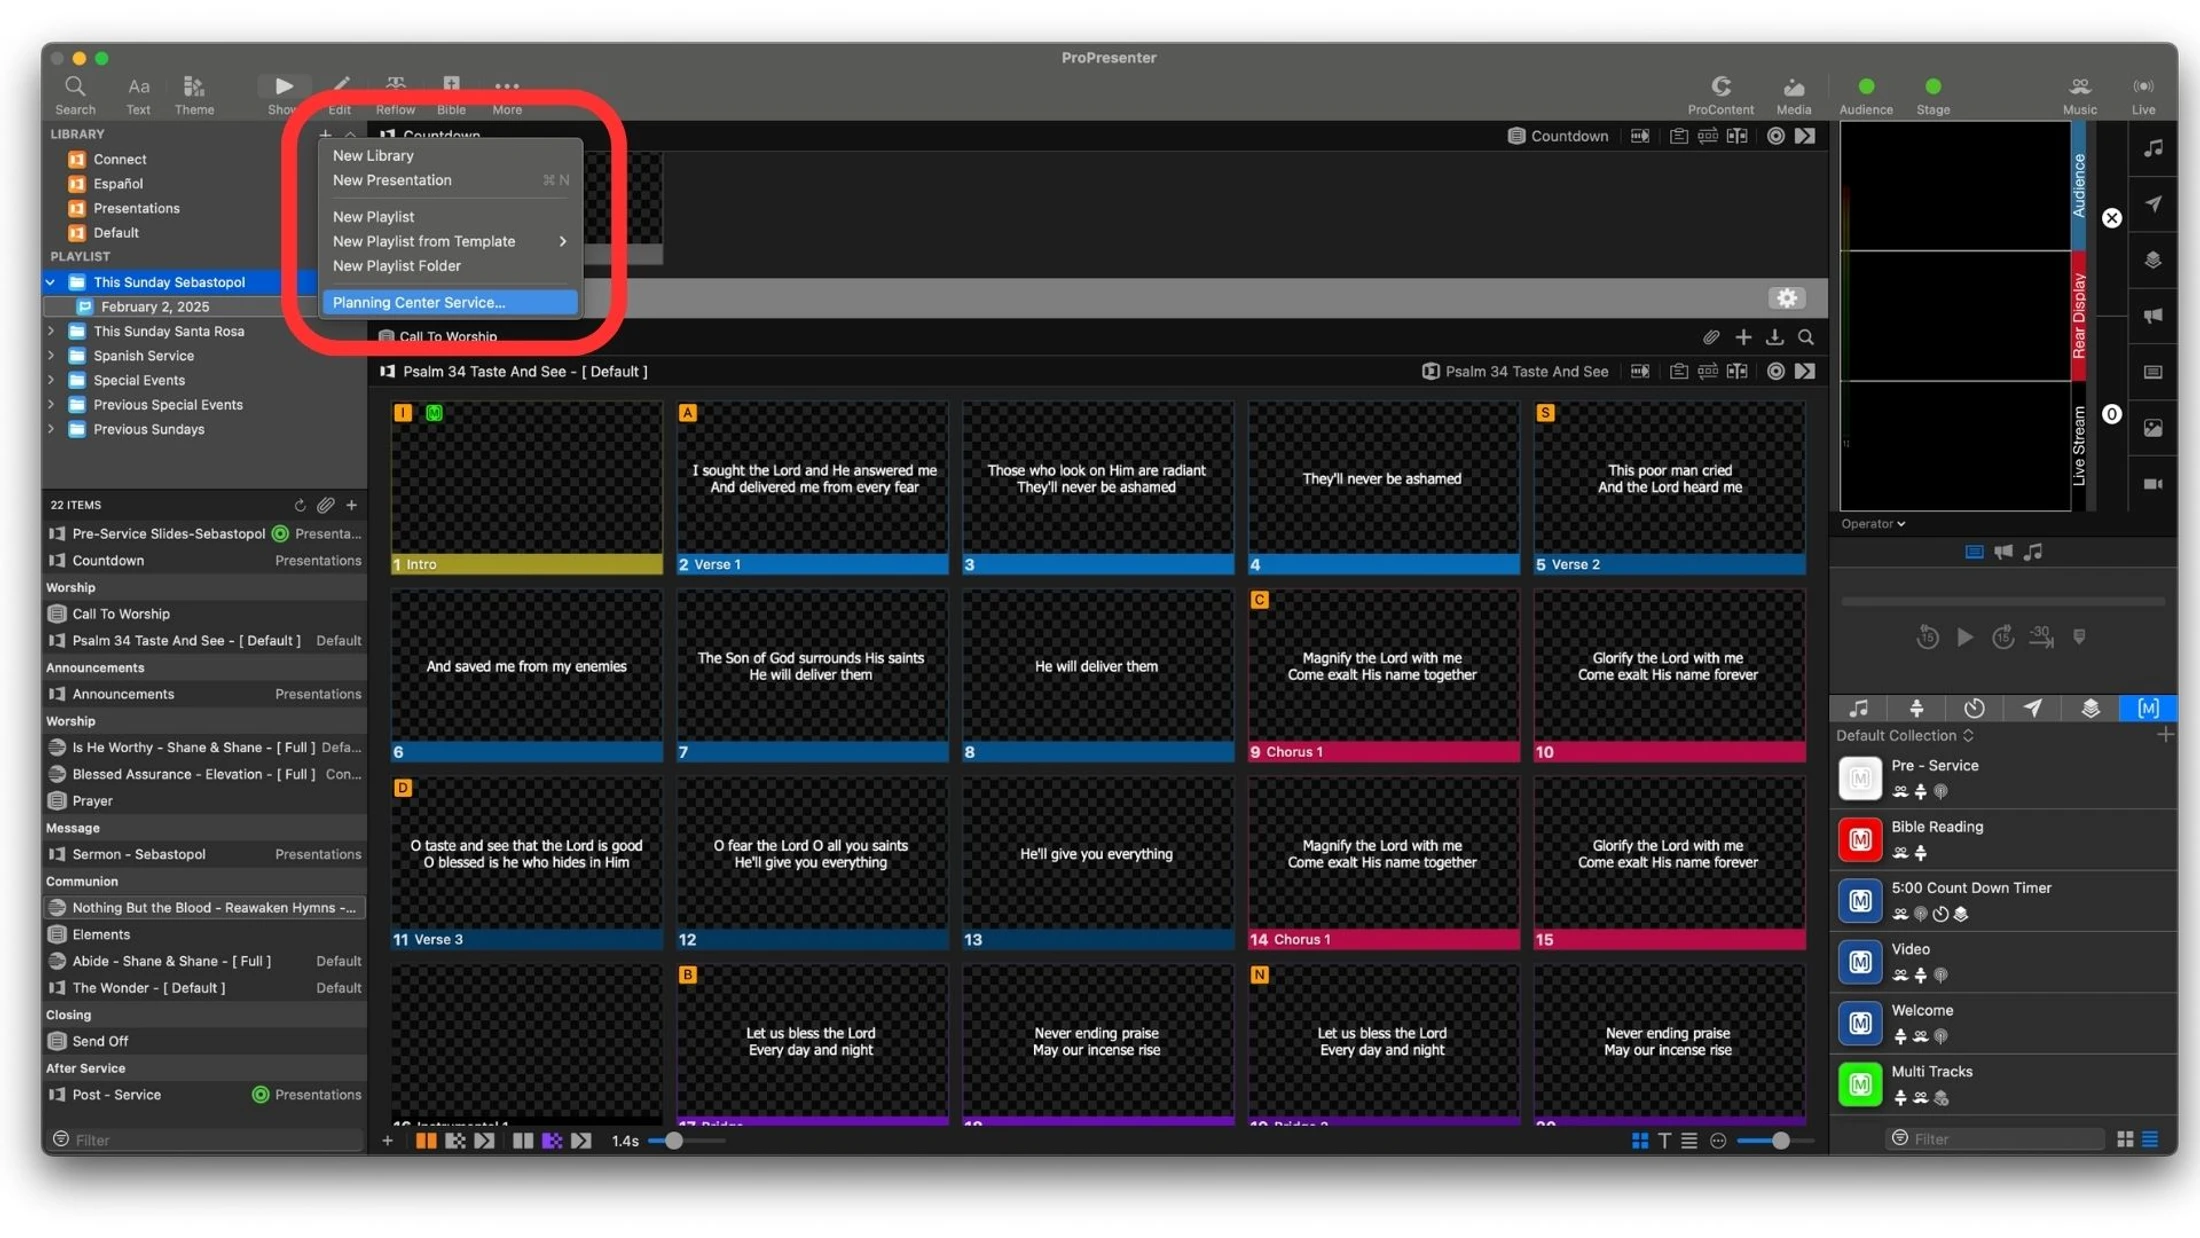
2. Press the “+” button next to library in the library window

3. Select “Planning Center Service…” in the window that appears
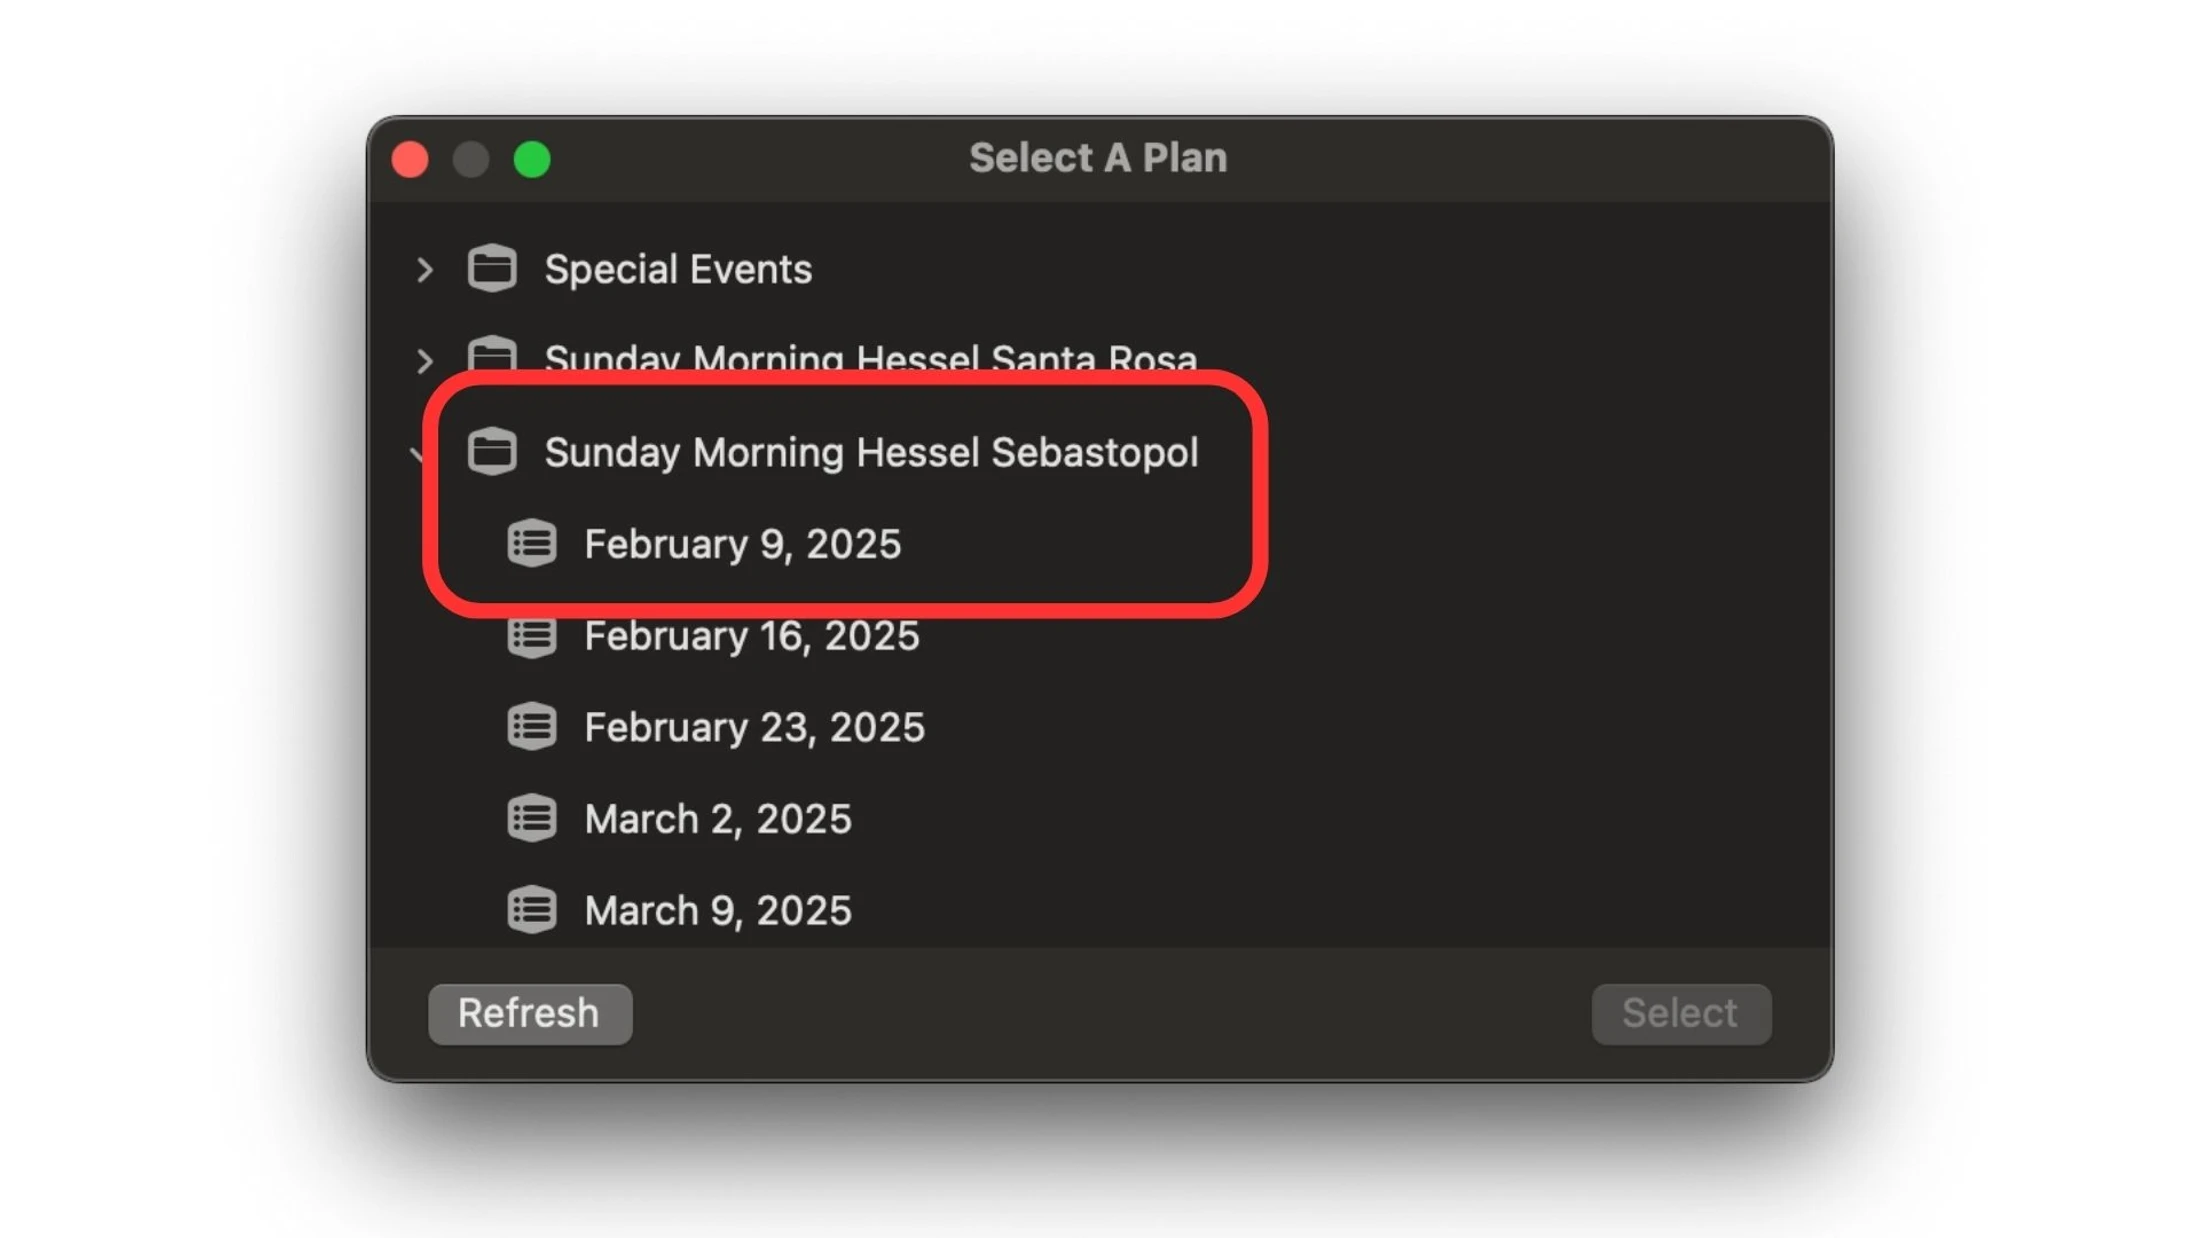
4. In the next window select the appropriate plan and date to import the service from planning center
How To Add A Service Playlist
How to Add Sermon Slides
1. Select the magnifying glass in the “Sermon” Placeholder presentation
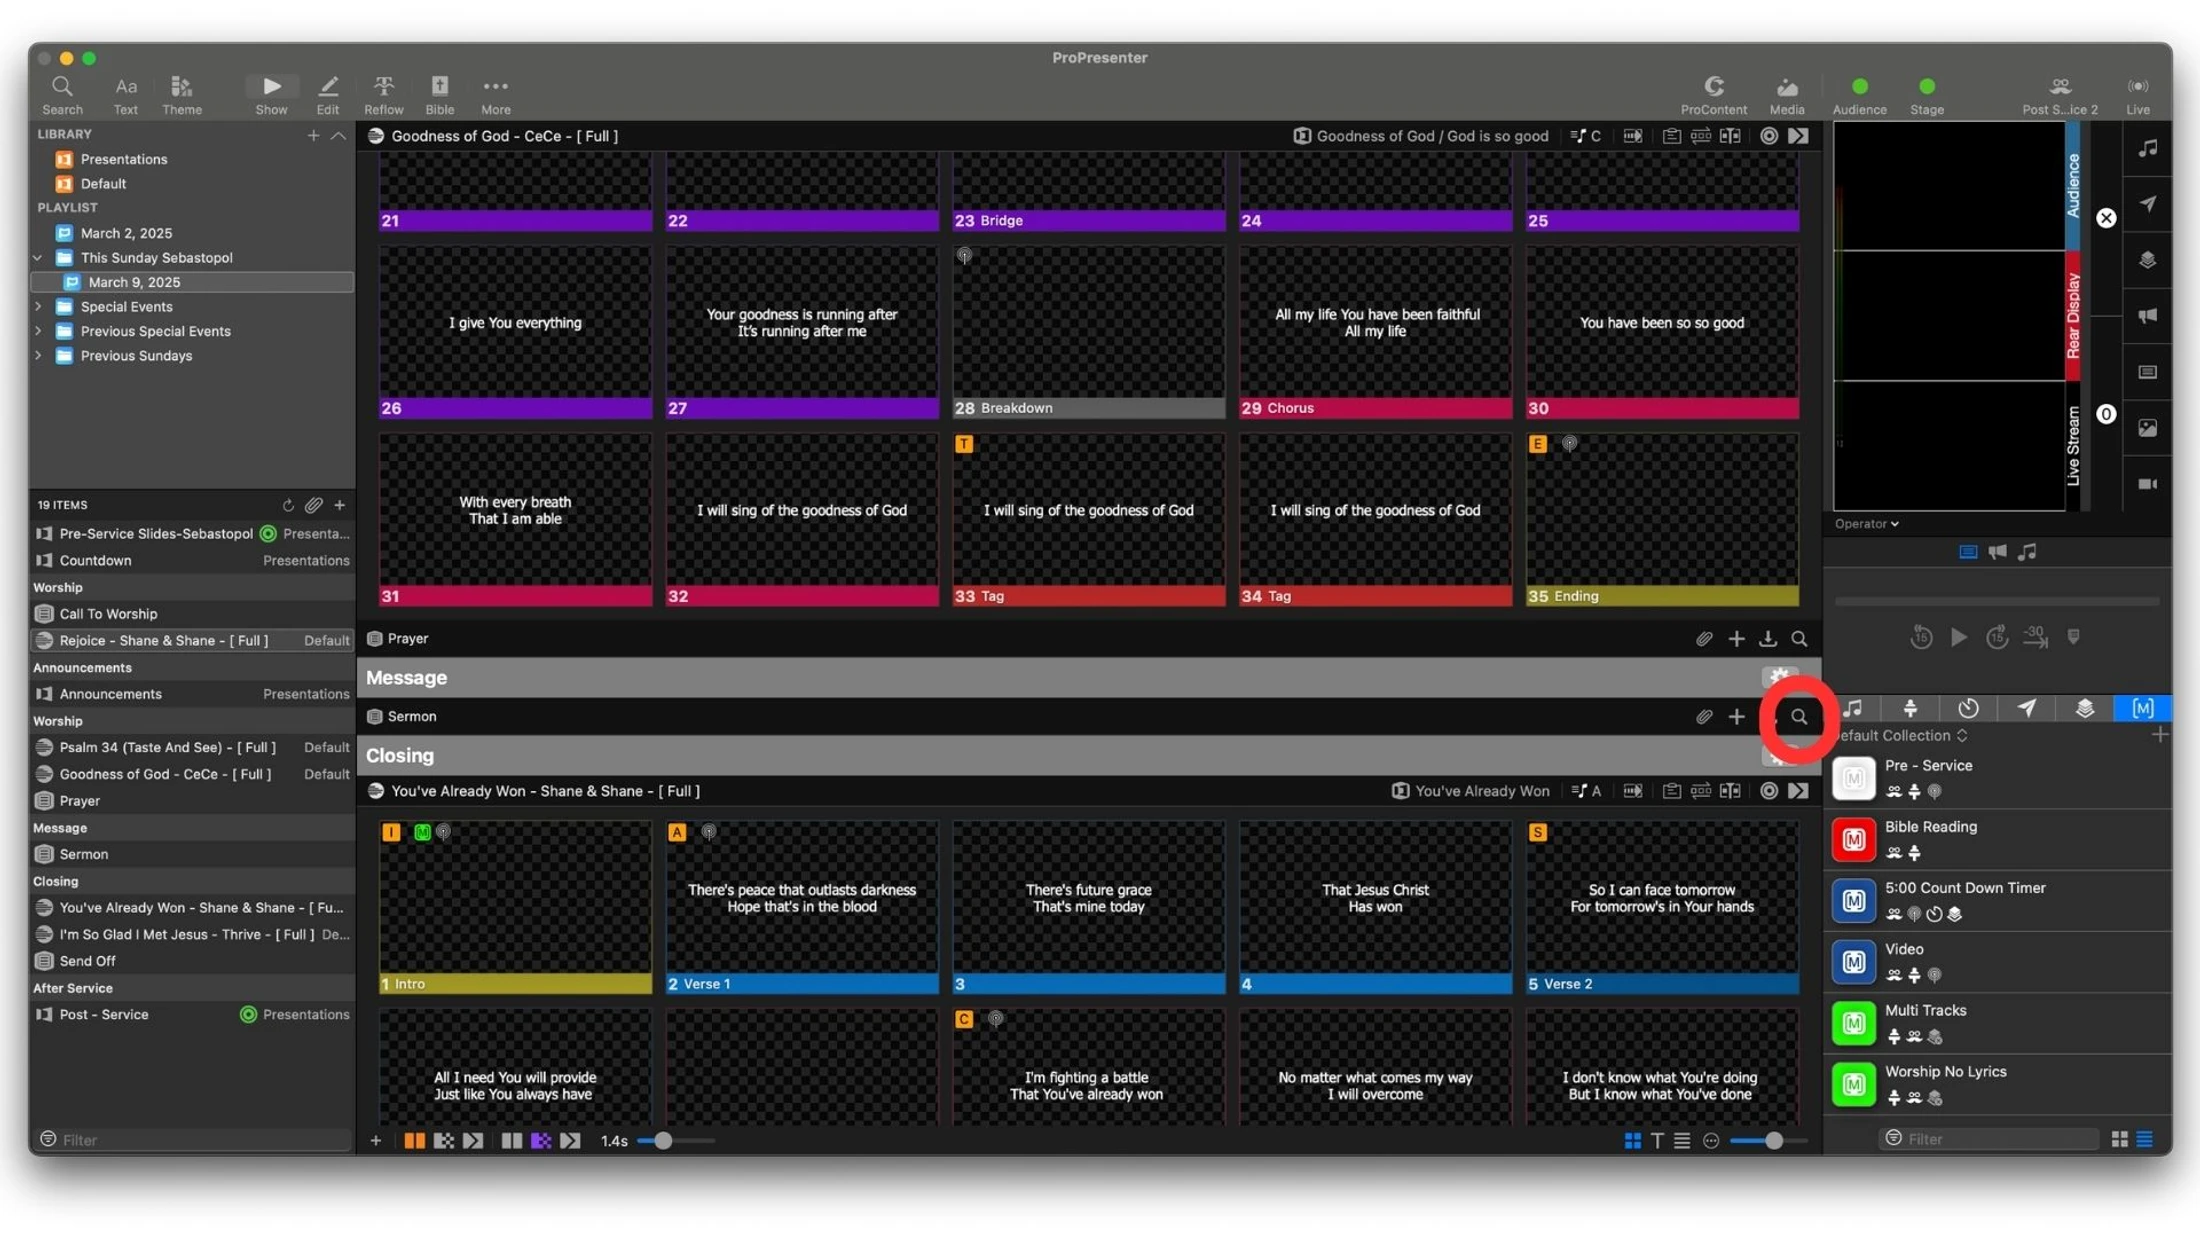
2. Link the “Sermon” presentation to the palceholder
3. Delete previous slide in the presentation
__largepreview__.webp)
4. Open the Powerpoint of the sermon slides
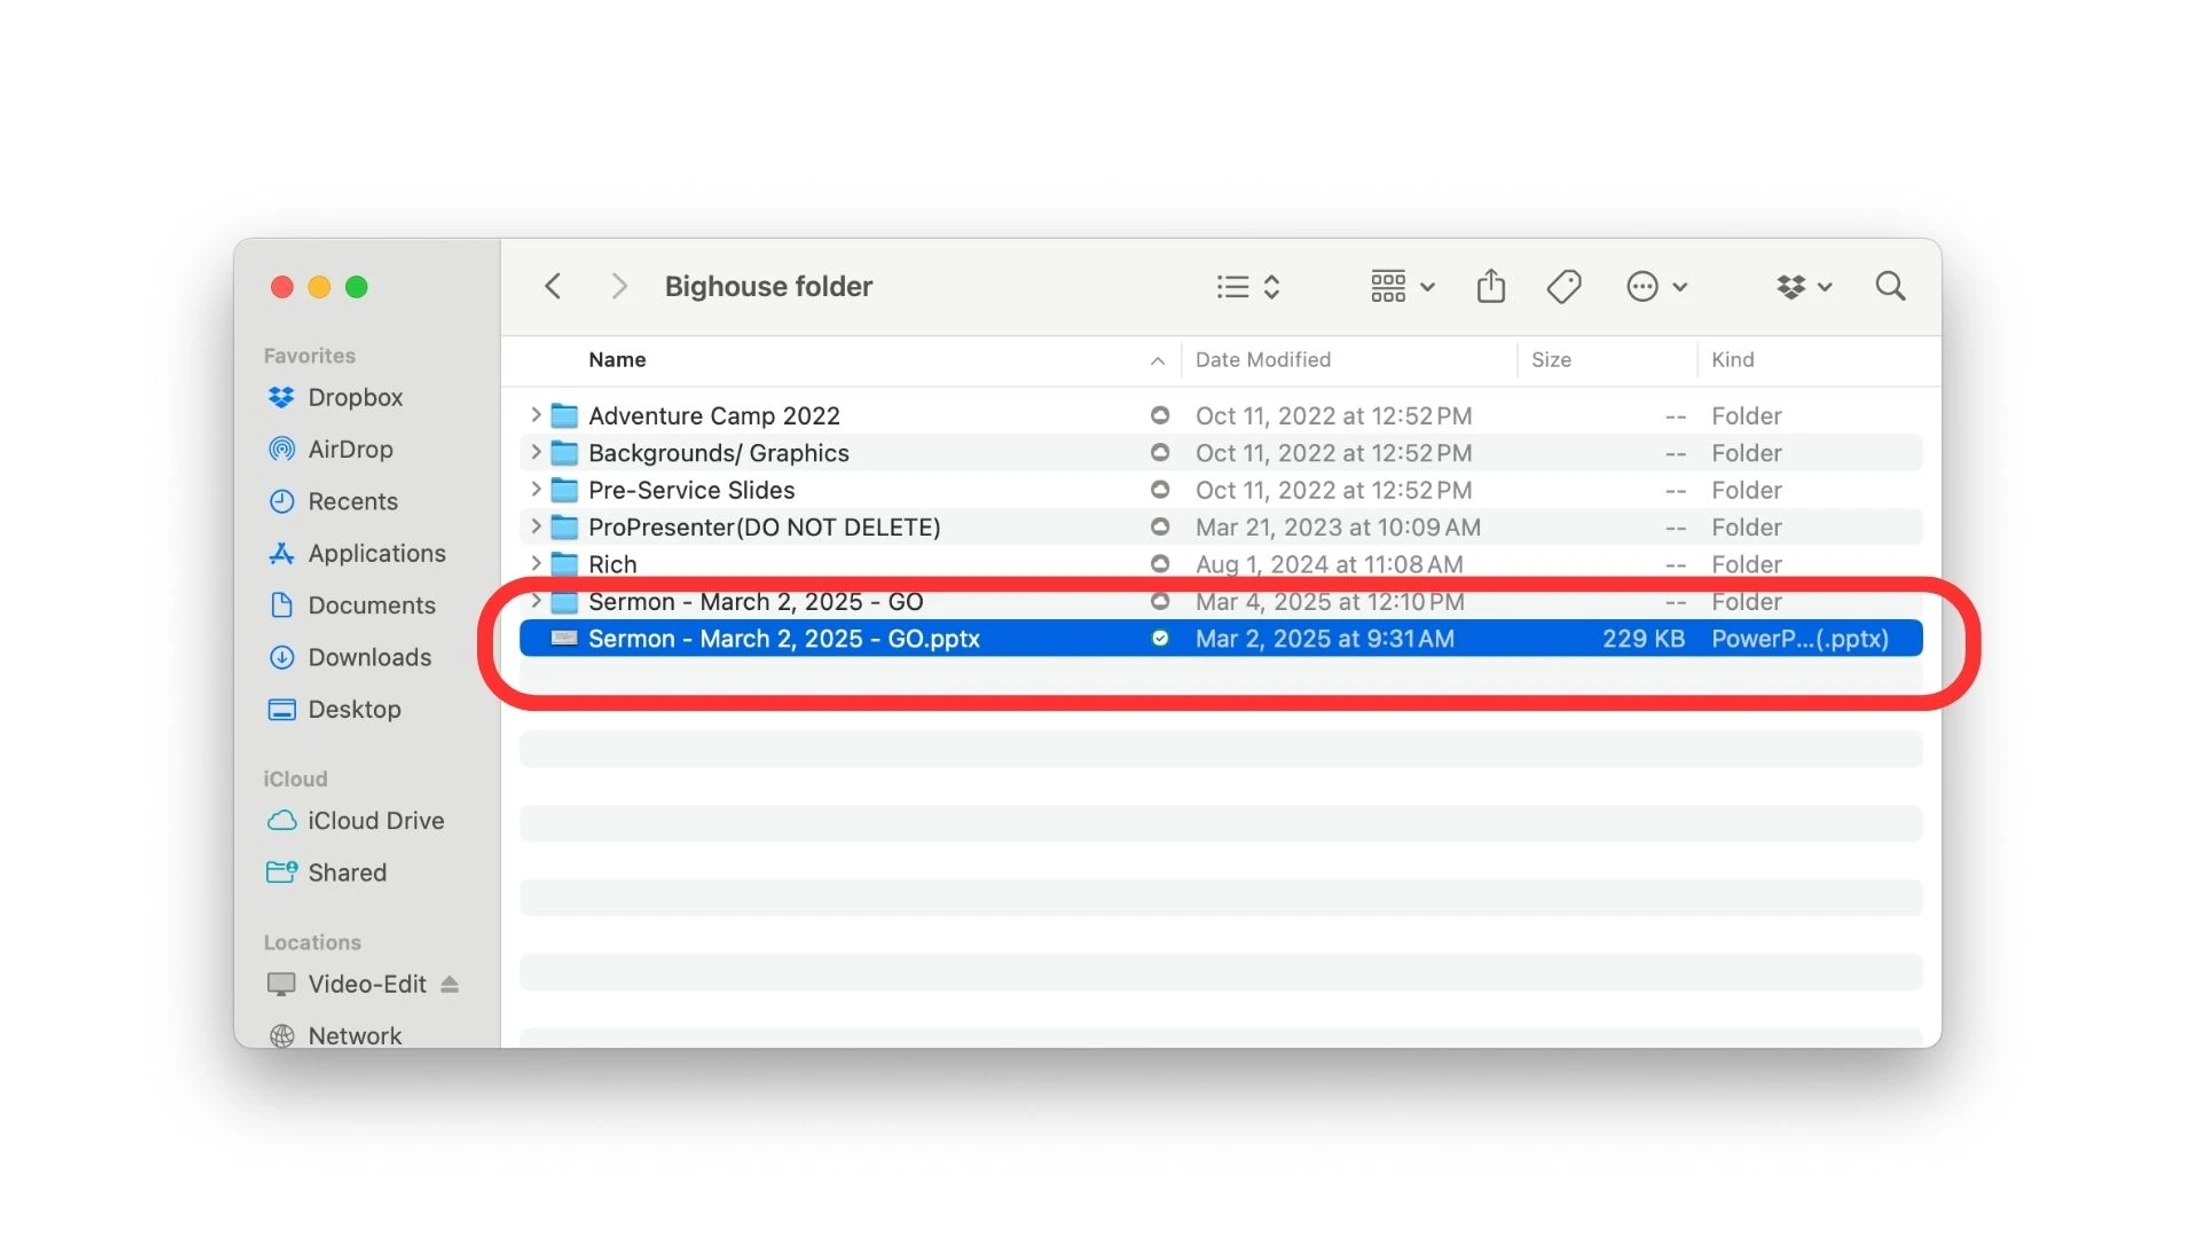
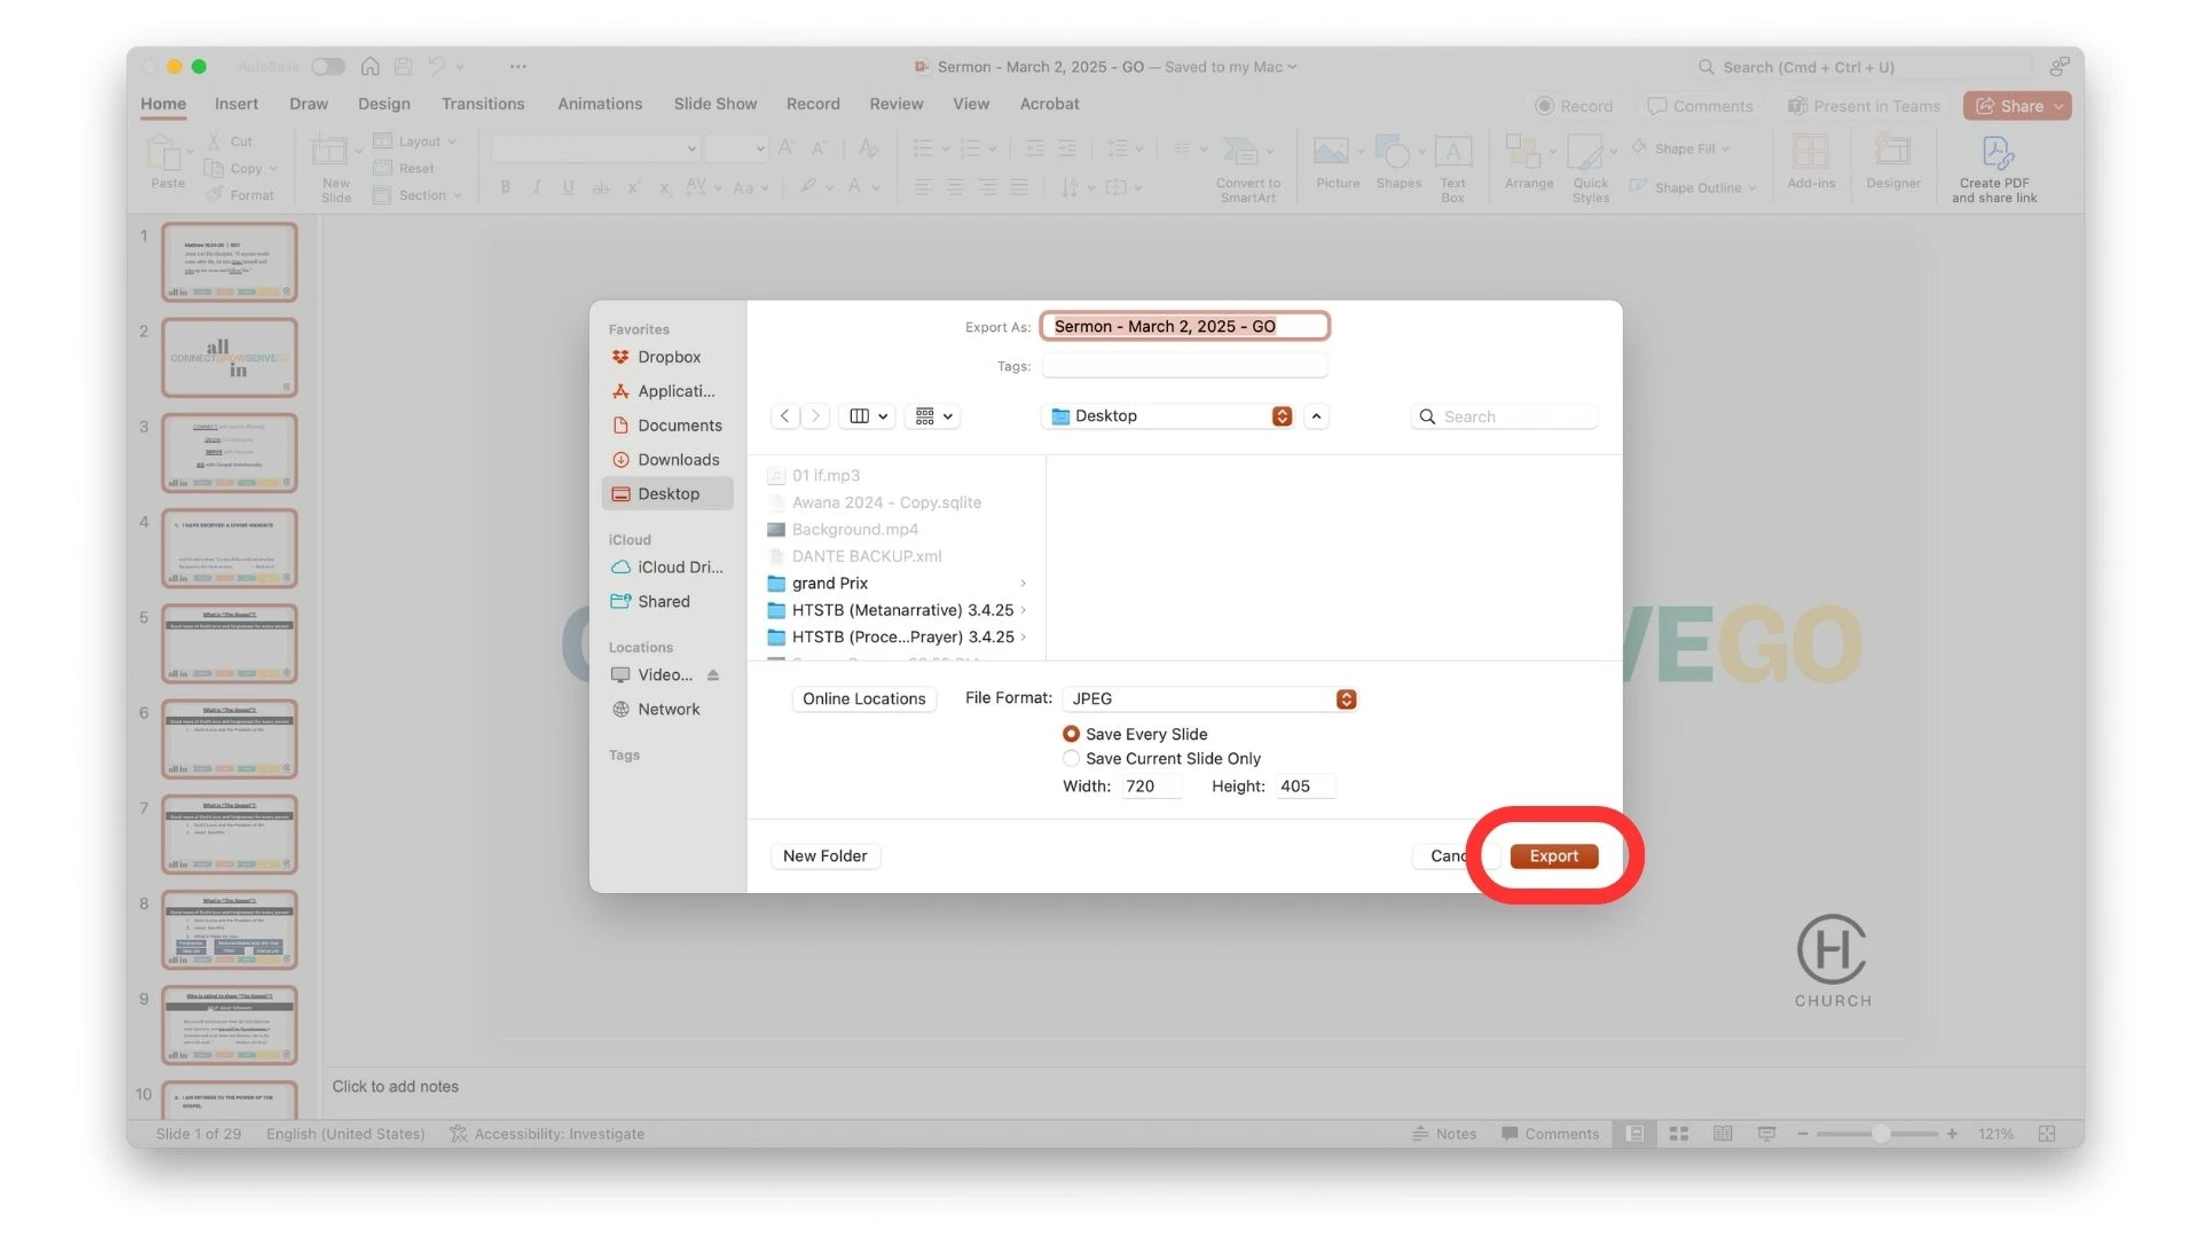
5. Select all slides
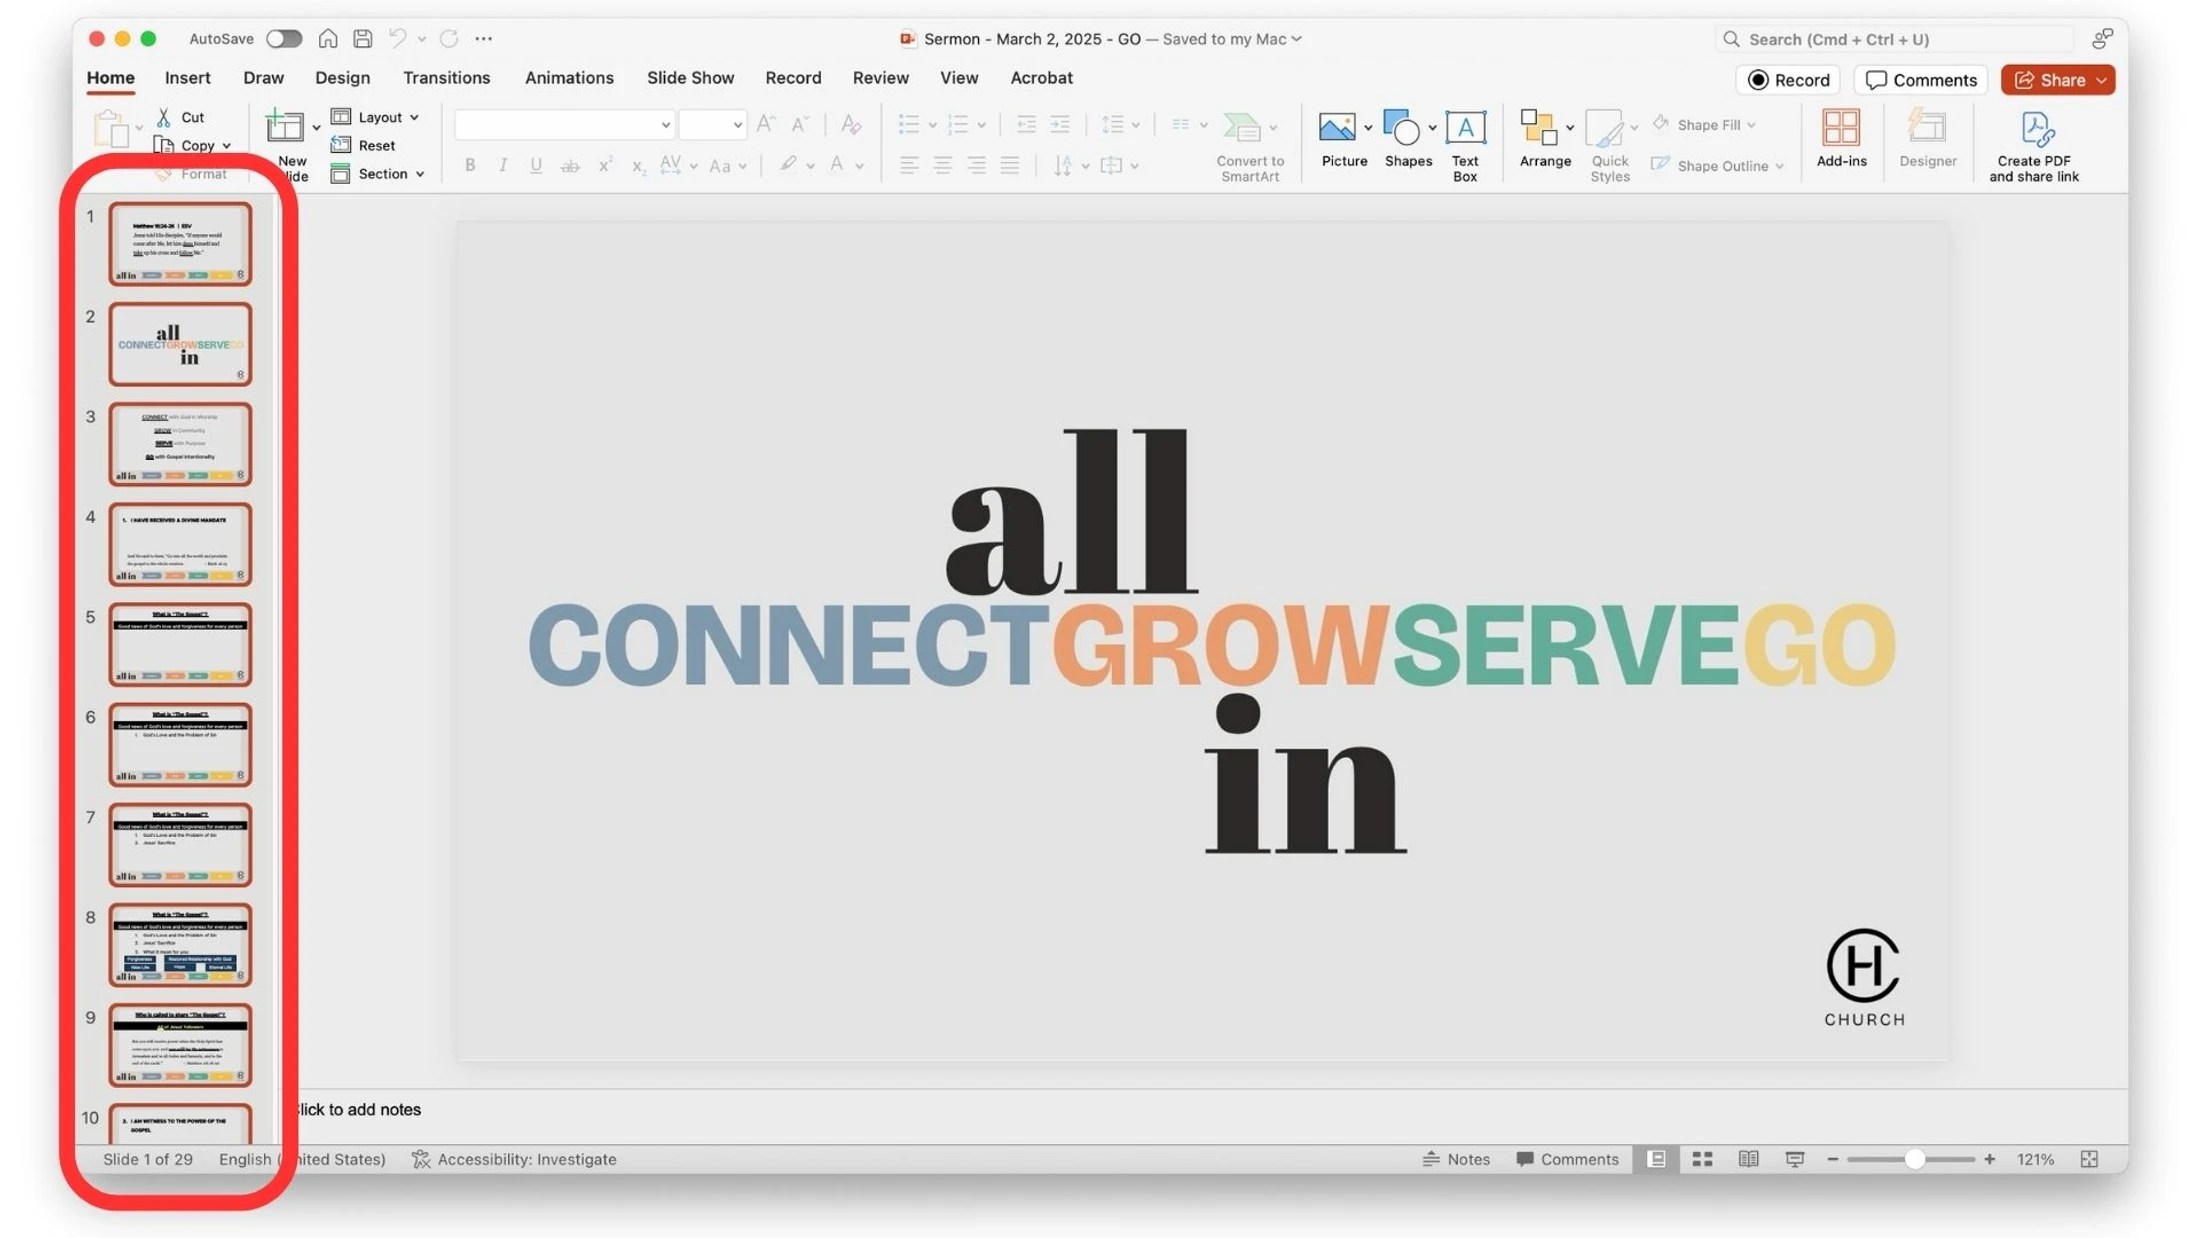
6. Press “File”
7. Press “Export”

8. Make sure the files are saving to the desktop
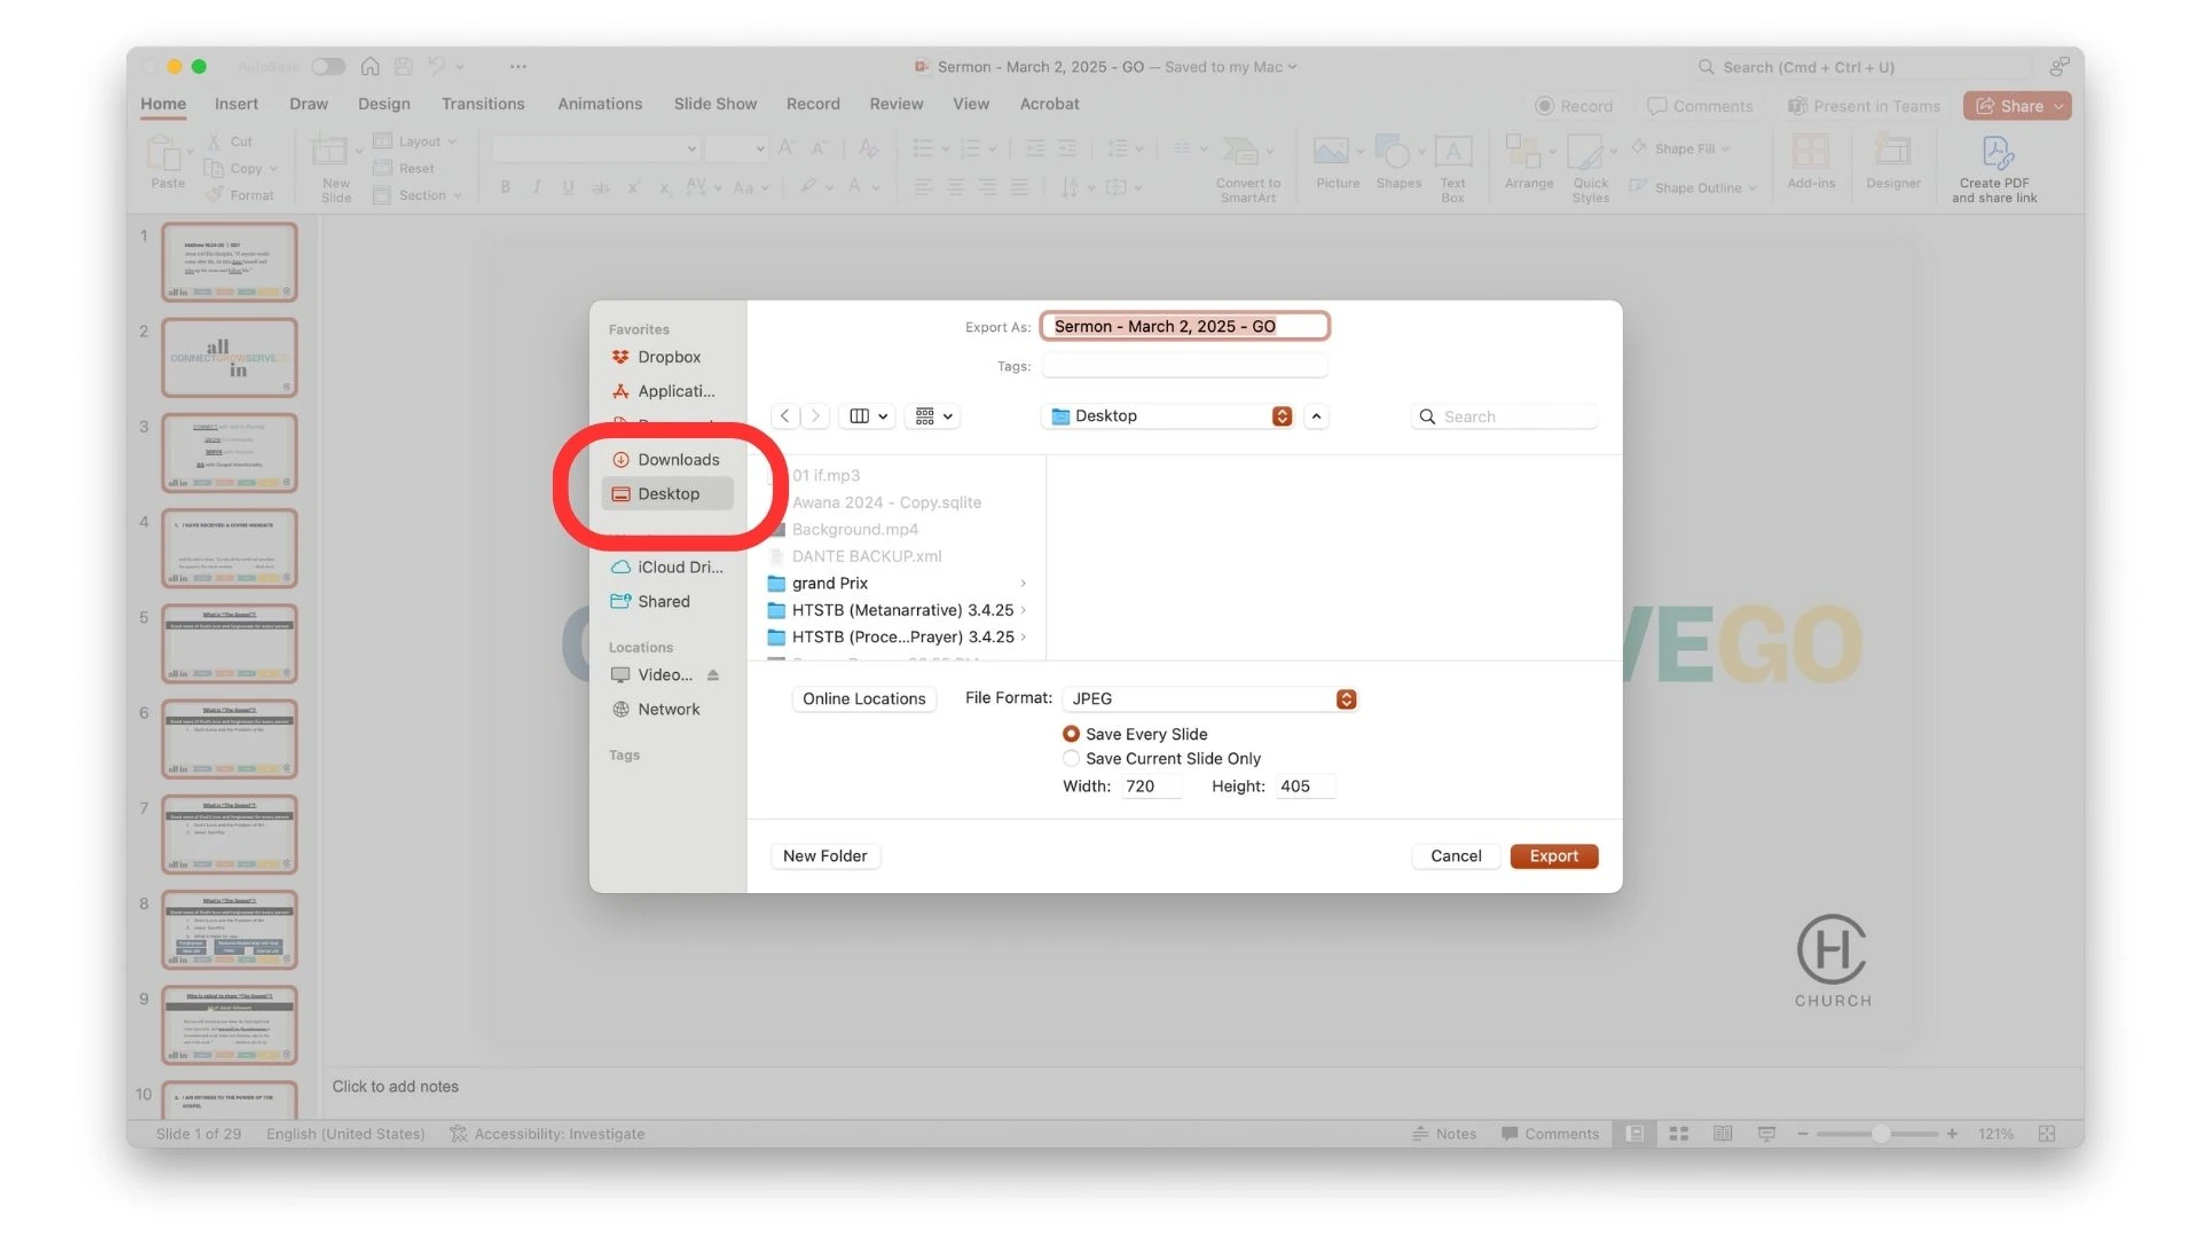
9. Make sure the files are set to “JPEG”
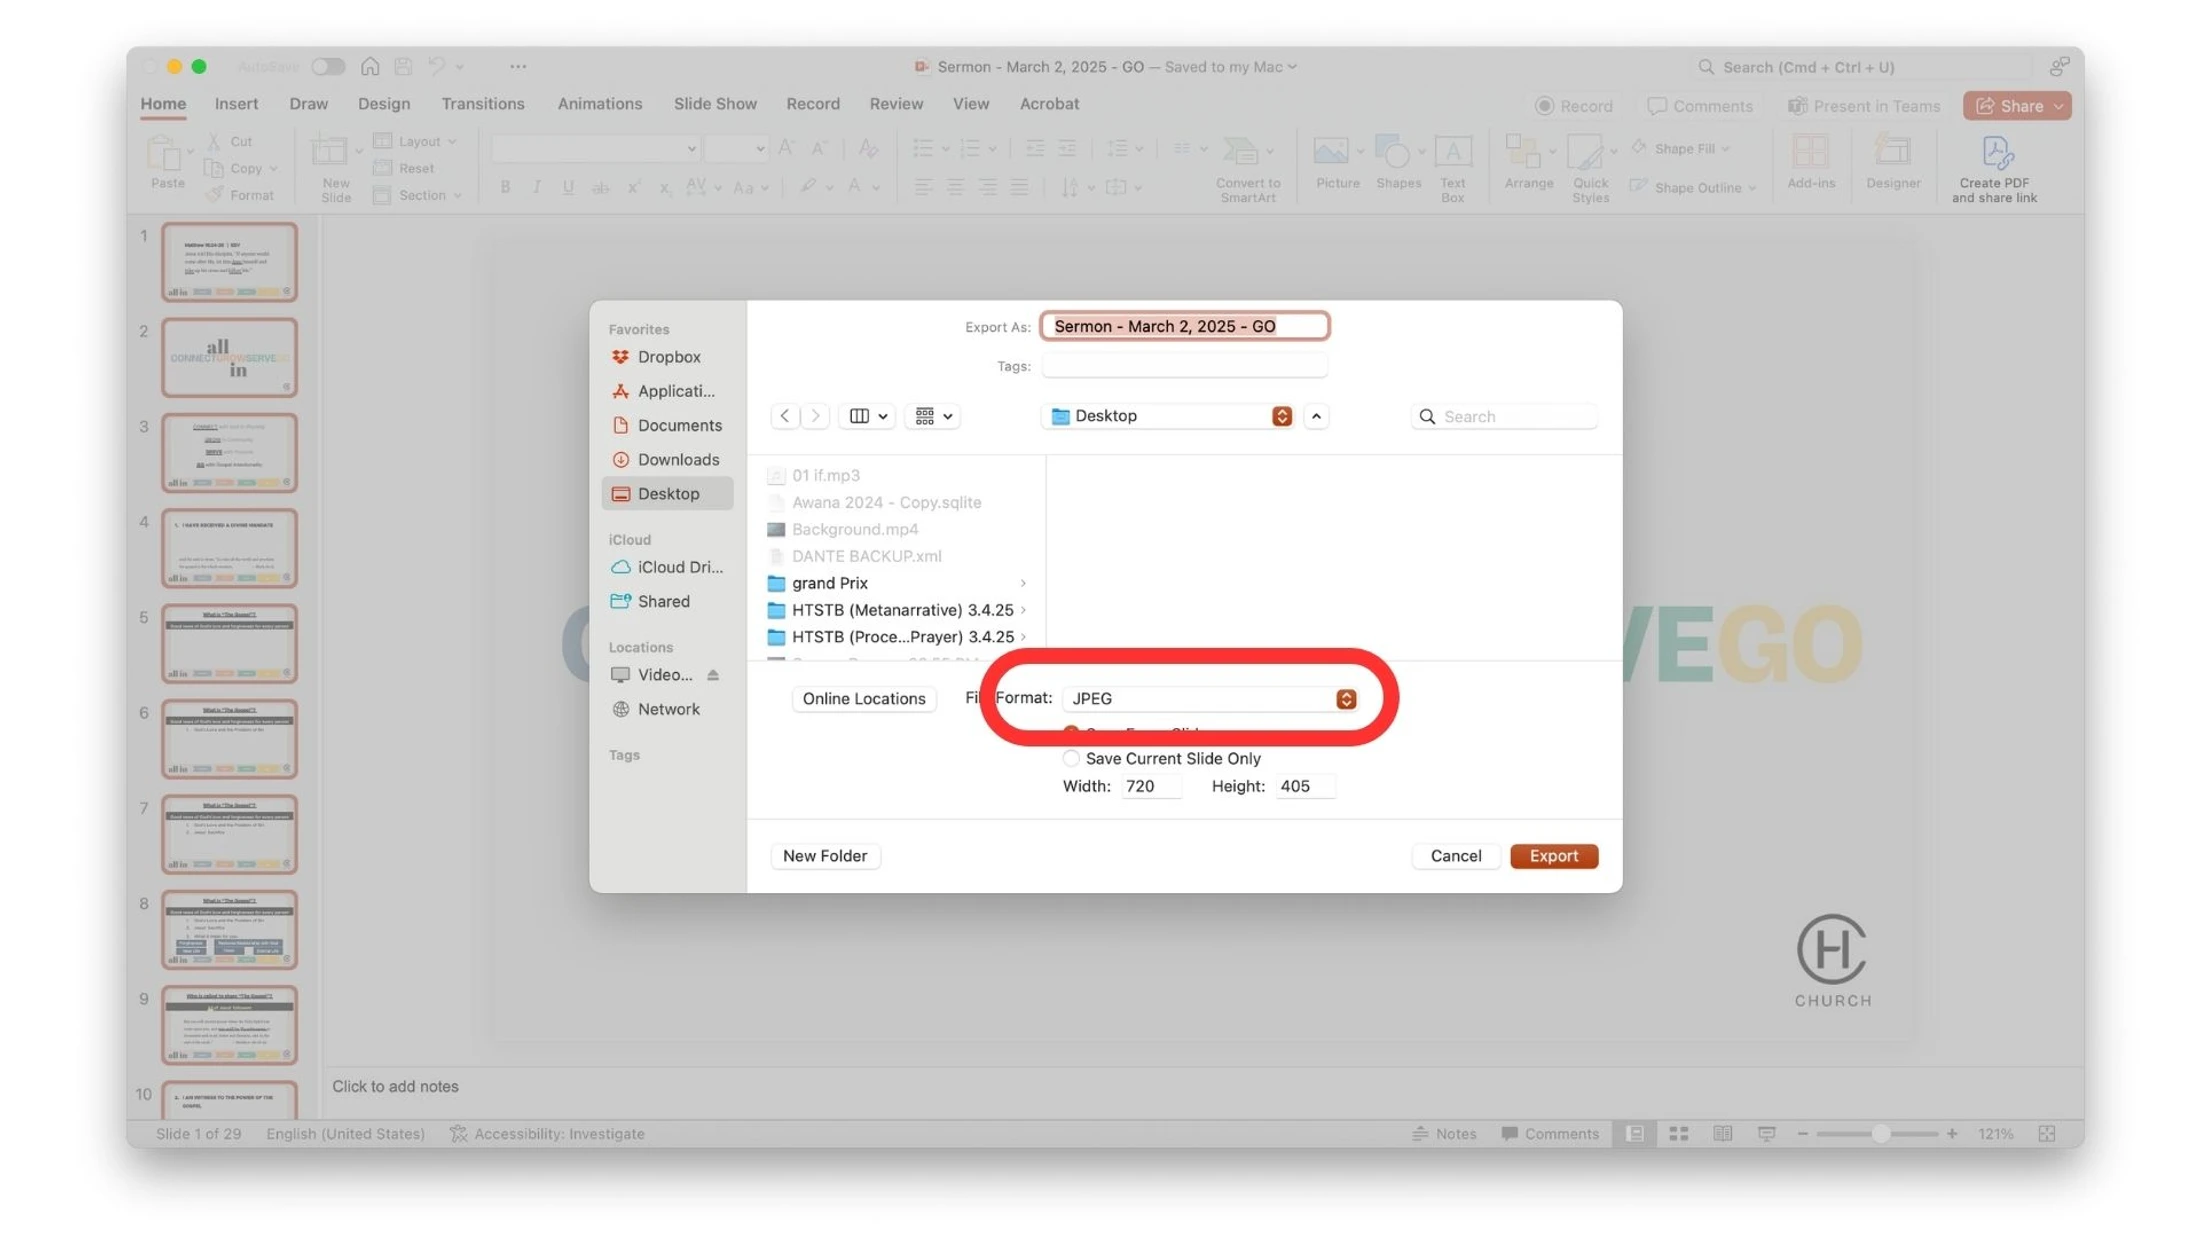
10. Press “Export”
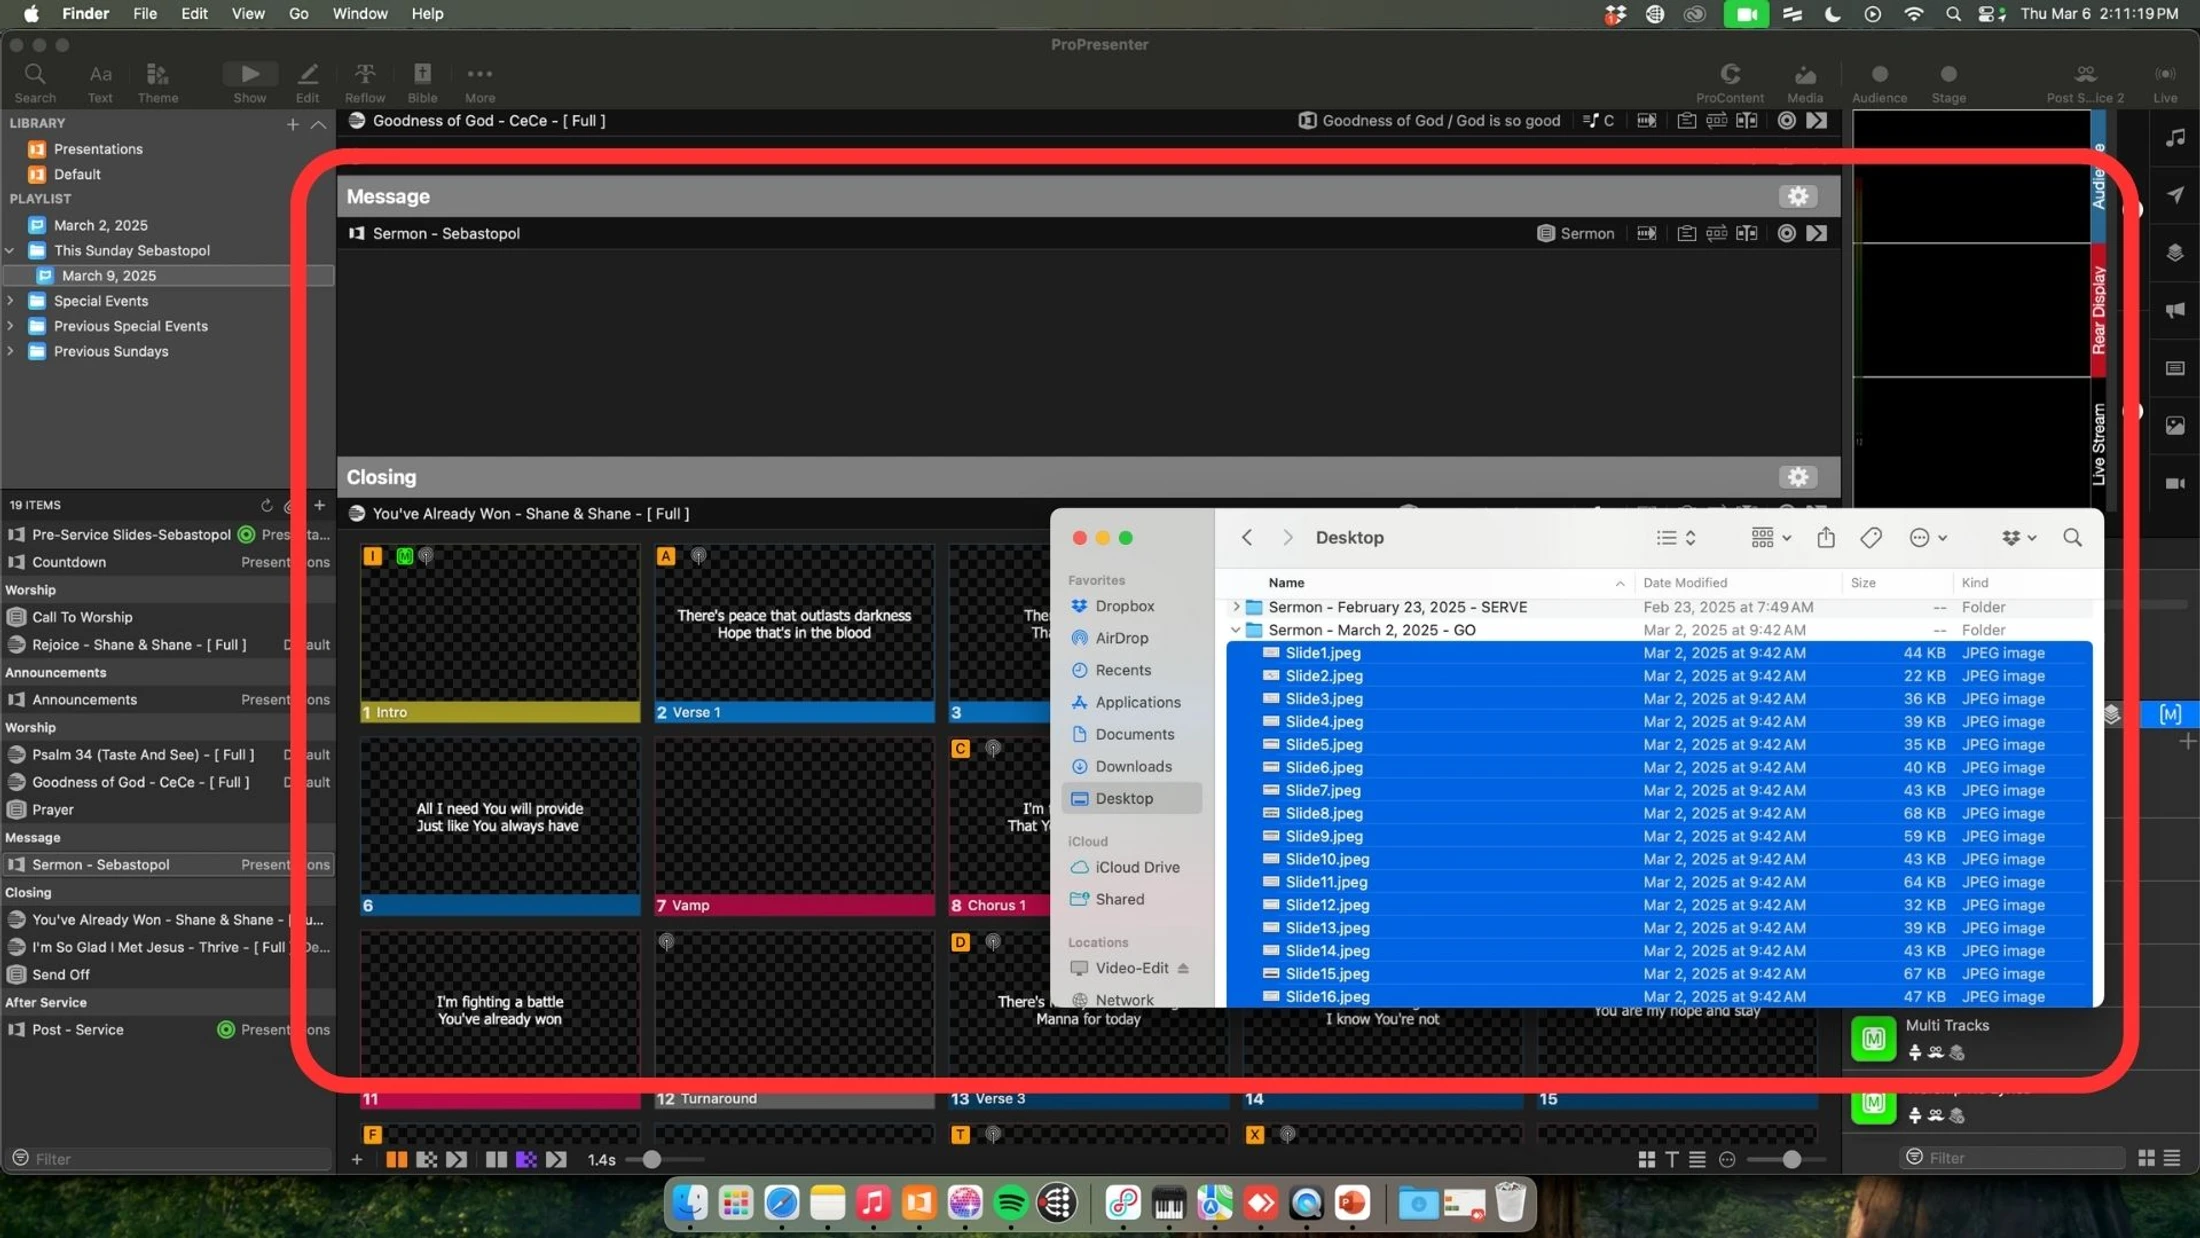
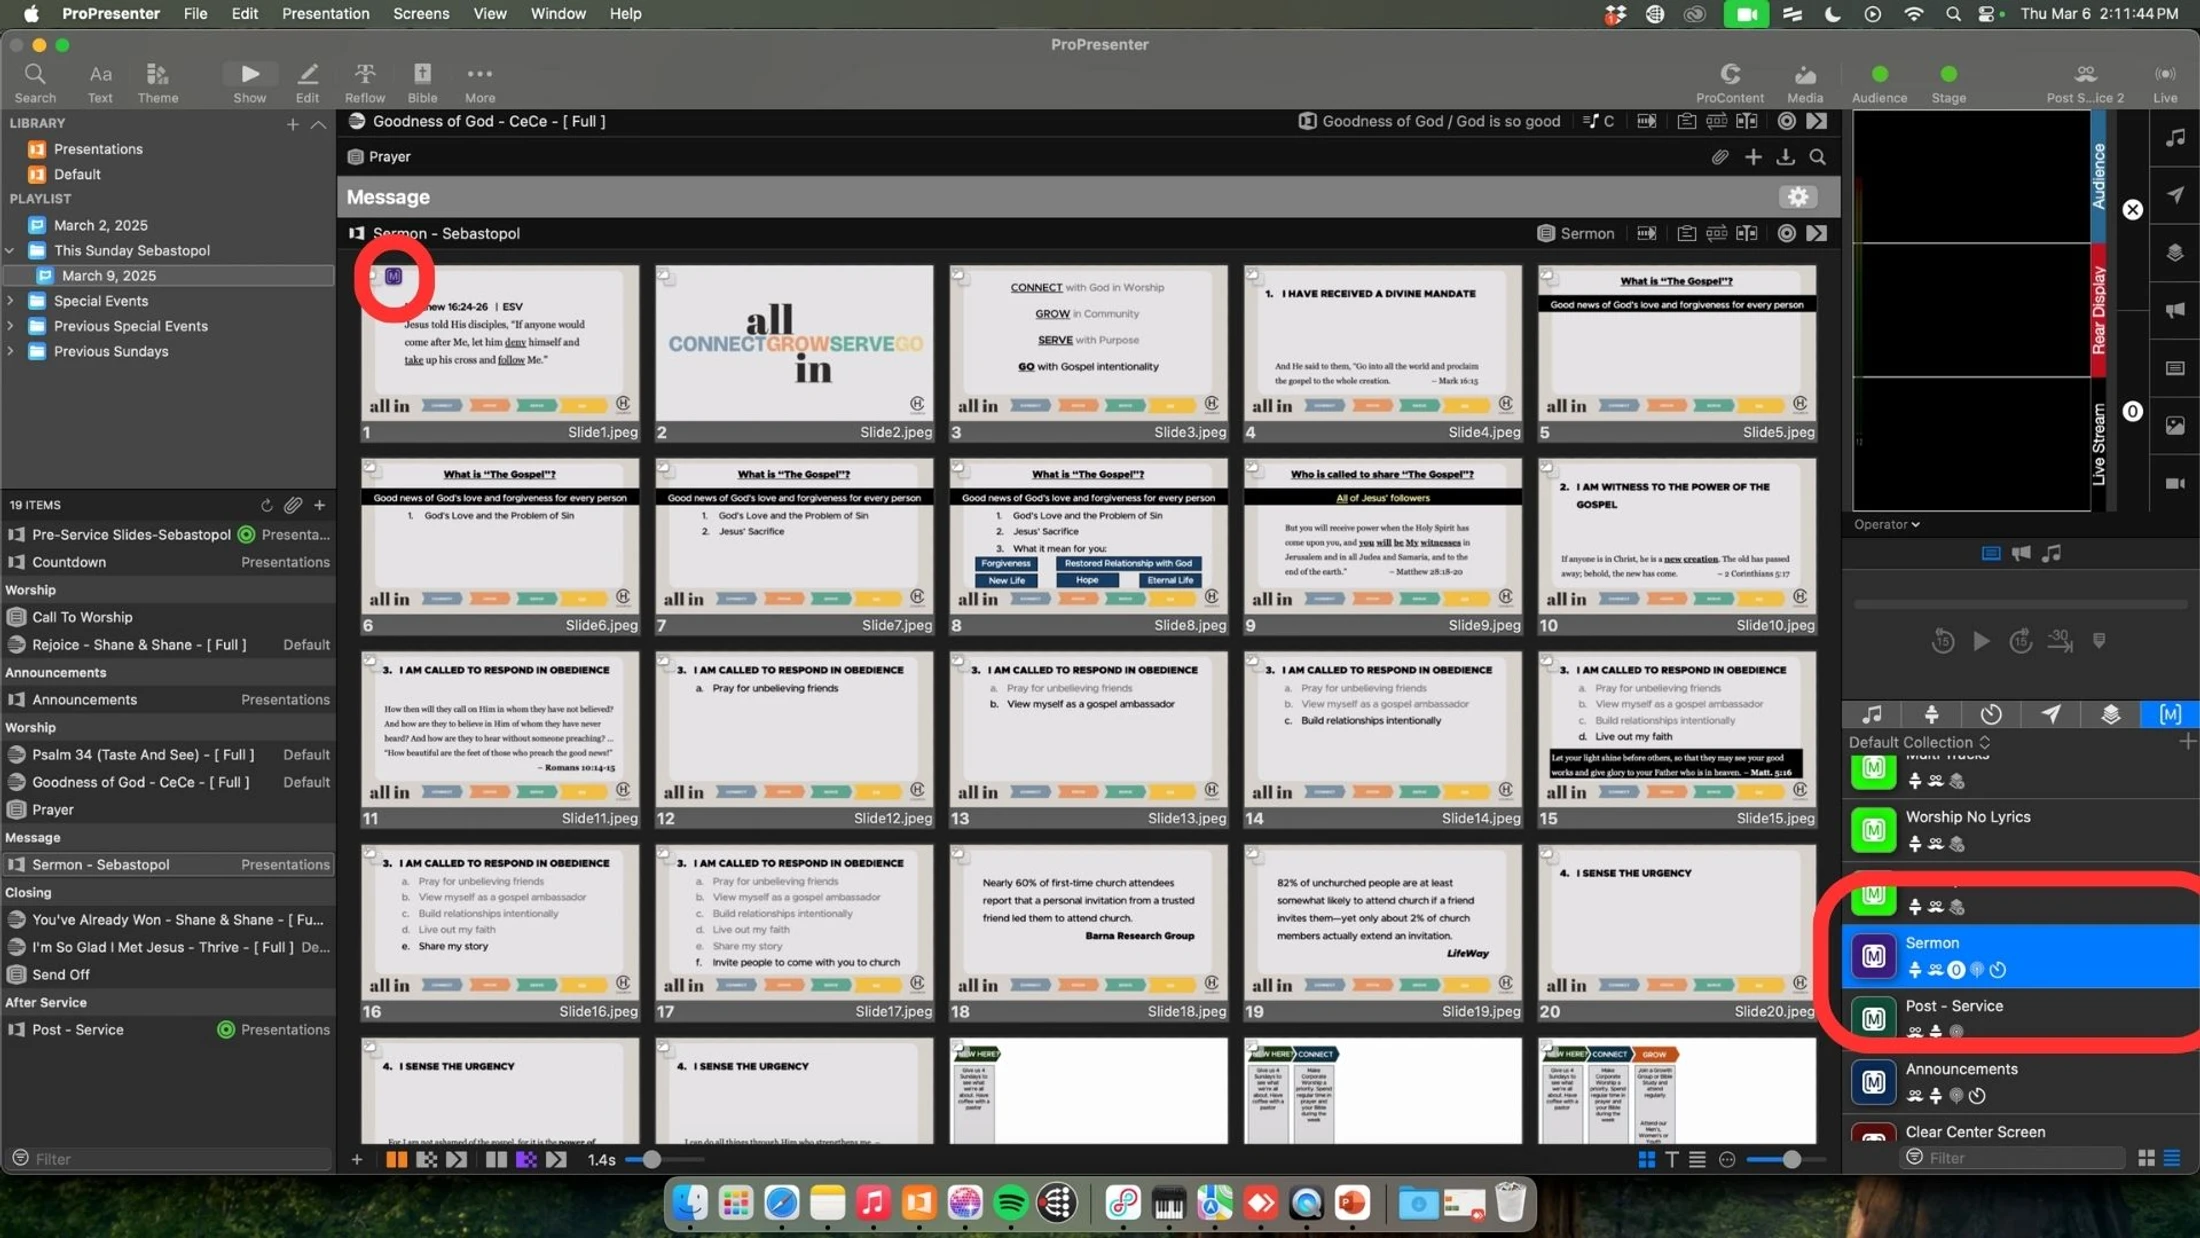
11. In ProPresenter drag and drop all slides in the desktop into the “Sermon” Presentation
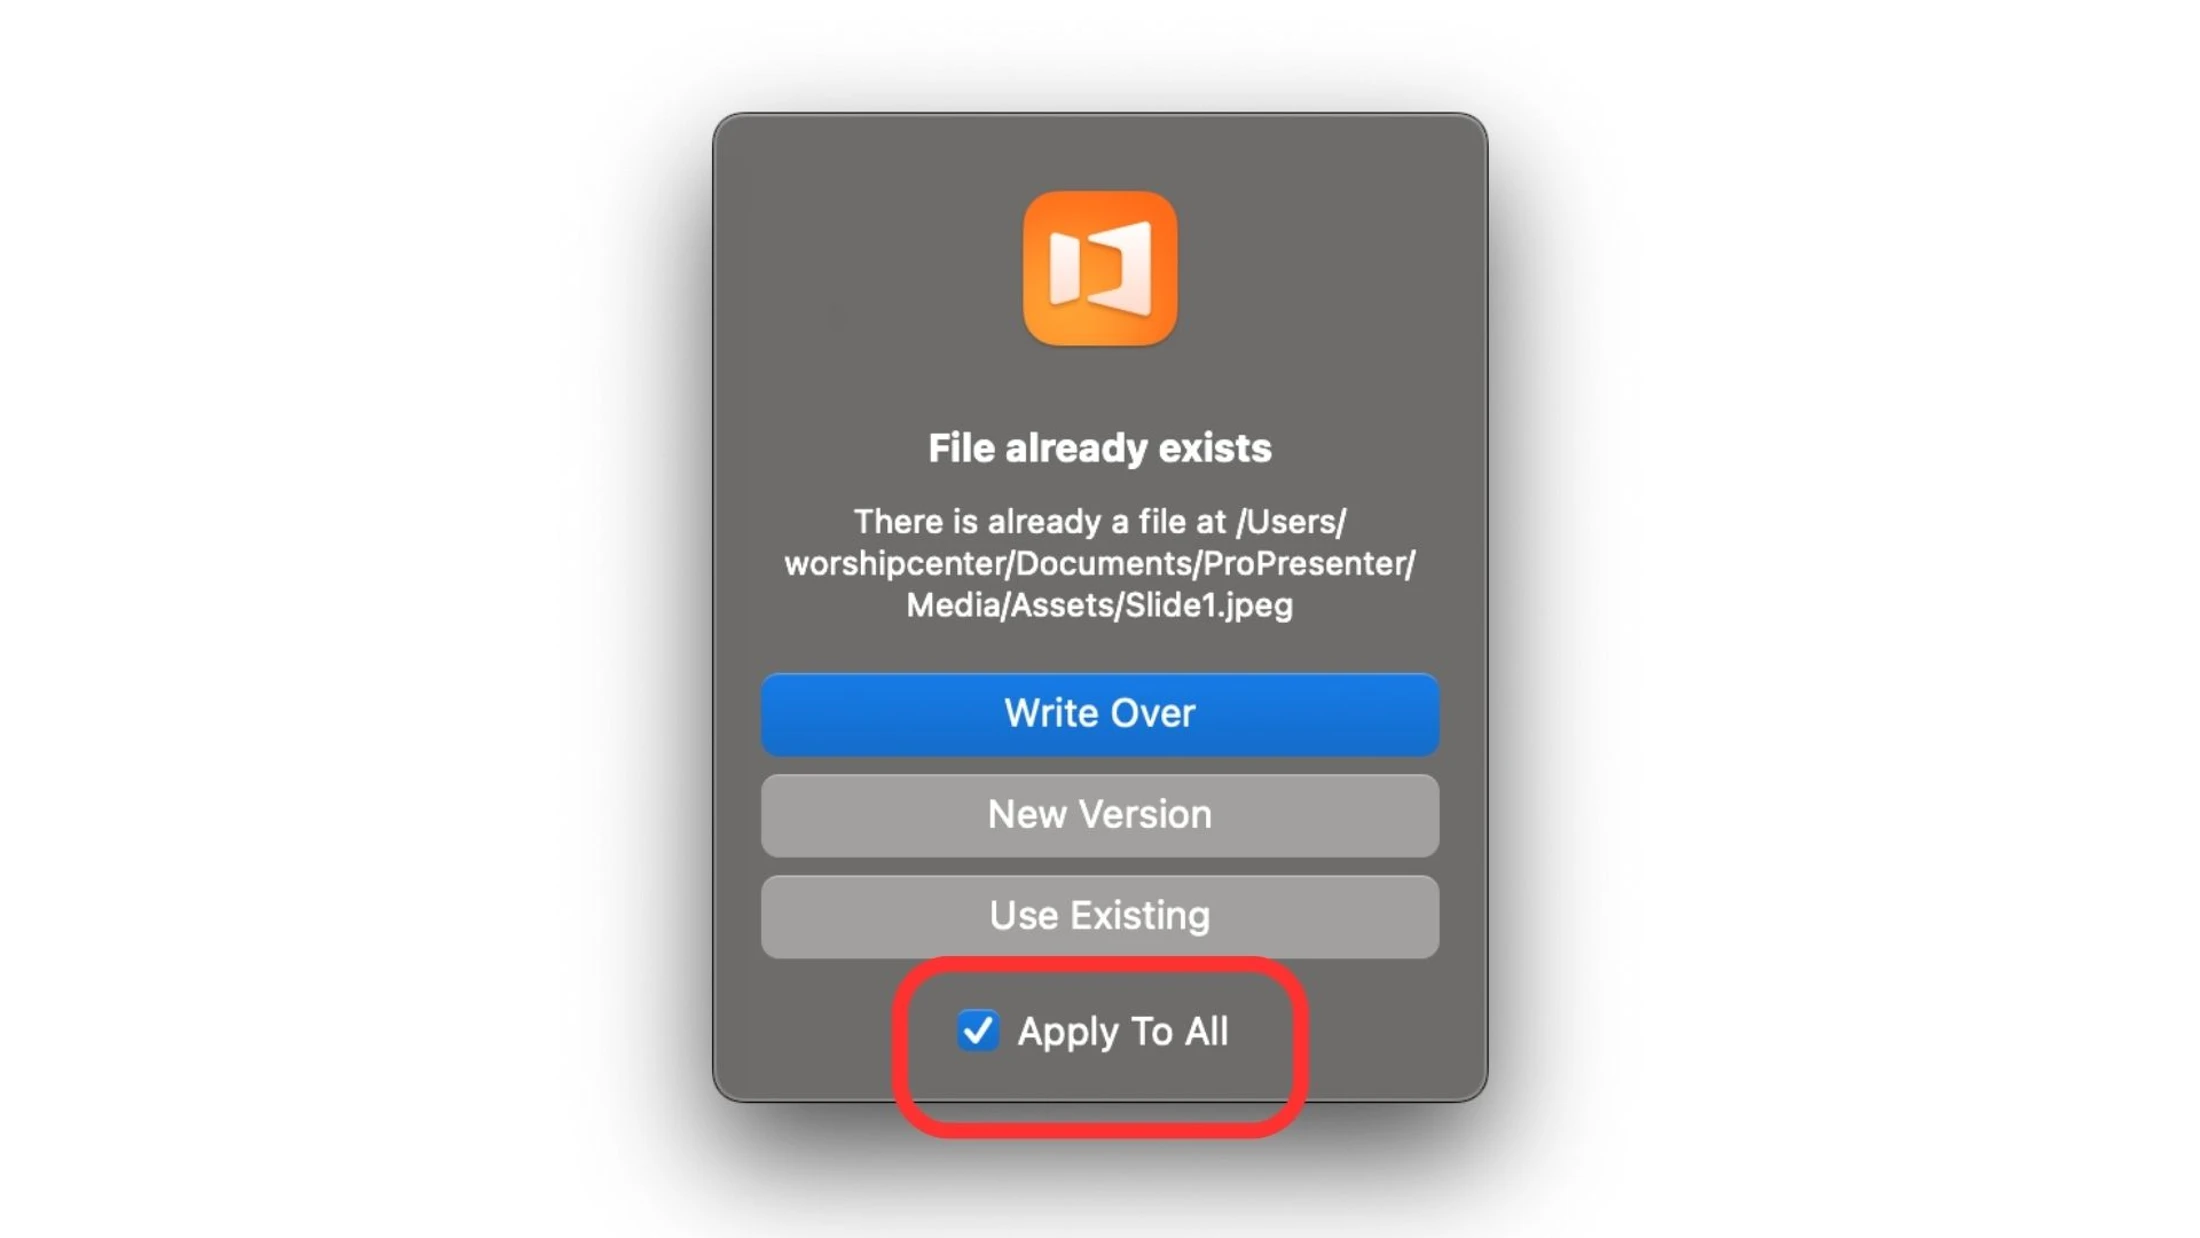
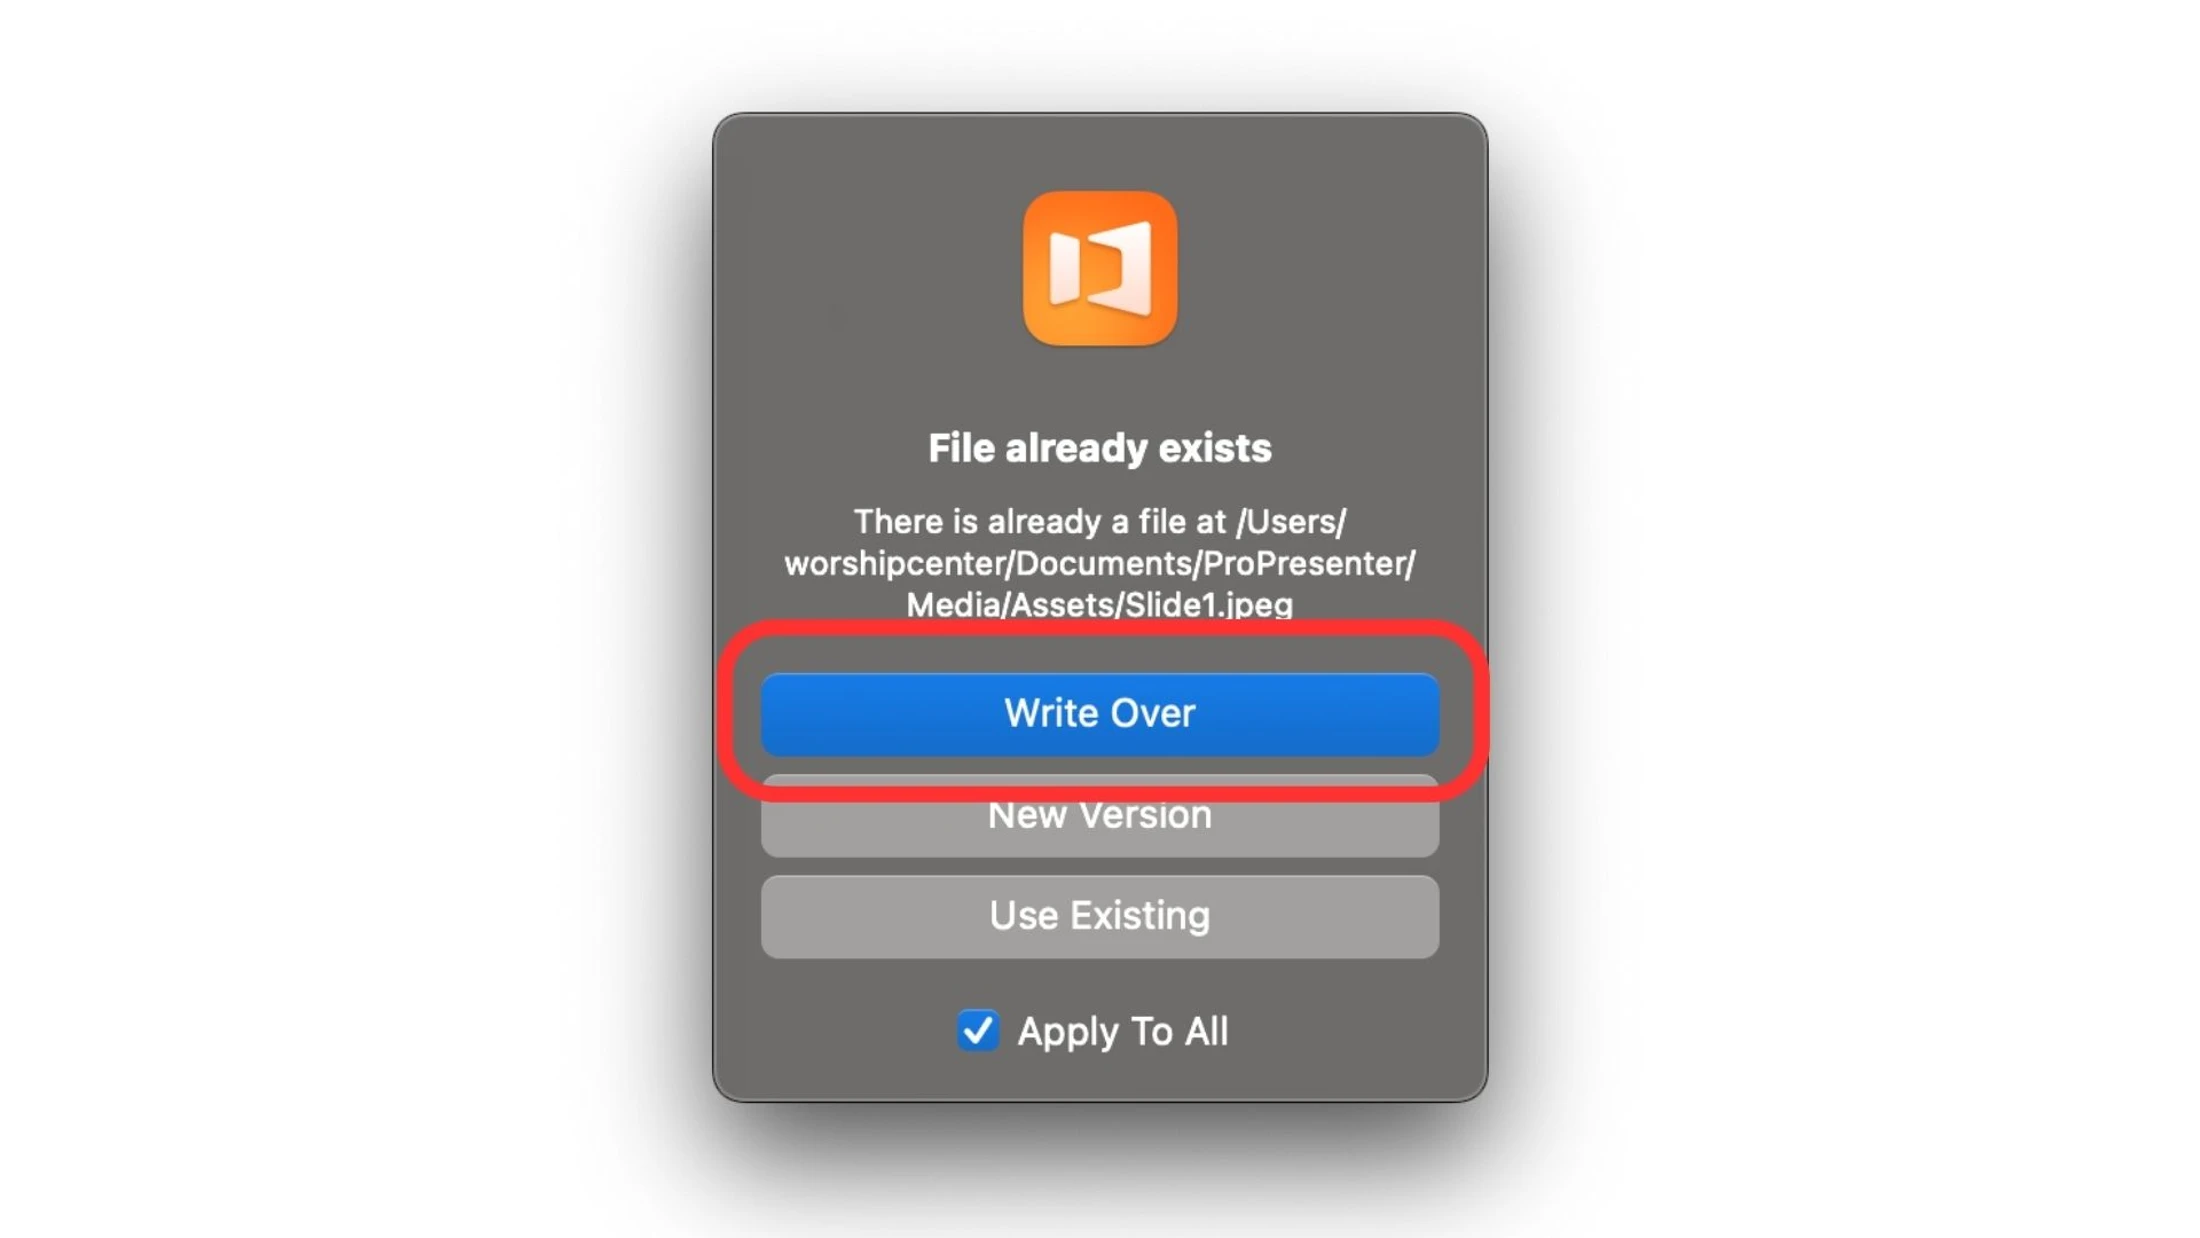
12. In the import window select “Apply to All” and press “Replace”
13. Add “Sermon Macro” to the first slide of the presentation
How To Add Media to ProPresenter
Lightkey
Overview
1. Presets
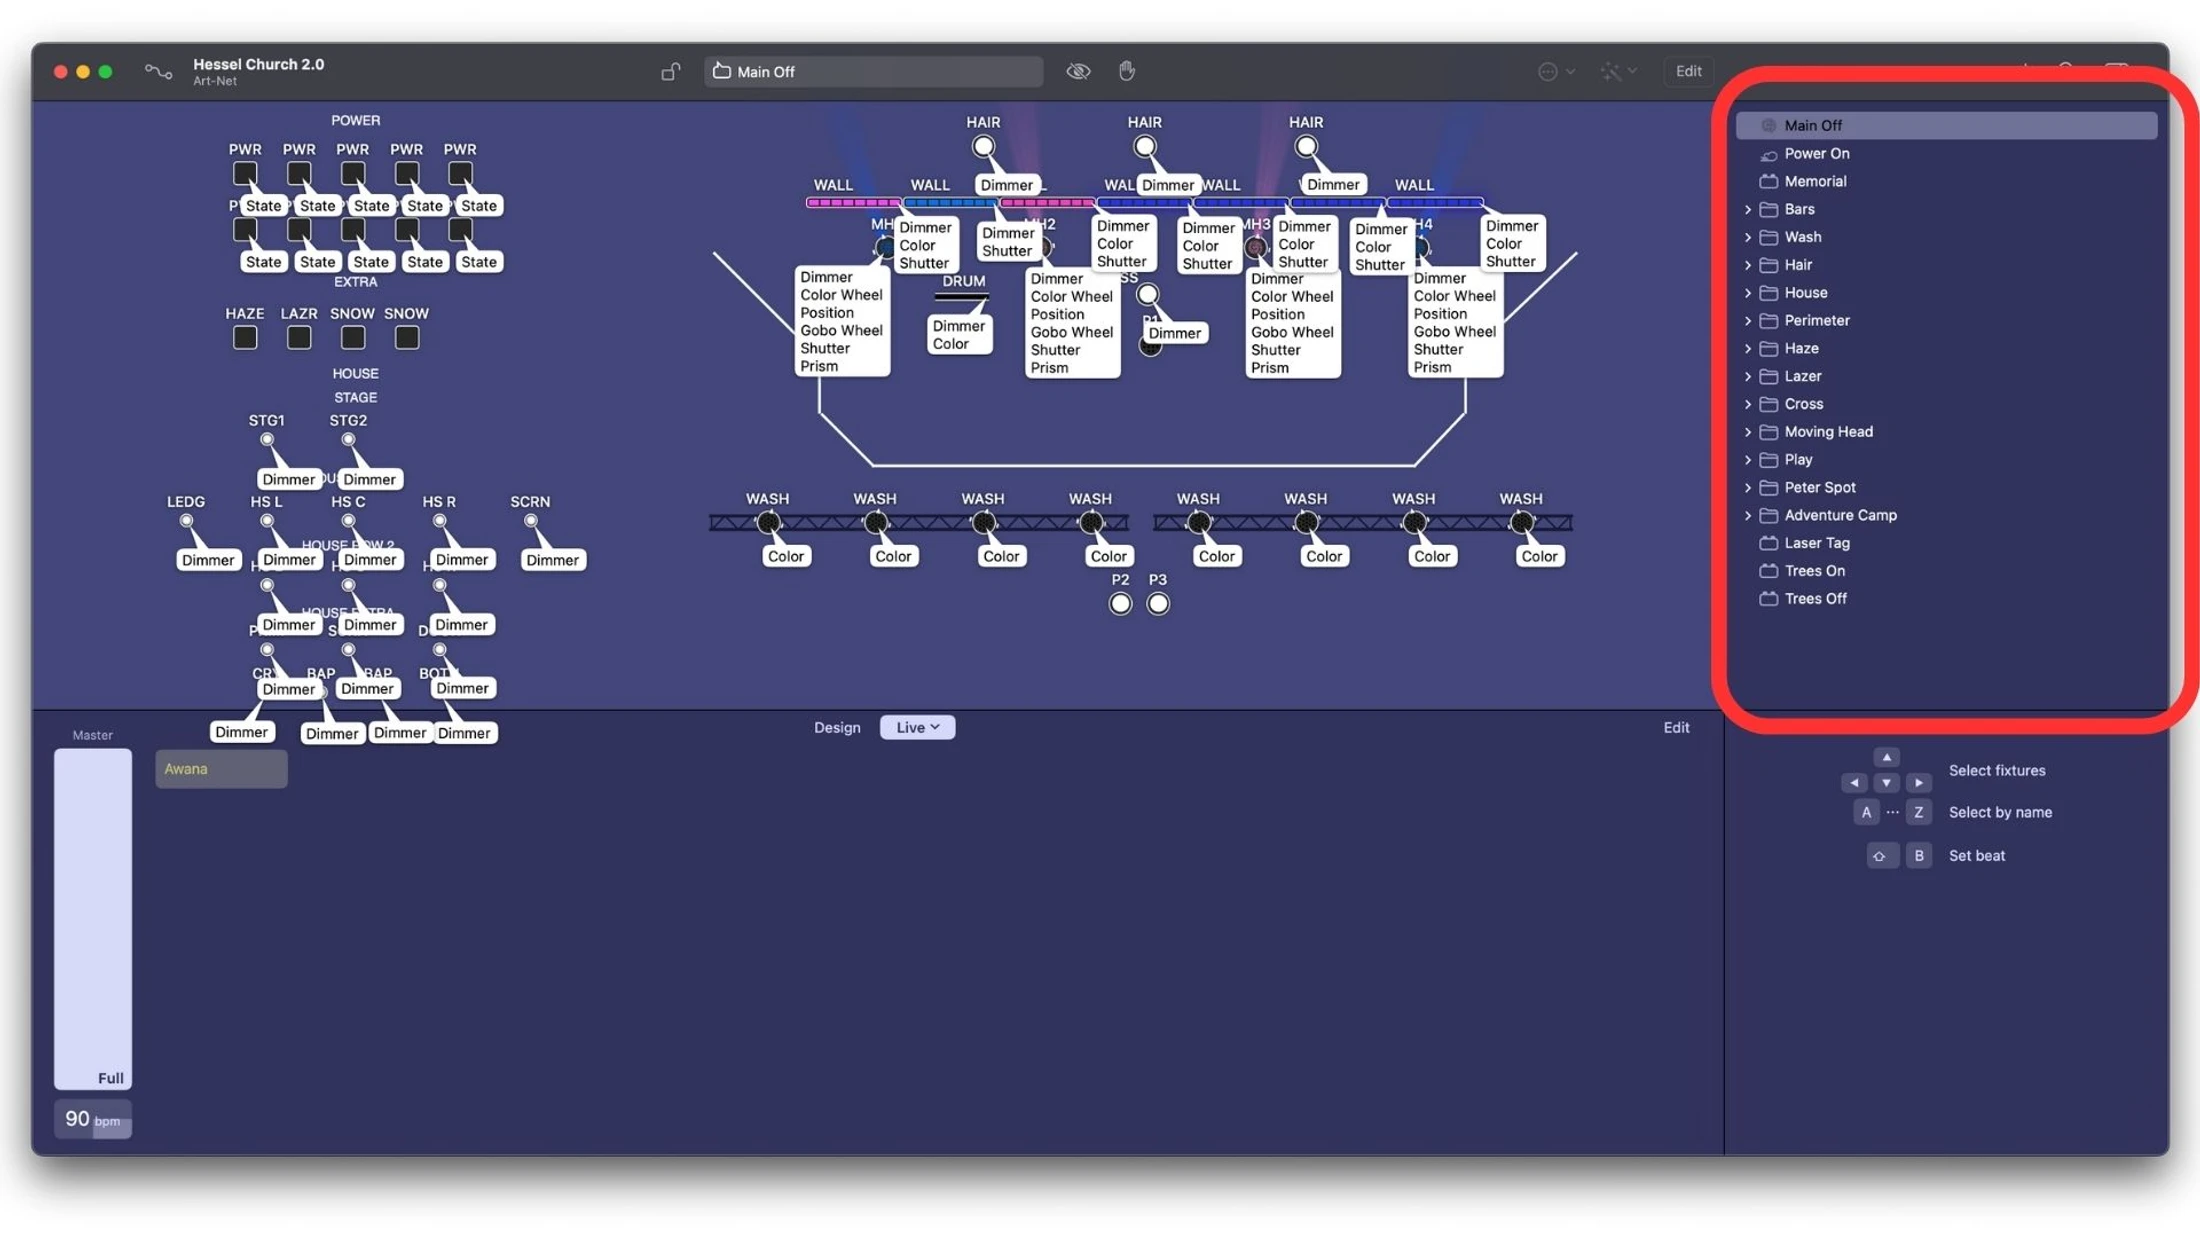
- Lights
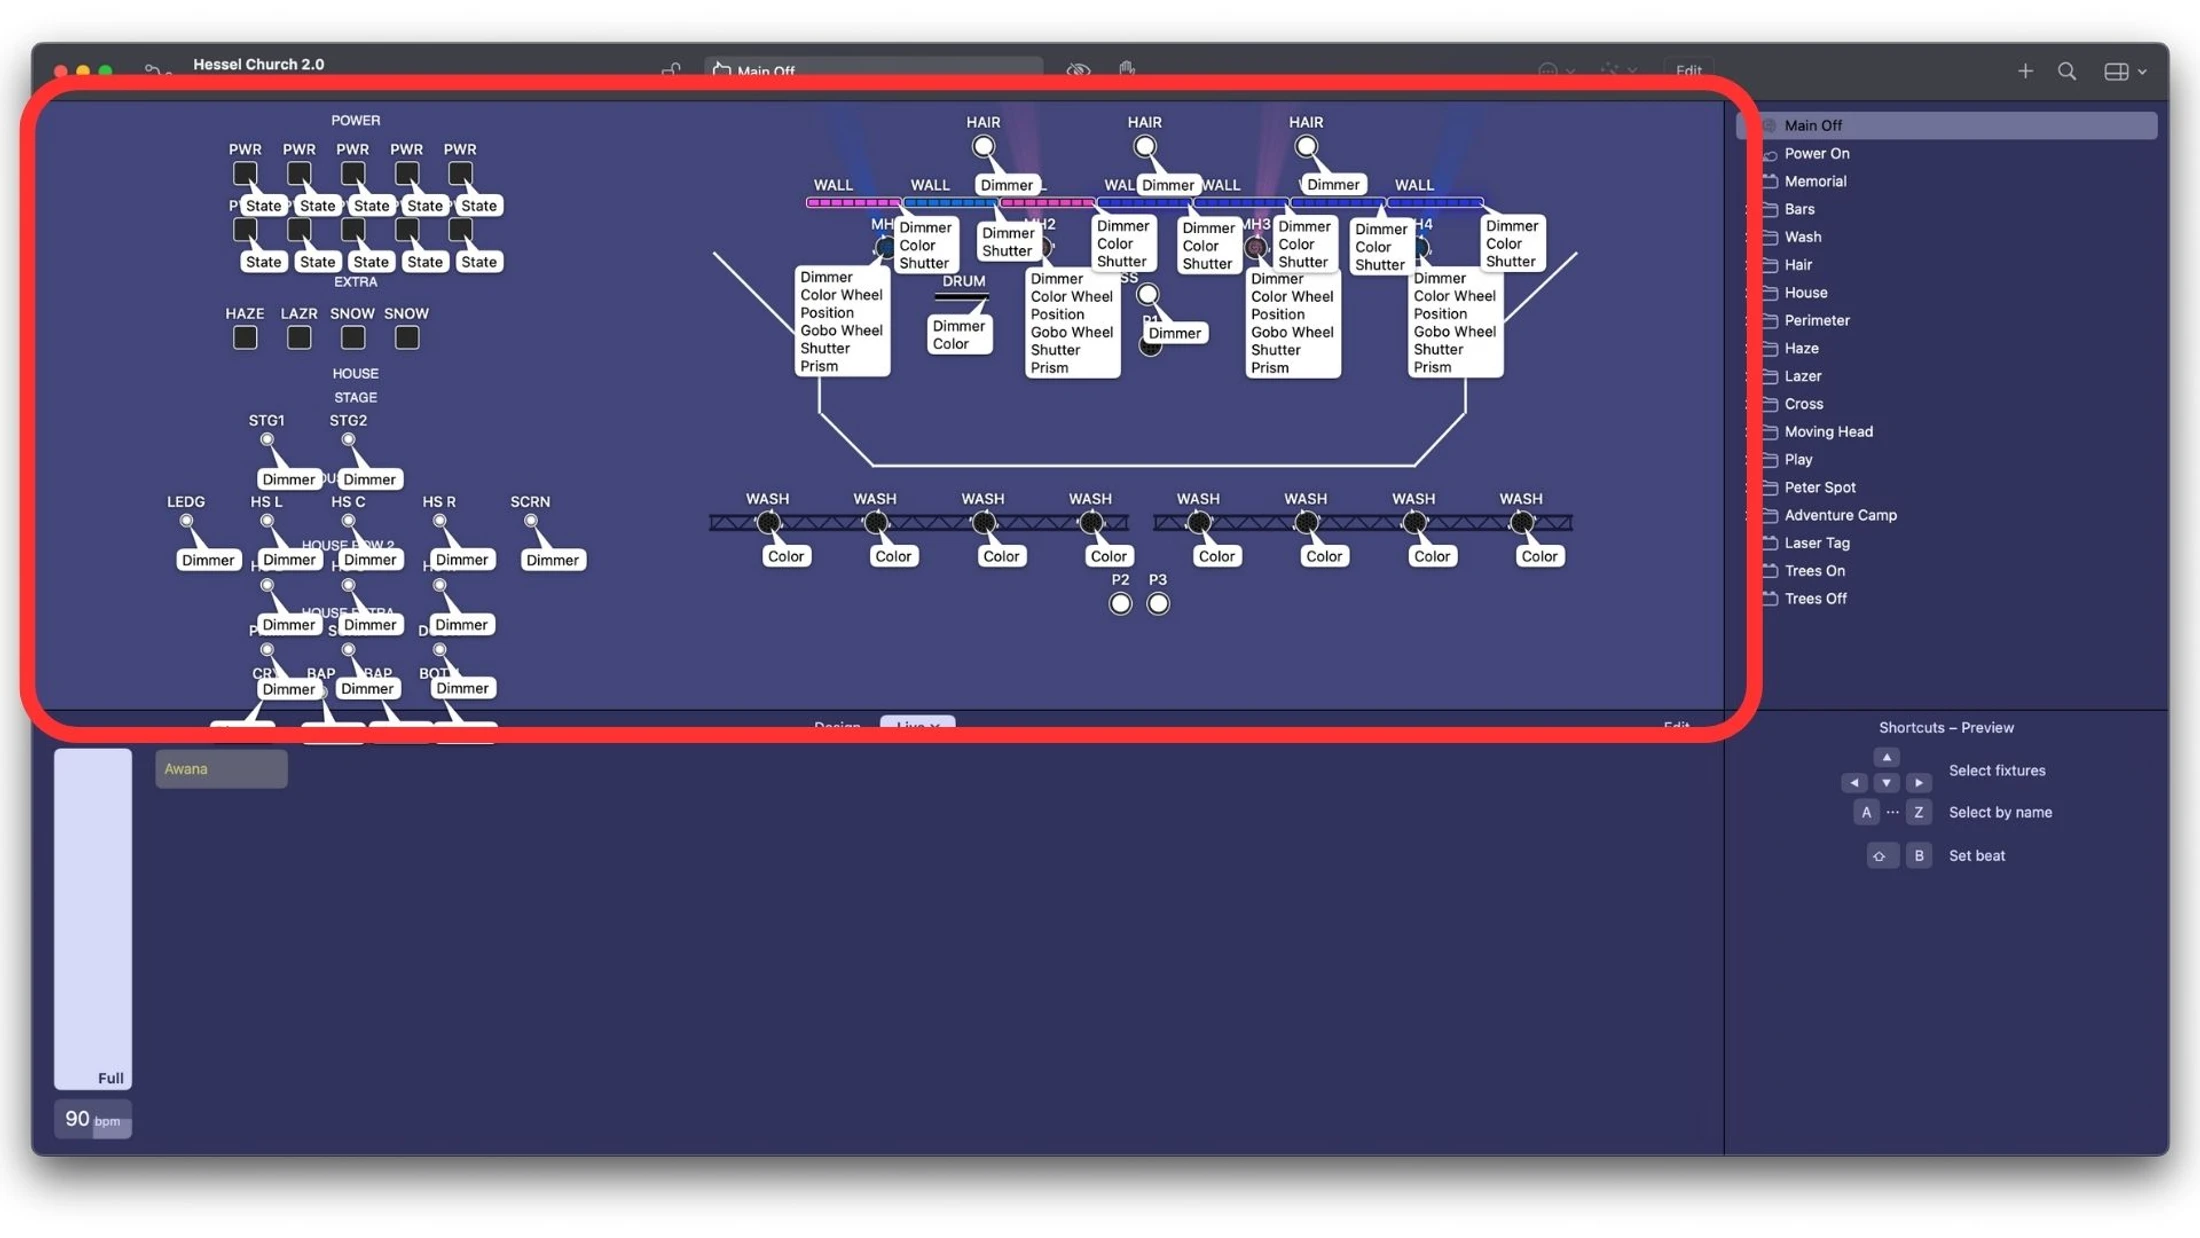
- Editor
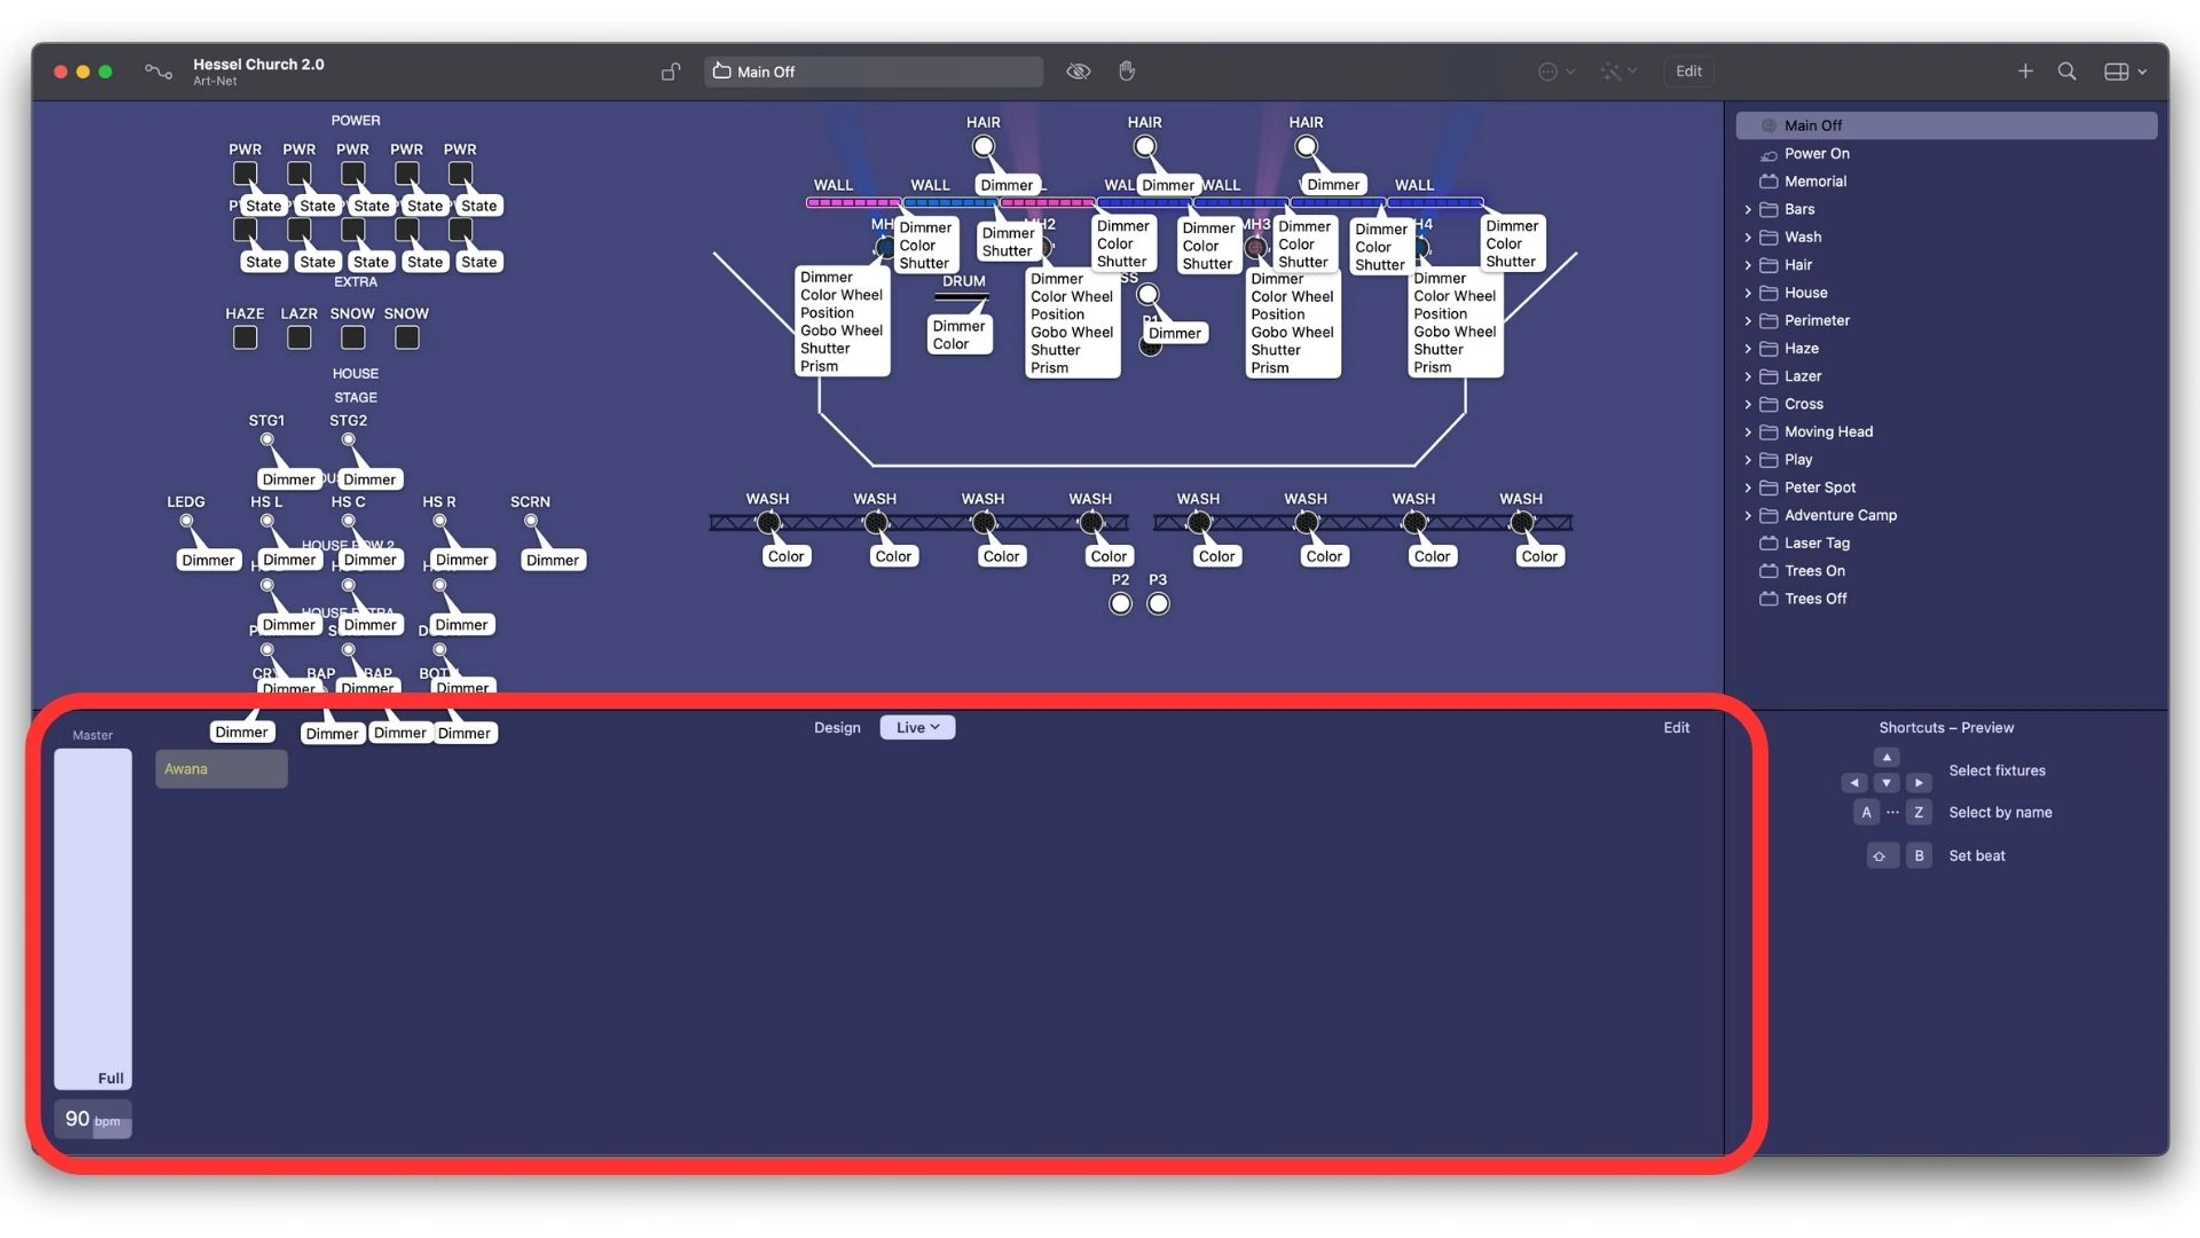
Lightkey Set Up
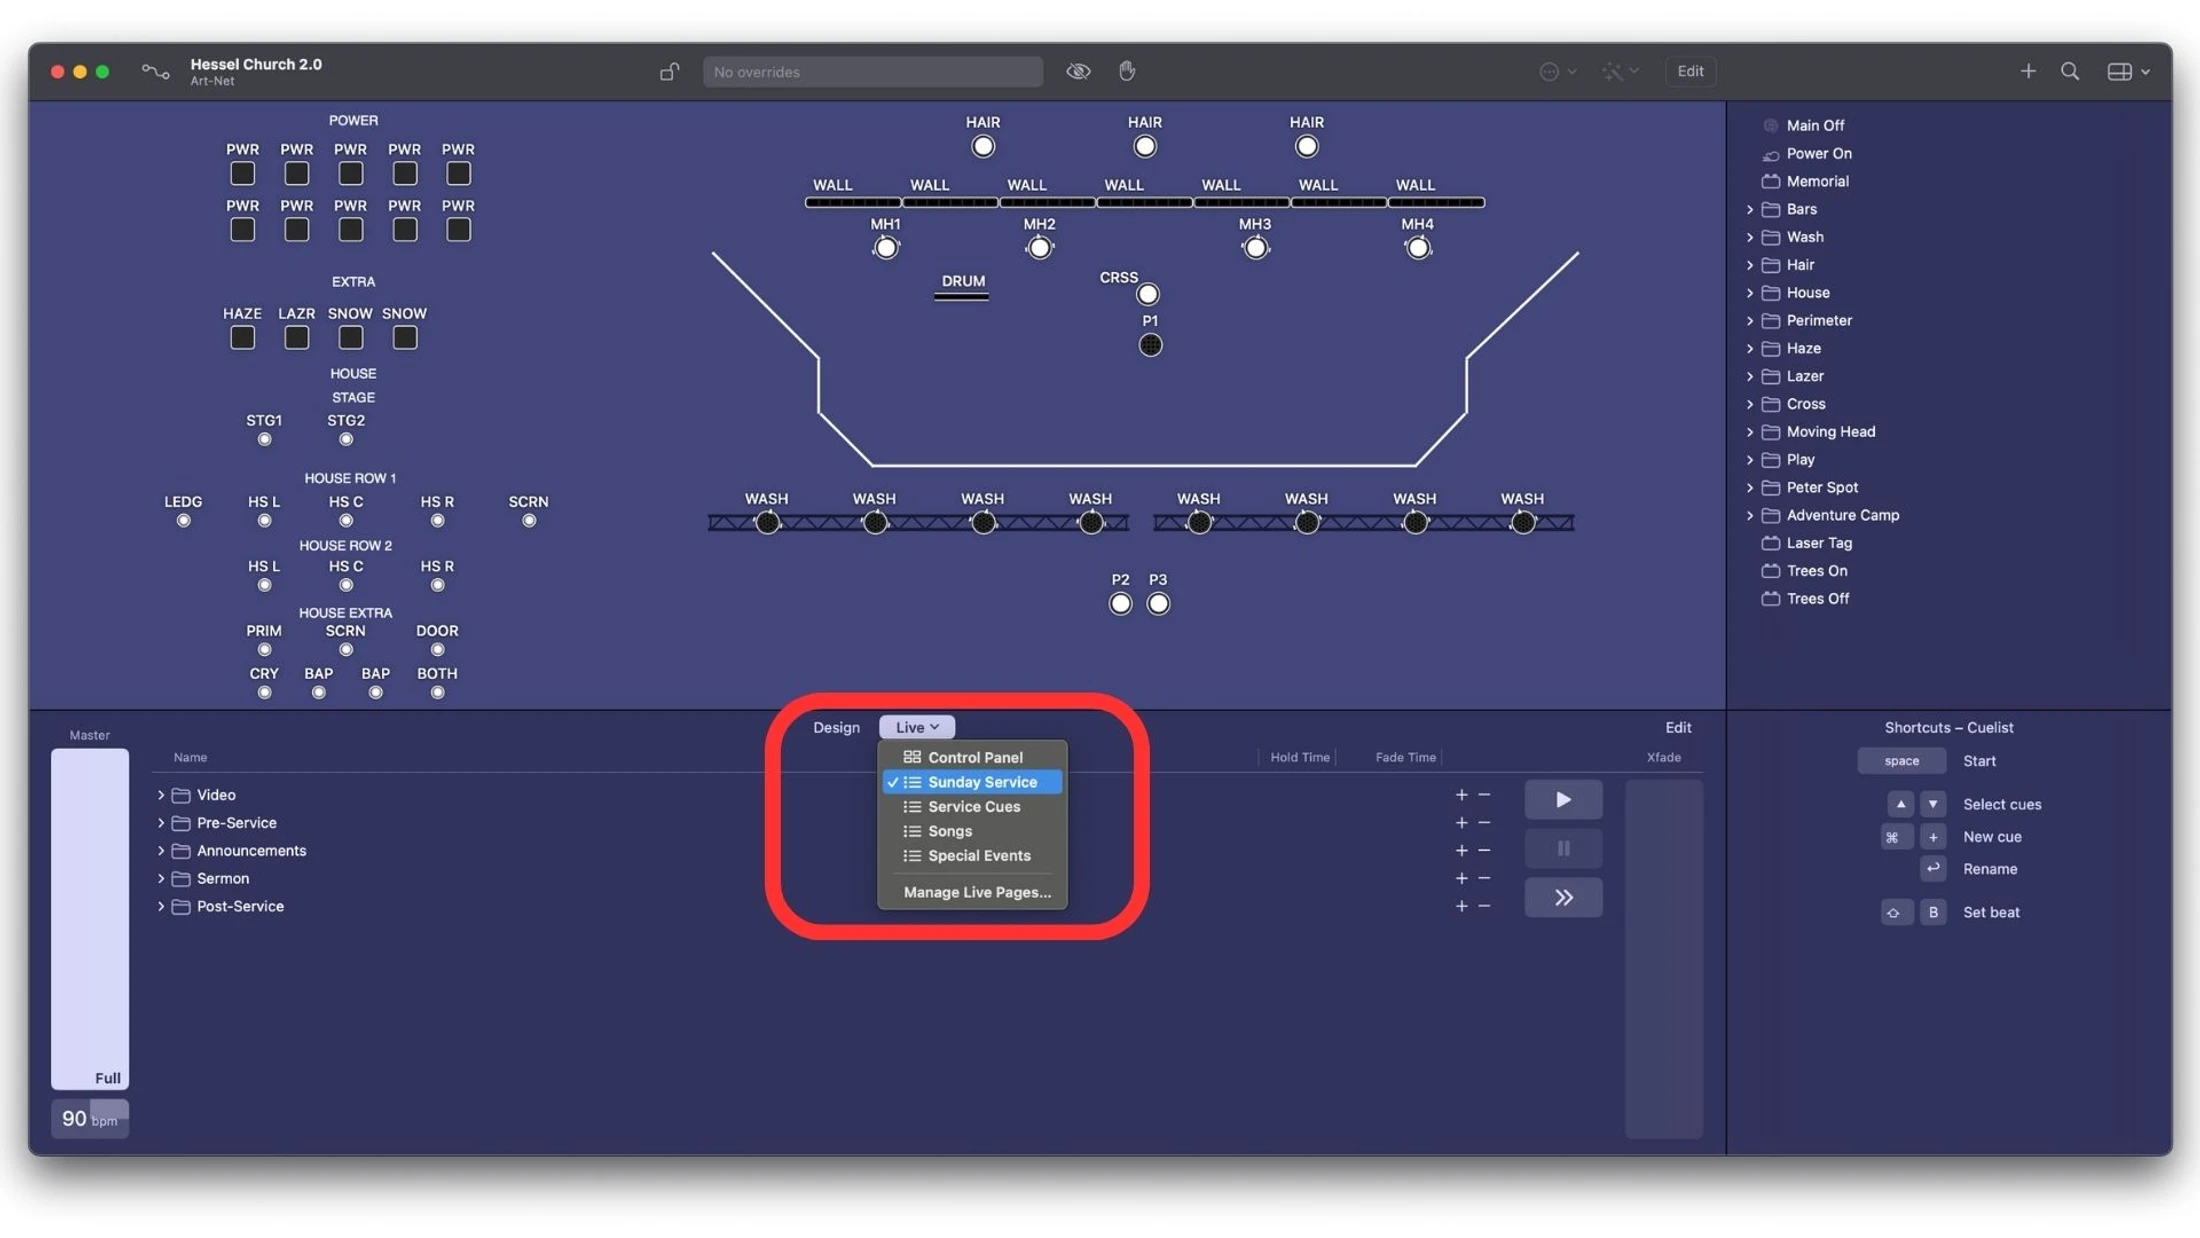
1. Select “Live” Dropdown and change to the event you are controlling. In this case we will use “Sunday Services”
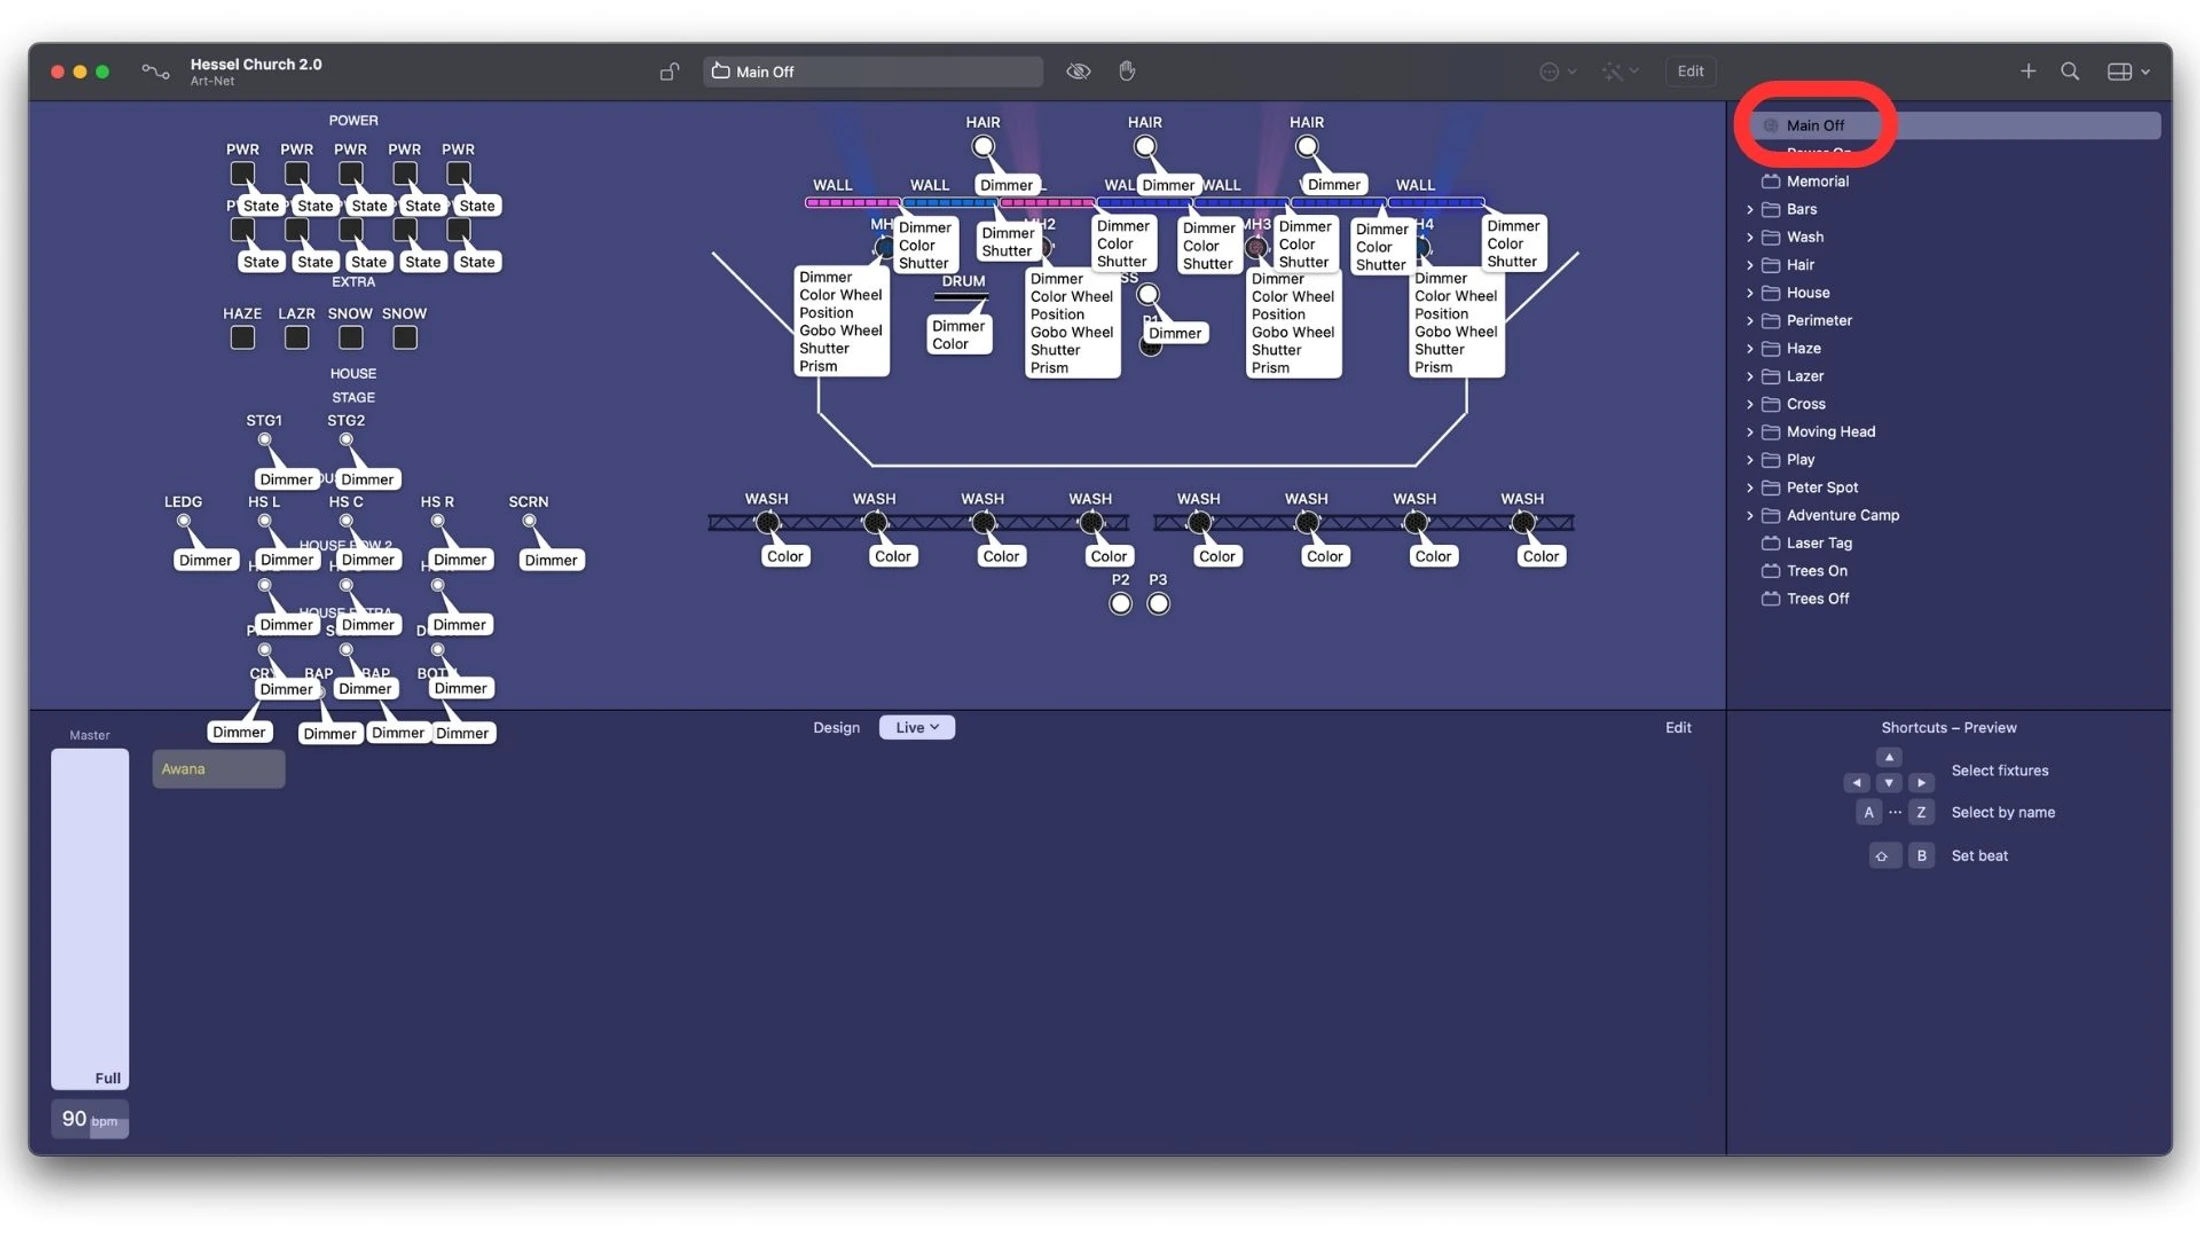
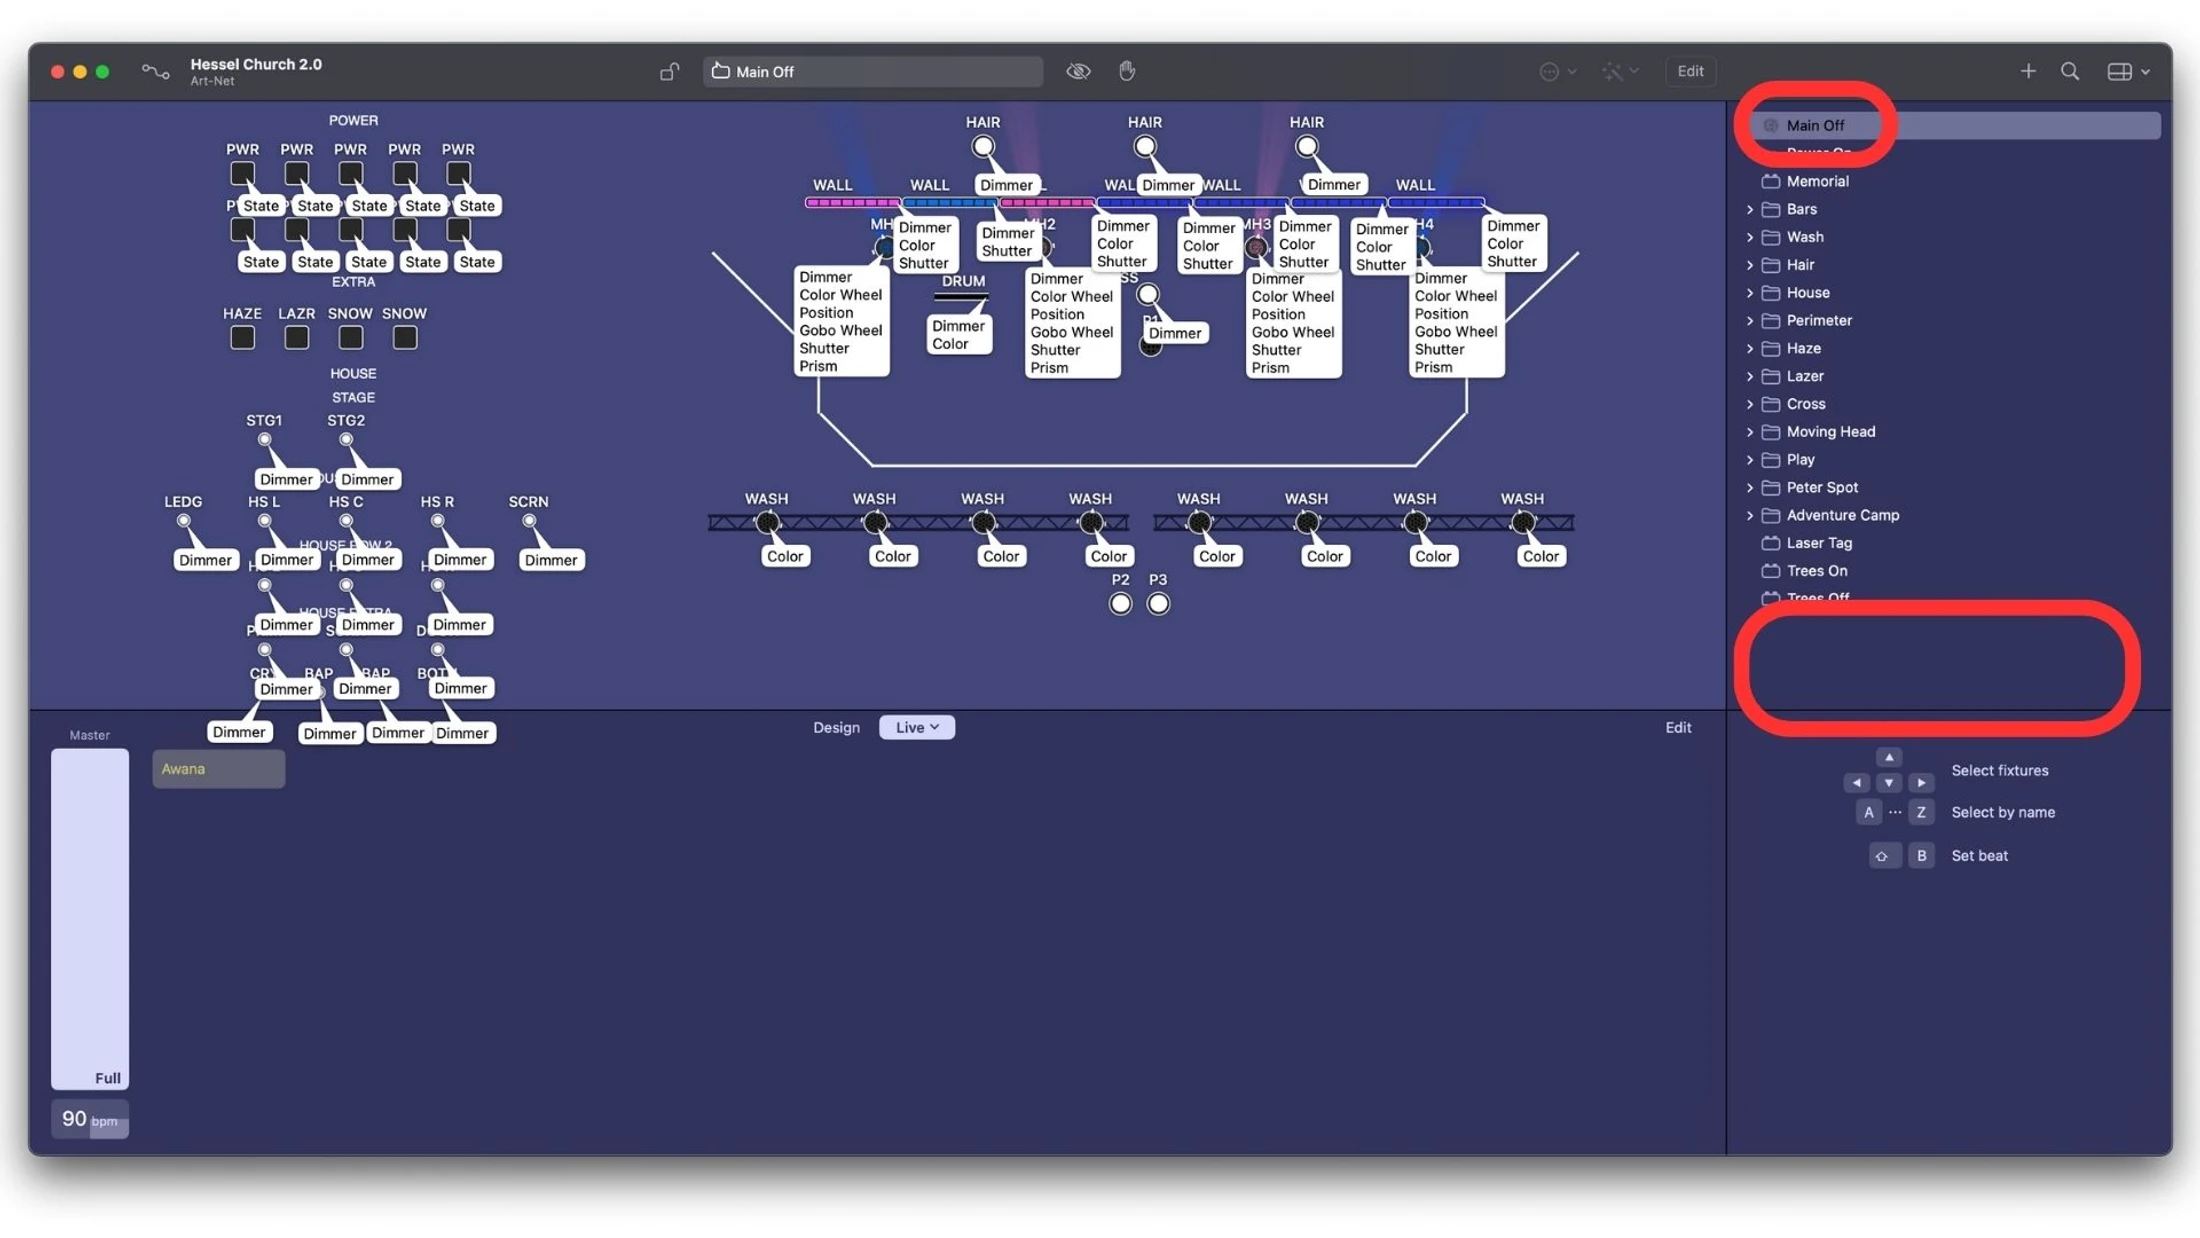
2. Deselect “Main Off” in the preset window by pressing in any blank space
Lightkey Shutdown
1. To turn the lights off Select “Main Off” in the preset window.
